


P-H3-Image ComfyUI Workflow: 8 MP text to image in eight steps#
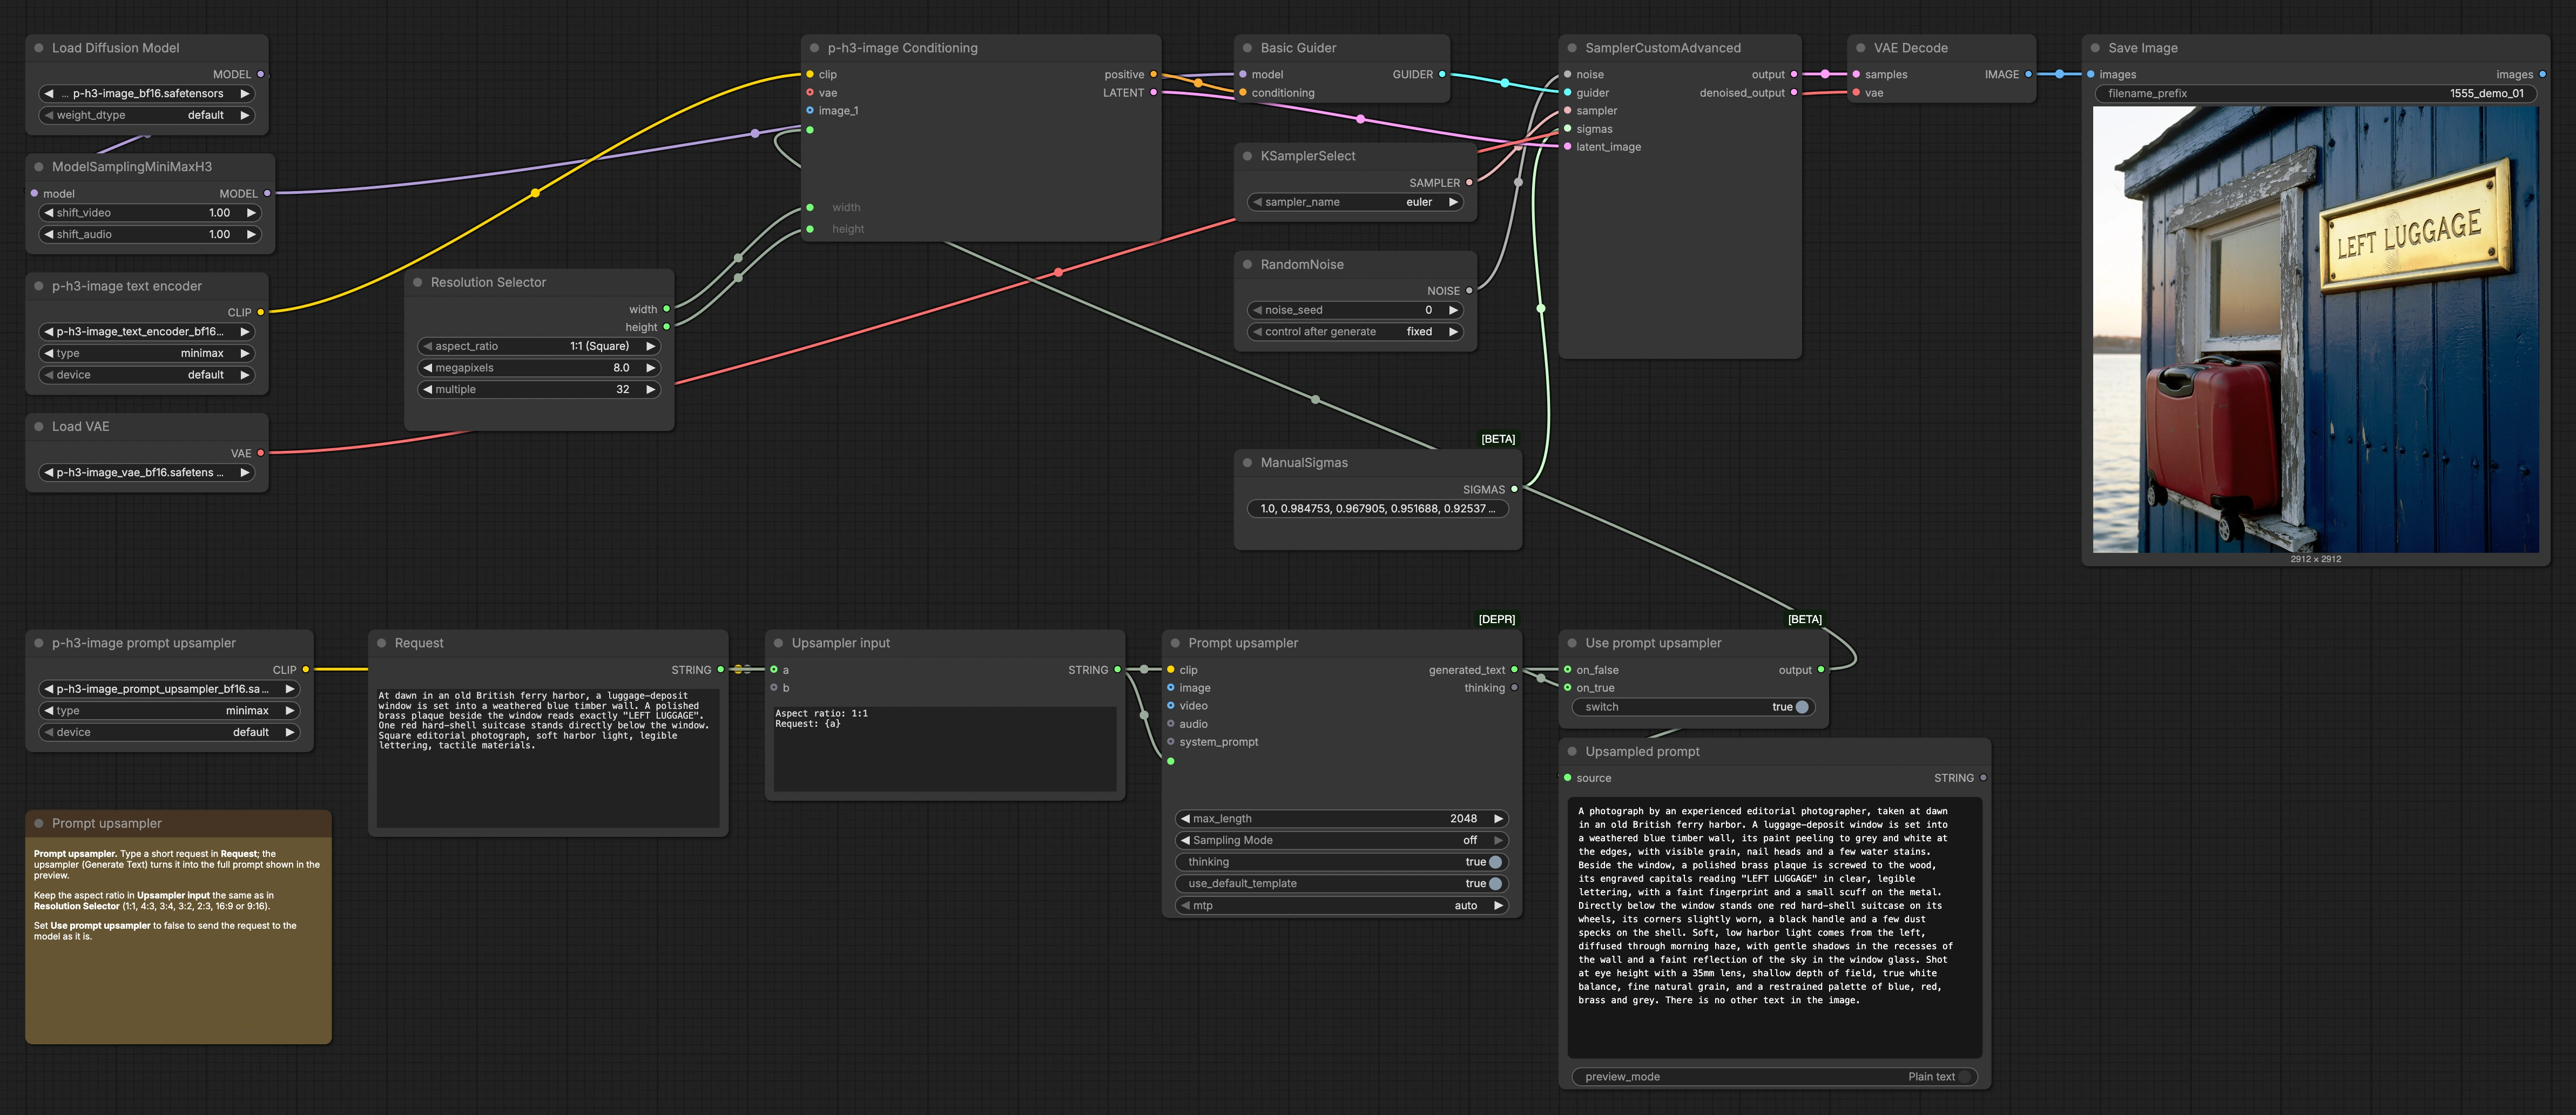
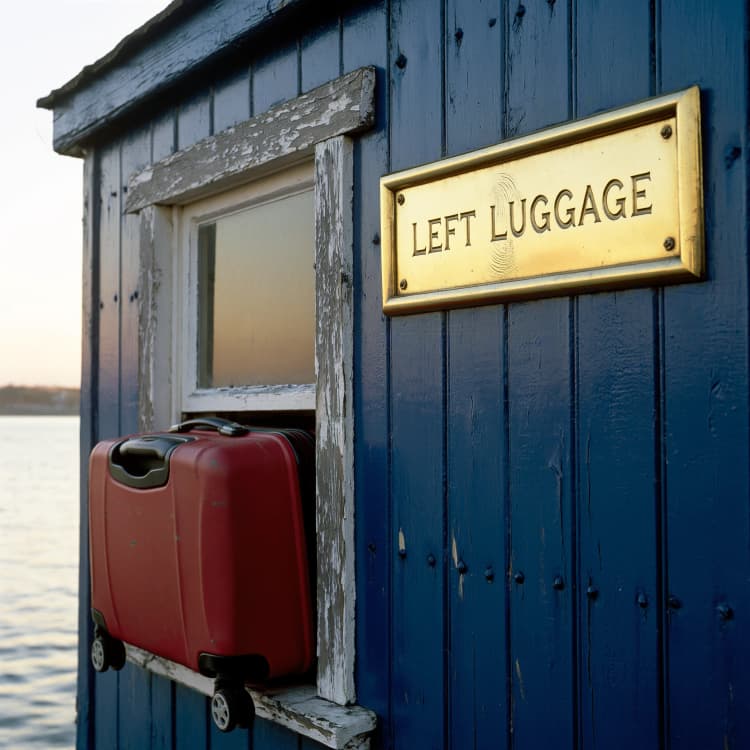
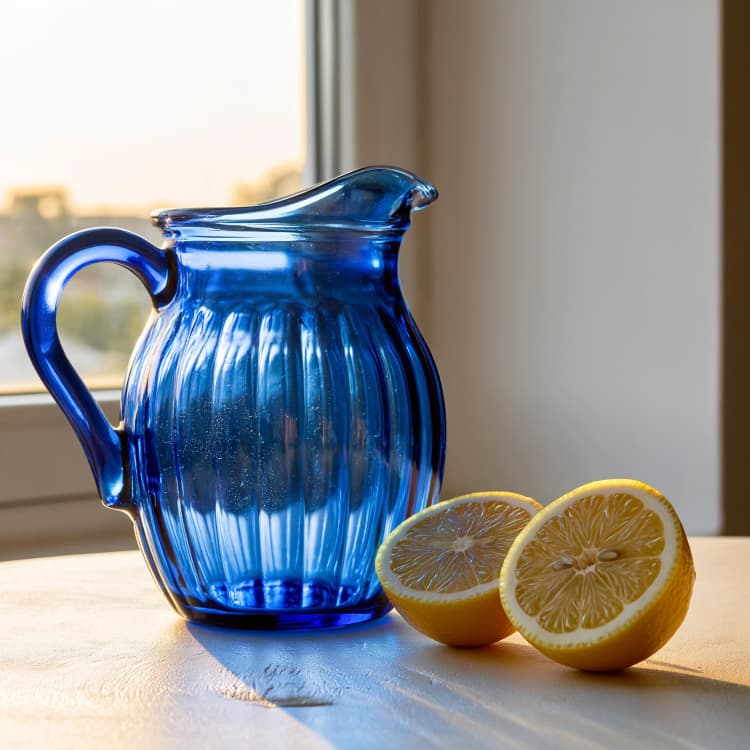
This P-H3-Image ComfyUI Workflow turns a short scene description into a high‑quality 8 megapixel image in just eight sampling steps. It includes an optional prompt upsampler that expands your request into a fuller, style-aware prompt and shows you the final text before rendering.
Use it when you want fast, large images with clean composition and consistent detail. You can keep the automatic expansion on for convenience or switch it off to send your own wording directly to the model. The workflow saves images with a predictable filename prefix so batches remain organized.
Key models in Comfyui P-H3-Image ComfyUI Workflow#
- P-H3-Image UNet (bf16). The diffusion backbone that denoises latents into images. It is the core generator used during sampling. Model file
- P-H3-Image Text Encoder (bf16). Encodes the final prompt into embeddings that guide the UNet. This is the conditioning interface between text and image. Model file
- P-H3-Image Prompt Upsampler (bf16). Expands short requests into richer, constraint-aware prompts. It improves specificity and coherence while keeping your core intent. Model file
- P-H3-Image VAE (bf16). Decodes the final latent into a full‑resolution RGB image with faithful colors and textures. Model file
All assets are provided in the Hugging Face repository PrunaAI/P-H3-Image-Comfy.
How to use Comfyui P-H3-Image ComfyUI Workflow#
This workflow follows a clear path: author or expand a prompt, pick resolution, build conditioning and the starting latent, run eight sampling steps, then decode and save the image.
Prompt authoring and expansion#
Write a short description in Request (#16). The text is wrapped with aspect guidance in Upsampler input (#17) and sent to Prompt upsampler (#18) to generate a longer, production‑ready prompt. Toggle Use prompt upsampler (#19) to choose between your original text and the expanded version. The final text that will guide the model is previewed in Upsampled prompt (#15) so you can make quick edits before rendering.
Choose resolution#
Select the aspect ratio and target pixels in ResolutionSelector (#20); the default is 8 megapixels and common ratios like 1:1, 3:2, 2:3, 4:3, 3:4, 16:9, and 9:16. This defines width and height aligned to multiples of 32 for efficient sampling. Keep the ratio string used in Upsampler input consistent with the choice here so the expansion matches your canvas. The selected size is forwarded to conditioning and latent initialization.
Conditioning and latent setup#
p-h3-image text encoder (CLIP) loads the text encoder and PH3ImageConditioning (#26) converts the final prompt plus your chosen width and height into conditioning and a latent template. The UNet is loaded by UNETLoader (#22). A small adjustment in MiniMaxH3SigmaShift (#23) prepares the model for the H3 schedule so the subsequent sampler runs efficiently at low step counts. These pieces provide the guider, the starting latent, and a schedule configured for the model.
Sampling#
KSamplerSelect (#8) picks the sampler algorithm, and ManualSigmas (#6) supplies a compact sigma schedule for eight steps. RandomNoise (#9) seeds the process for reproducible or varied results. BasicGuider (#7) combines the UNet and text conditioning, and SamplerCustomAdvanced (#10) runs the eight denoising iterations over the latent provided by PH3ImageConditioning (#26). The default Euler strategy is tuned for speed and stability at 8 MP.
Decode and save#
VAEDecode (#11) converts the final latent to an image while preserving fine color and material cues. SaveImage (#12) writes the file with the prefix set to p-h3-image, making it easy to track outputs from this P-H3-Image ComfyUI Workflow.
Key nodes in Comfyui P-H3-Image ComfyUI Workflow#
Prompt upsampler (#18)#
Expands your short request into a detailed prompt that enforces composition, lighting, and content constraints. Use it when you want consistent clarity from brief inputs; switch it off to write your own full prompt. If outputs become too wordy, simplify your original request and keep only the essentials.
Use prompt upsampler (#19)#
A simple gate that routes either the expanded prompt or your original text into the model. Turn it off when you want total control over phrasing or to test baseline behavior. Turn it on to speed up ideation and reduce prompt engineering effort.
ResolutionSelector (#20)#
Sets the aspect ratio and total pixels, defaulting to 8 MP for large, print‑friendly outputs. Keep its ratio aligned with the string embedded in Upsampler input (#17) for best prompt‑to‑canvas coherence. Increase pixels for more detail if your GPU memory allows, or reduce them for faster previews.
PH3ImageConditioning (#26)#
Builds the positive conditioning and initializes a latent at the exact width and height you selected. Ensure the prompt arriving here is final, since this is what the sampler will follow. Changing size or text here affects both composition and detail density downstream.
MiniMaxH3SigmaShift (#23)#
Adapts the sigma schedule for H3‑style sampling so eight steps remain stable at high resolution. Leave it on for default runs; disable or change only if you are experimenting with custom schedules. It works in concert with ManualSigmas (#6) and your sampler choice.
ManualSigmas (#6) and KSamplerSelect (#8)#
These two control how denoising unfolds. Keep the eight‑step schedule for fast, high‑res results; increase steps only if you need extra micro‑texture or very fine typography. You can try alternative samplers for a different trade‑off between sharpness and smoothness.
RandomNoise (#9)#
Sets the seed that drives variation. Lock the seed to reproduce a result exactly; change it to explore new compositions with the same prompt and settings.
Optional extras#
- Keep prompts concrete. Short, specific nouns and verbs work best with the upsampler.
- For consistent layouts, specify aspect and key objects in the first sentence of your request.
- To explore variations, fix the seed and tweak one element at a time: time of day, lens, or material.
- Use the
Upsampled promptpreview to copy the final text into your notes or reuse it across scenes.
Acknowledgements#
This workflow implements and builds upon the following works and resources. We gratefully acknowledge PrunaAI for P-H3-Image-Comfy and for the ComfyUI text-to-image workflow p-h3-image_text_to_image.json for their contributions and maintenance. For authoritative details, please refer to the original documentation and repositories linked below.
Resources#
- PrunaAI/P-H3-Image-Comfy
- Hugging Face: PrunaAI/P-H3-Image-Comfy
- PrunaAI/p-h3-image_text_to_image.json (ComfyUI workflow)
- Hugging Face: workflows/p-h3-image_text_to_image.json
Note: Use of the referenced models, datasets, and code is subject to the respective licenses and terms provided by their authors and maintainers.