


MiniMax H3 Image Editing ComfyUI#
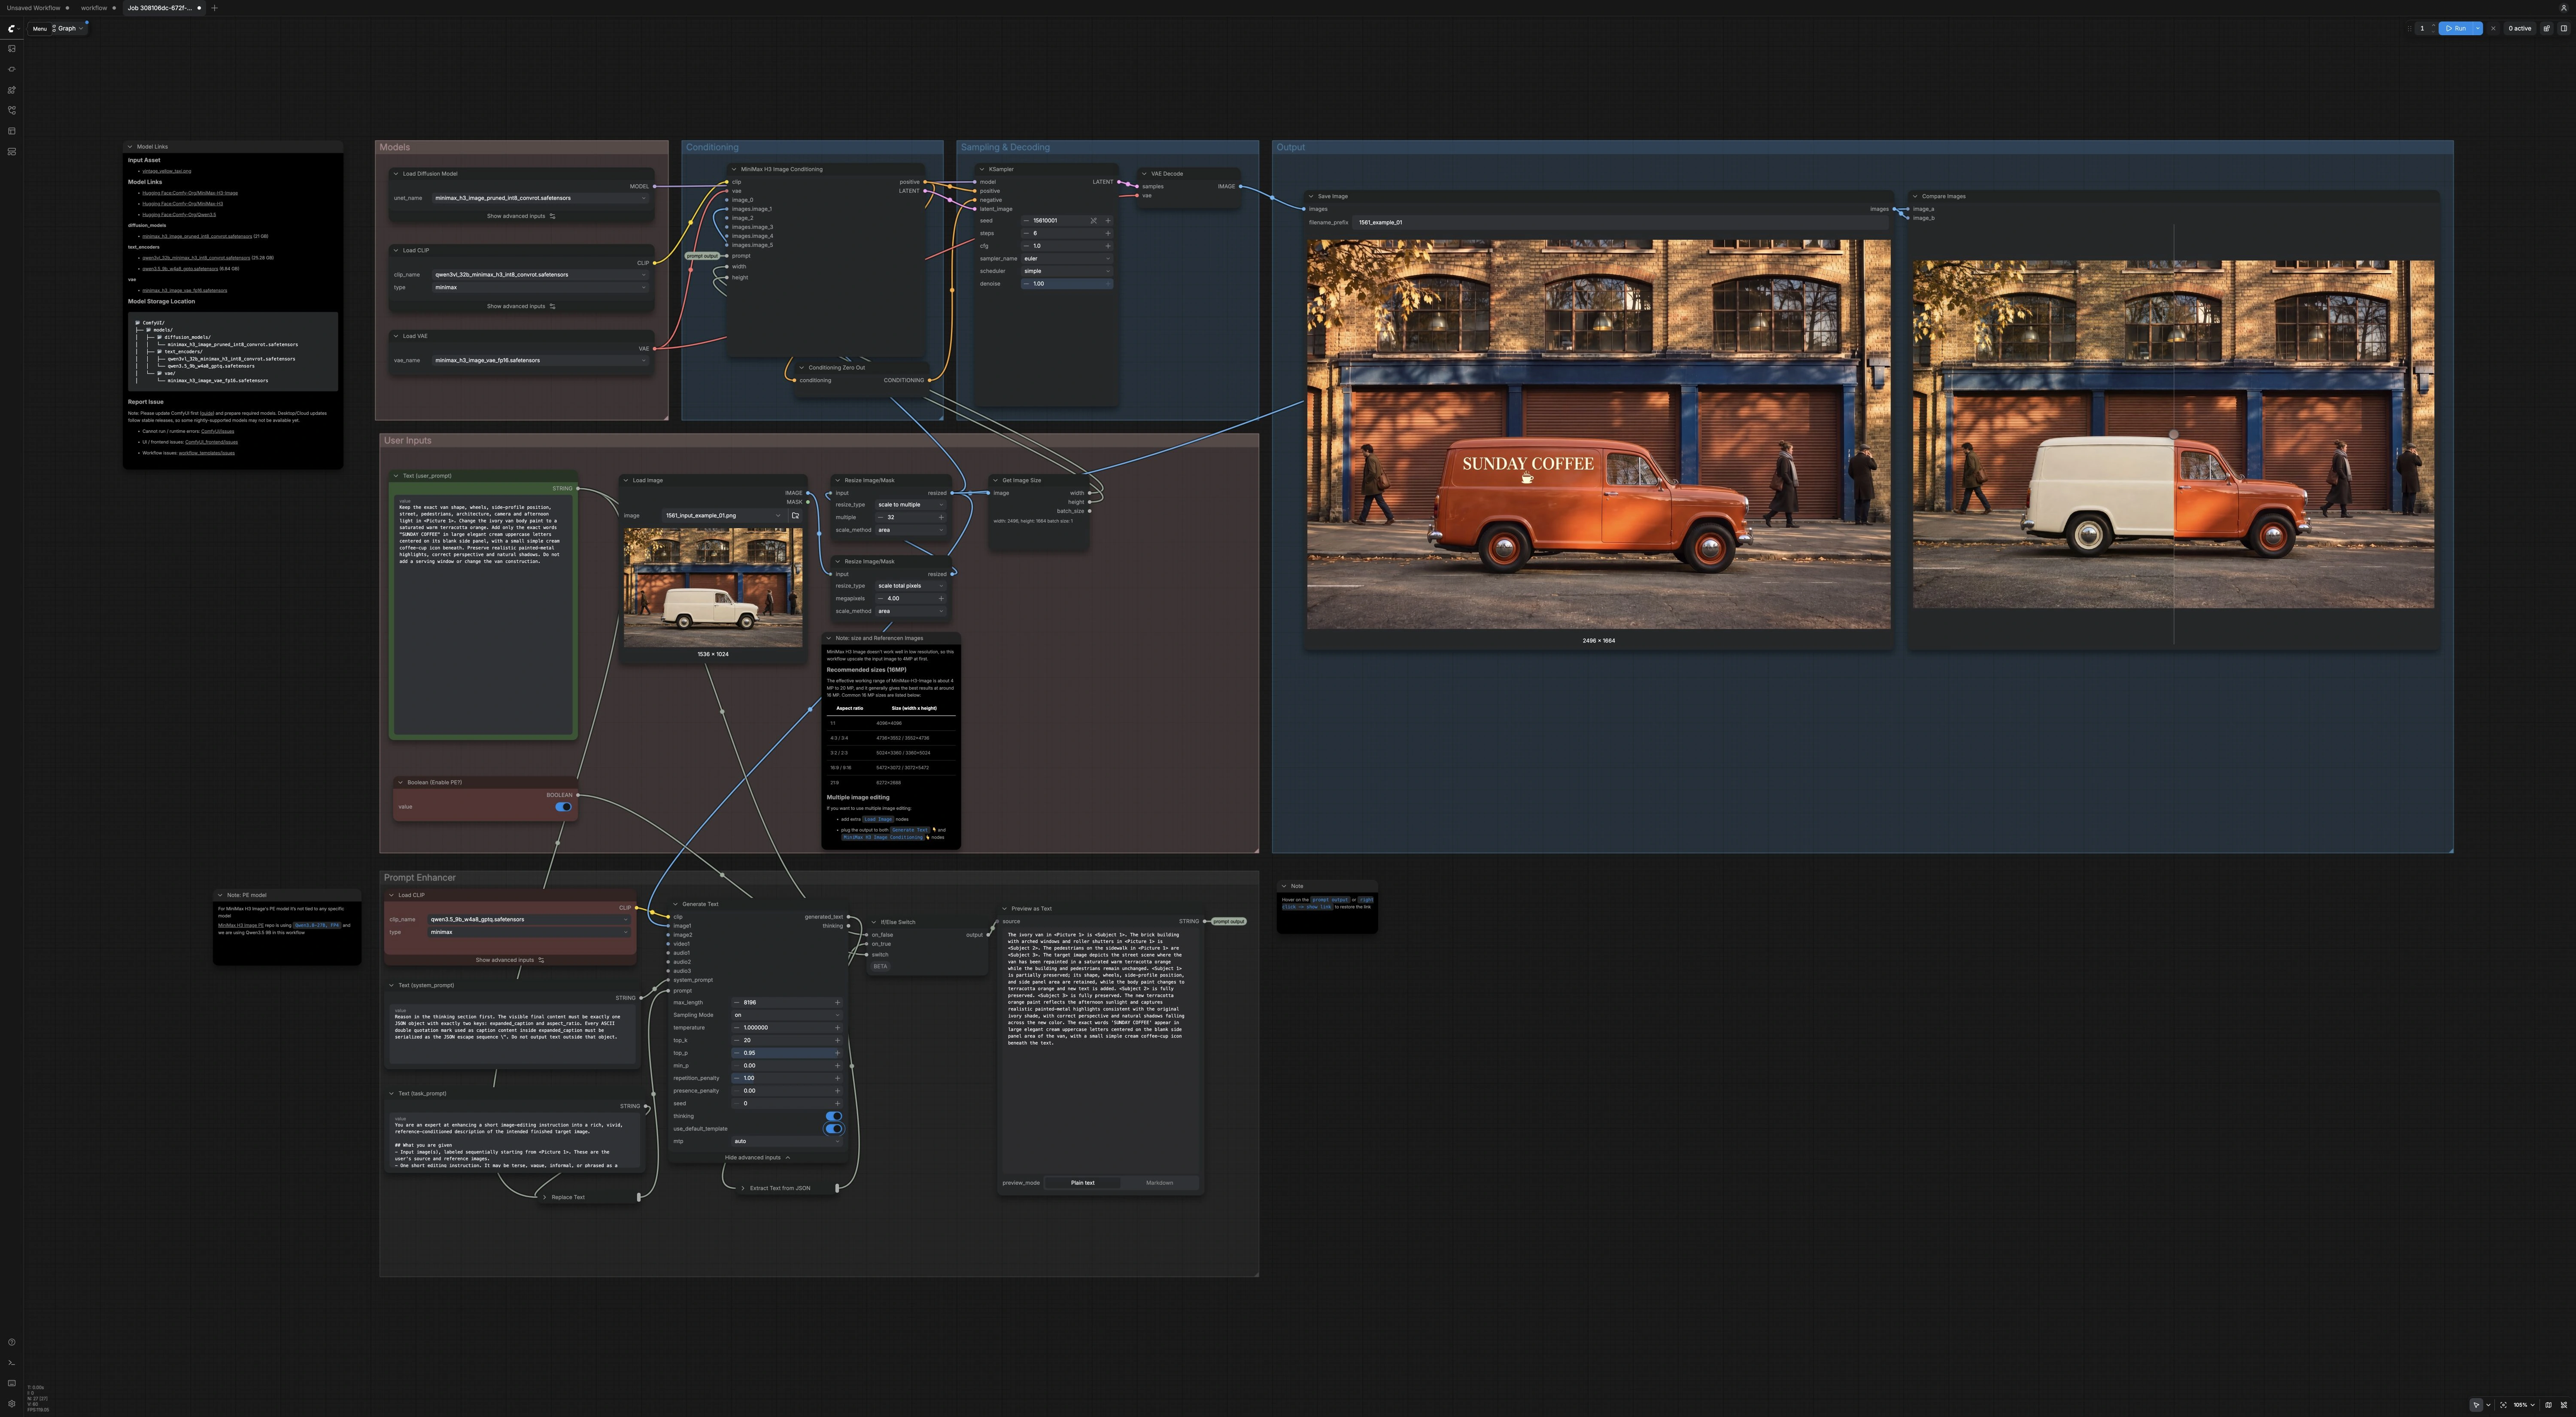
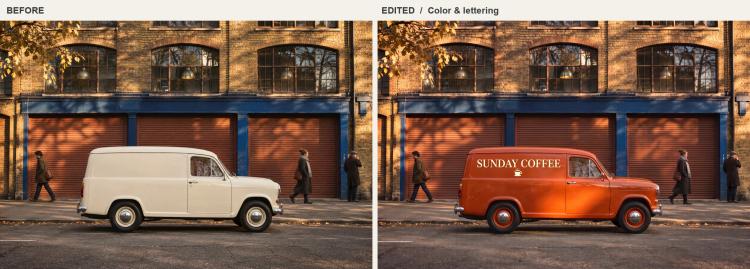
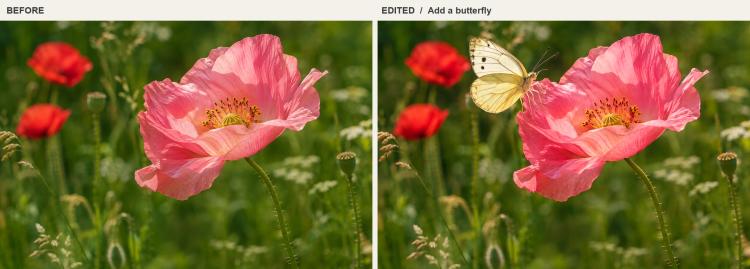
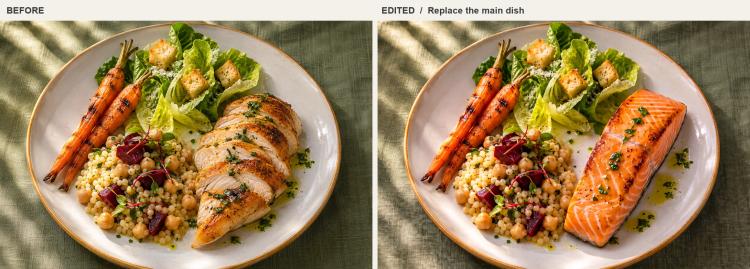
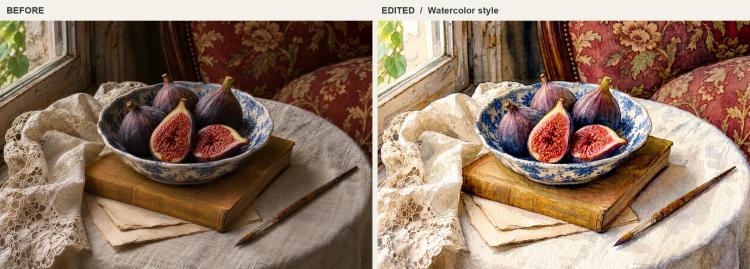
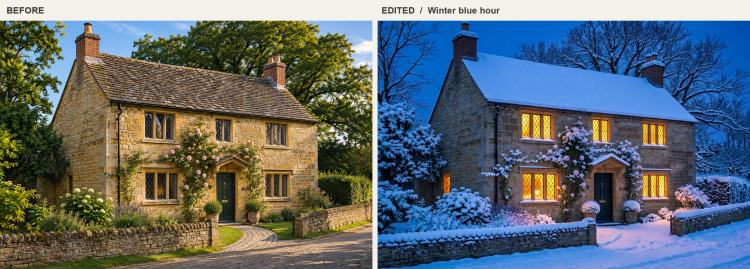
This workflow turns a single input photo into an edited result using natural‑language instructions powered by MiniMax-H3-Image. MiniMax H3 Image Editing ComfyUI adds a prompt enhancer for detailed, reference‑aware captions and an interactive before‑and‑after viewer so you can judge how well composition is preserved. It is ideal for object replacement, recoloring and lettering, seasonal scene changes, and watercolor‑style reinterpretation.
The pipeline automatically prepares your image for reliable editing, keeps the canvas ratio from your source unless you change it upstream, and routes either your original instruction or an enhanced caption into MiniMax H3 Image. Run it when you want fast, faithful edits without manual masking or complex node tweaks.
Key models#
- MiniMax-H3-Image. Diffusion backbone that performs the image‑conditioned edit from your prompt and reference, producing the final latent used for decoding. Model card
- Qwen3VL‑32B (MiniMax H3 variant). Multimodal text encoder paired with MiniMax‑H3 that embeds your editing instruction and image evidence for conditioning. Repo
- MiniMax‑H3‑Image VAE. Variational autoencoder used to encode and decode latents with correct color and detail characteristics for the editor. Weights
- Qwen 3.5 9B (W4A8 GPTQ). Lightweight LLM used by the Prompt Enhancer to turn short instructions into rich, reference‑conditioned captions. Repo Notes: the general PE approach is model‑agnostic; upstream examples also demonstrate a larger PE stack in MiniMaxAI/MiniMax-H3-Image-PE.
How to use this workflow#
Overall flow: you load one image and write a short instruction. The workflow resizes the image for stable editing, optionally expands your prompt with visual context, builds MiniMax‑H3 conditioning, runs a short sampler pass, then decodes and saves the result with a side‑by‑side comparison.
User Inputs#
Provide your photo in LoadImage (#45) and type a concise edit in Text (user_prompt) (#43). Typical instructions include object swaps, palette edits, lettering, or style changes; for example, “Replace the bicycle with a mint‑green motor scooter and preserve the cafe facade and lighting.” The Prompt Enhancer is enabled by default; turn off Boolean (Enable PE?) (#61) to use your original instruction directly. This saved workflow accepts one input image, resizes it to a target of 4 MP, and aligns its dimensions to multiples of 32. The canvas ratio follows your source image in this template; crop or pad before LoadImage if you want a different final ratio.
Prompt Enhancer#
TextGenerateV2 (#34) reads your short instruction plus a low‑res preview of the image to generate a structured JSON that includes an expanded, scene‑aware caption. A strict system_prompt (#36) enforces clean output; StringReplace (#40) injects your instruction, and JsonExtractString (#44) pulls the expanded_caption field. ComfySwitchNode (#41) lets you route either the enhanced caption or your raw instruction, and PreviewAny (#37) shows exactly what text will drive the edit. Use this when you want MiniMax H3 Image Editing ComfyUI to infer precise preservation rules, spatial anchors, and clear wording from a brief request.
Models#
UNETLoader (#29), CLIPLoader (#30), and VAELoader (#31) fetch MiniMax‑H3‑Image, its Qwen3VL‑32B text encoder, and the VAE. These are preselected for the workflow and normally require no changes. Keeping these components paired ensures the editor interprets your prompt and image consistently.
Conditioning#
MiniMaxH3ImageConditioning (#32) fuses the prompt text, CLIP embeddings, and your resized reference image to produce both the positive conditioning and a starting latent tied to your source resolution. GetImageSize (#50) supplies width and height so edits stay compositionally aligned with the source. ConditioningZeroOut (#33) supplies the sampler’s negative input. With CFG fixed at 1, there is no classifier-free guidance pass; put your editing and preservation instructions in the positive prompt.
Sampling & Decoding#
KSampler (#38) uses the validated distilled configuration: 6 steps, CFG 1, Euler sampler, simple scheduler, and denoise 1. Keep these settings and guide the edit through your instruction, the expanded caption, and seed variations. VAEDecode (#42) converts the final latent back to an RGB image ready for saving and comparison.
Output#
SaveImage (#9) writes your result with a clear filename. ImageCompare (#62) presents an interactive before‑and‑after view so you can inspect geometry, lighting, and texture continuity and quickly iterate on the prompt if needed.
Key nodes#
MiniMaxH3ImageConditioning (#32)#
Builds the edit setup by binding your prompt, text encoder, VAE, and reference image into a MiniMax‑H3 compatible latent and positive conditioning. For stronger preservation, keep the source image connected and phrase instructions with explicit “preserve” language; for larger scene changes, focus the caption on new content and relationships. This saved workflow connects one source image to the conditioning and prompt-enhancement stages.
TextGenerateV2 (#34)#
Expands brief instructions into a rich, reference‑conditioned caption using Qwen 3.5 9B. Tweak the system_prompt (#36) to change how captions are structured or how strictly preservation is emphasized, keeping its JSON contract intact. If the enhanced caption feels too prescriptive, disable the enhancer with the switch or simplify your instruction to give MiniMax‑H3 more latitude.
KSampler (#38)#
Runs the diffusion edit with the model’s distilled schedule: 6 steps, CFG 1, Euler/simple, and denoise 1. These match the official template settings. For targeted replacements, specify the new object and explicitly name the lighting, perspective, background, and other details to preserve. Try another seed or revise the prompt when an edit needs improvement.
ResizeImageMaskNode (#56 and #48)#
Node #56 resizes the input to a target of 4 MP, scaling it up or down as needed. Node #48 aligns dimensions to a multiple of 32. The validated output was 2496 × 1664 pixels, approximately 4 MP. Larger targets increase memory requirements and have not been validated for this saved workflow.
ComfySwitchNode (#41)#
Selects between the raw instruction and the enhanced caption. Use the enhanced path when you want precise preservation rules and spatial references; choose the raw path when experimenting quickly or when your own wording is already specific.
Scope and prompt tips#
The supplied and tested workflow edits one source image at approximately 4 MP. The upstream model supports native output around 16 MP and multiple reference images, but those capabilities are outside this workflow’s validated configuration. Using additional references requires changing the graph; see the official tutorial for those extensions.
- Prompt patterns that work well with MiniMax H3 Image Editing ComfyUI:
- “Replace [object] with [new object]; preserve [list specific elements like facade, lighting, perspective].”
- “Recolor [subject] to [target color]; keep material, shading, and reflections consistent.”
- “Add lettering [exact text] on [surface]; match perspective and cast subtle contact shadows.”
- References:
- Official template for MiniMax‑H3 image editing in ComfyUI: workflow_templates
- Model weights and text encoders: Comfy‑Org/MiniMax‑H3‑Image and Comfy‑Org/MiniMax‑H3 and Comfy‑Org/Qwen3.5
Acknowledgements#
This workflow implements and builds upon the following works and resources. We gratefully acknowledge Comfy-Org for the Official ComfyUI image-editing workflow template and the MiniMax H3 Image model weights, Comfy.org for the MiniMax H3 Image launch announcement, and Comfy.org for the MiniMax H3 Image ComfyUI tutorial for their contributions and maintenance. For authoritative details, please refer to the original documentation and repositories linked below.
Resources#
- Comfy-Org/Official ComfyUI image-editing workflow template
- GitHub: Comfy-Org/workflow_templates
- Comfy.org/MiniMax H3 Image launch announcement
- Docs / Release Notes: MiniMax H3 Image launch announcement
- Comfy.org/MiniMax H3 Image ComfyUI tutorial
- Docs / Release Notes: MiniMax H3 Image ComfyUI tutorial
- Comfy-Org/MiniMax H3 Image model weights
- Hugging Face: Comfy-Org/MiniMax-H3-Image
Note: Use of the referenced models, datasets, and code is subject to the respective licenses and terms provided by their authors and maintainers.