
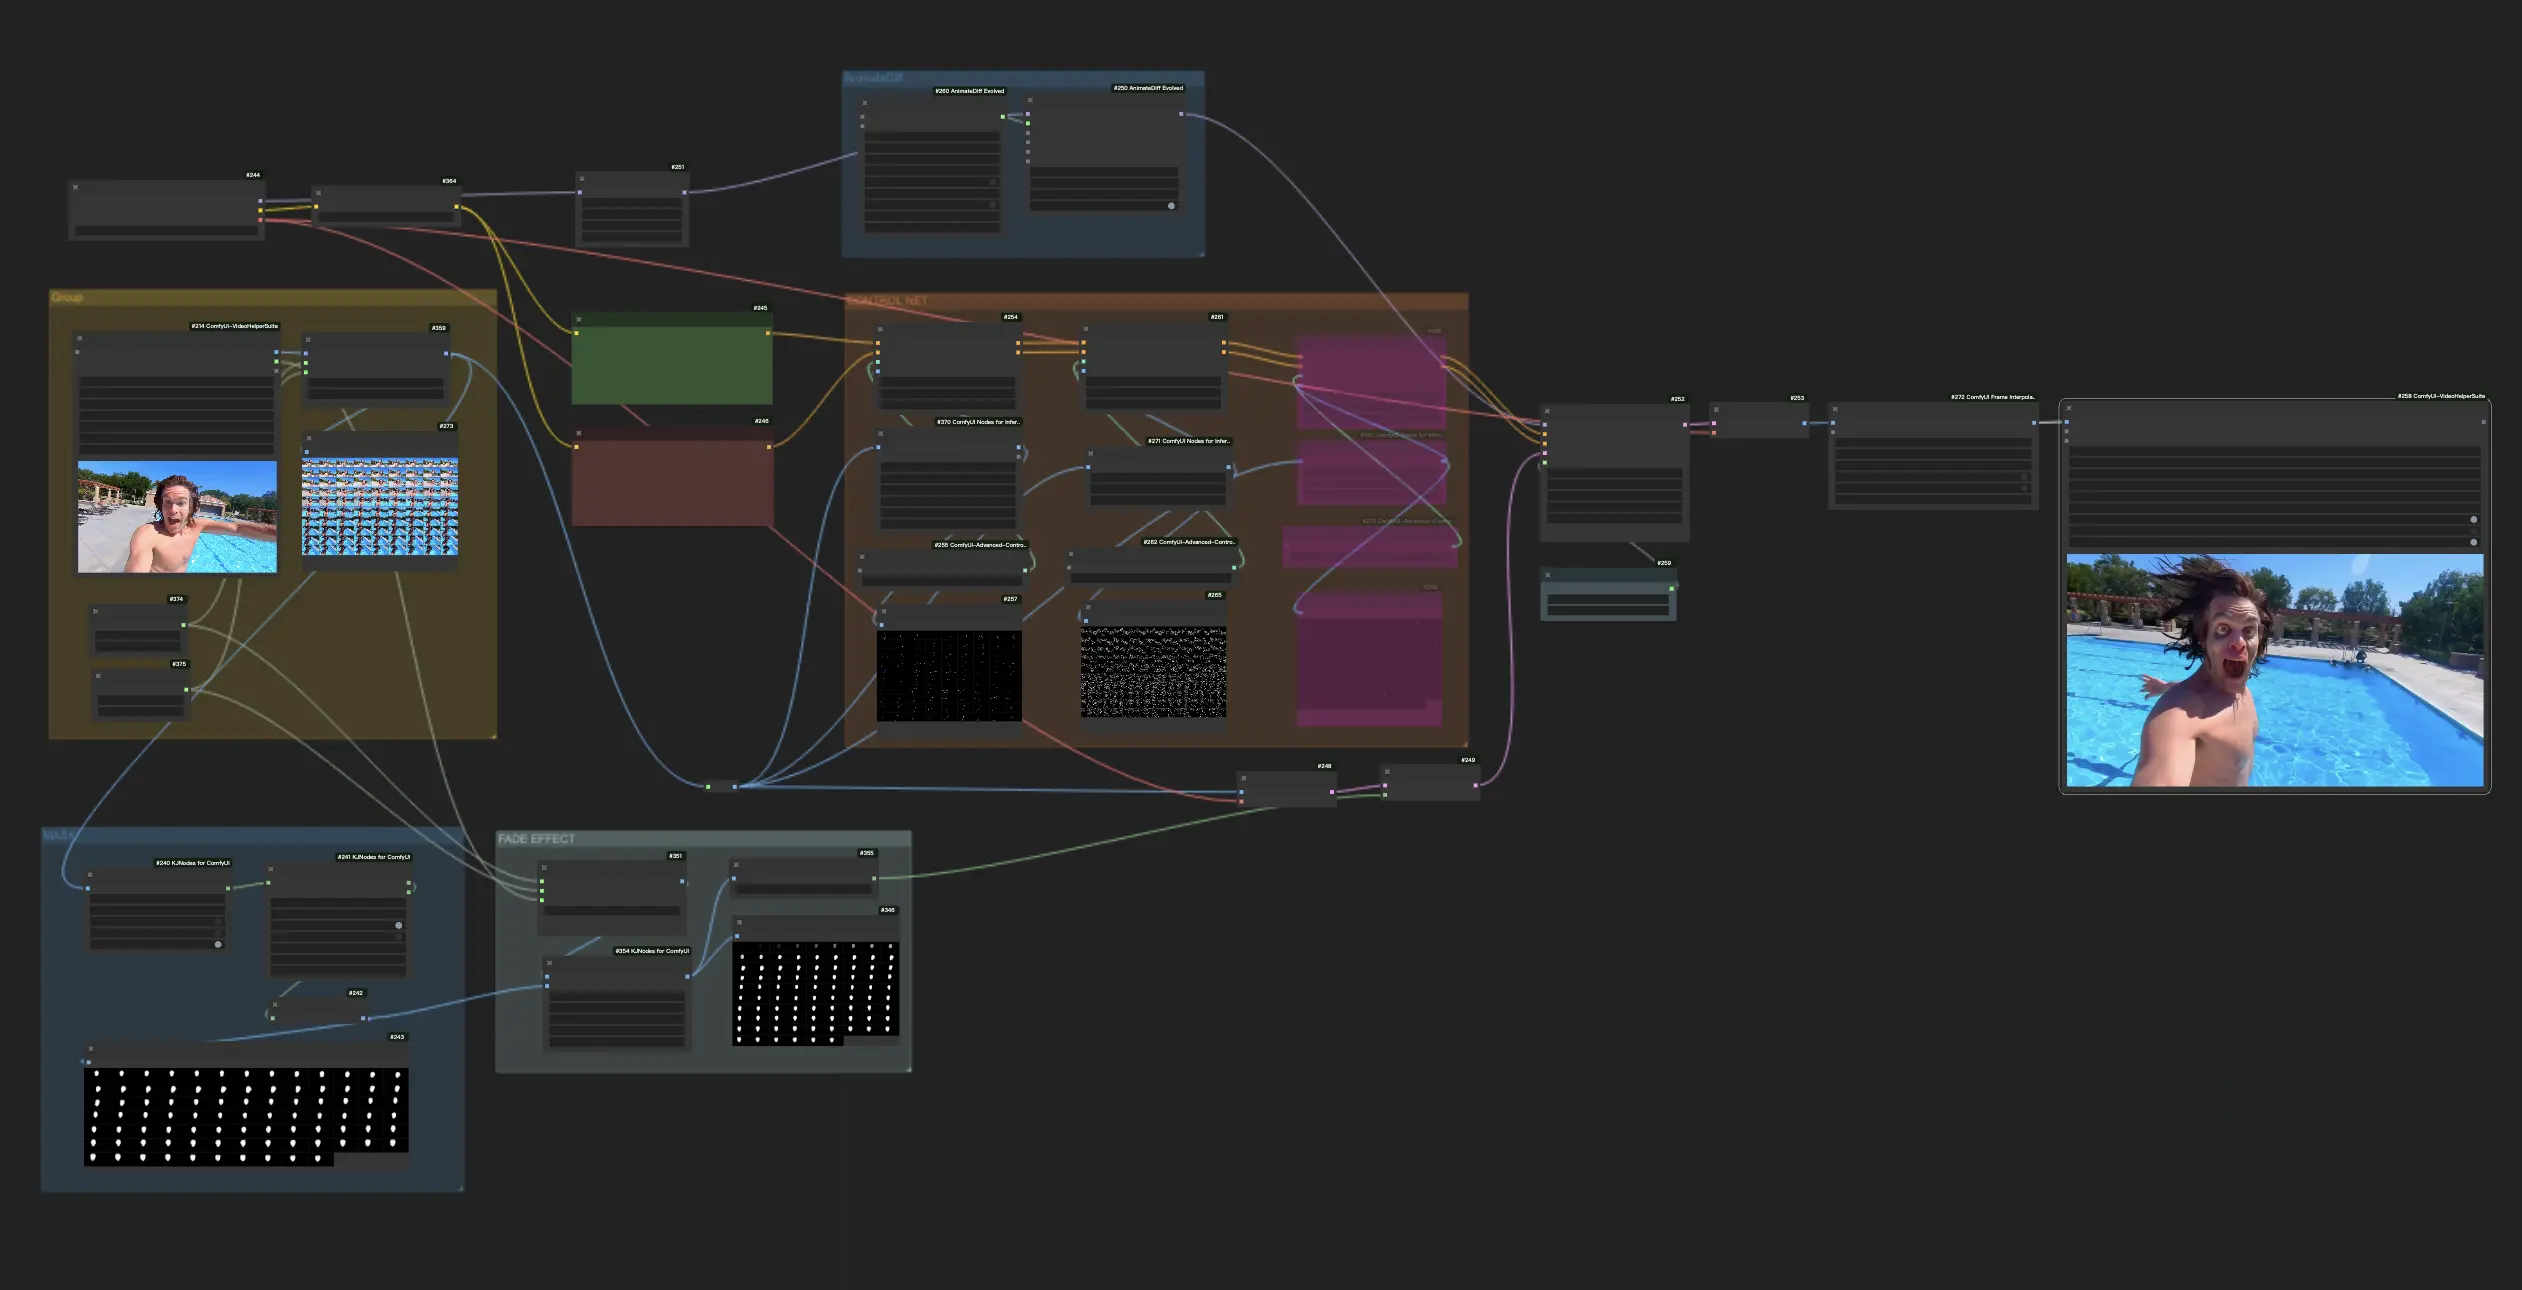
1. ComfyUI Workflow:AnimateDiff + AutoMask + ControlNet | Visual Effects (VFX)#
This workflow harnesses the capabilities of AnimateDiff, ControlNet, and AutoMask to create stunning visual effects with precision and ease. The core of this process lies in the strategic use of AutoMask, which plays a crucial role in defining and isolating the specific area for the visual transformation.
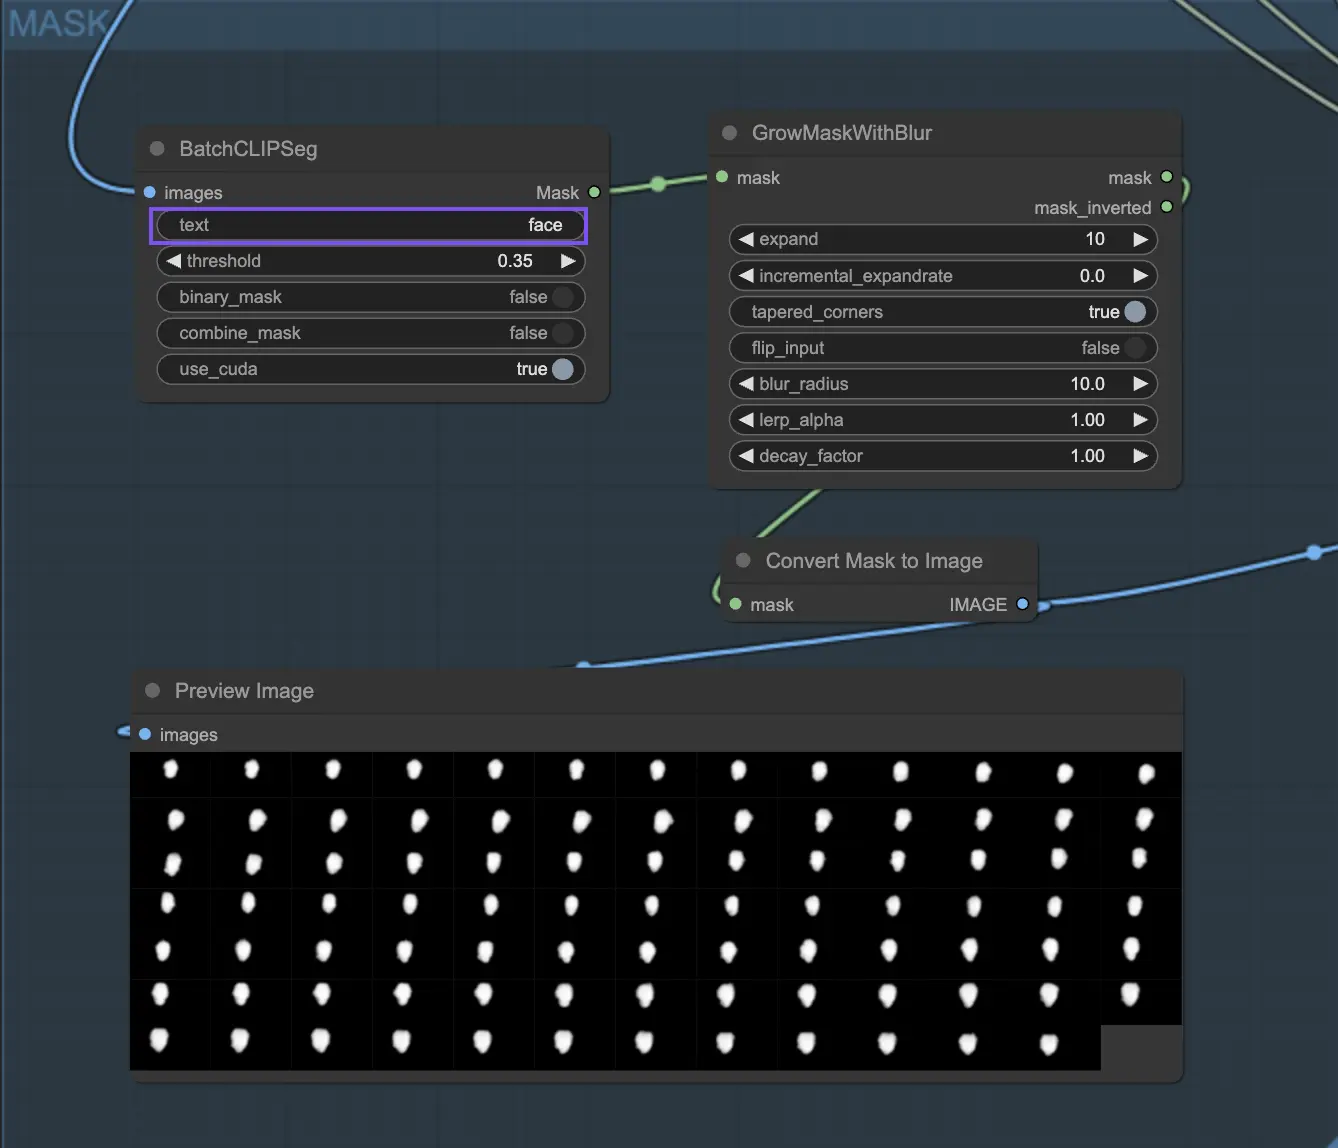
2. Precise Transformations with AutoMask#
The initial step in creating detailed and impactful visual effects, such as transforming a human face into a zombie, involves the use of AutoMask. AutoMask plays a crucial role in this process by accurately identifying and isolating the specific area for enhancement. For effects that demand a high degree of realism and precision, such as morphing into a zombie, focusing the transformation on the facial area is essential. AutoMask excels in this by generating a highly accurate mask that envelops the face. This precision ensures that the transformative effect is confined strictly to the face, maintaining the integrity of the surrounding areas of the image without alteration. In this workflow, we use the BatchCLIPSeg Node and the GrowMaskWithBlur node to realize it automatically.
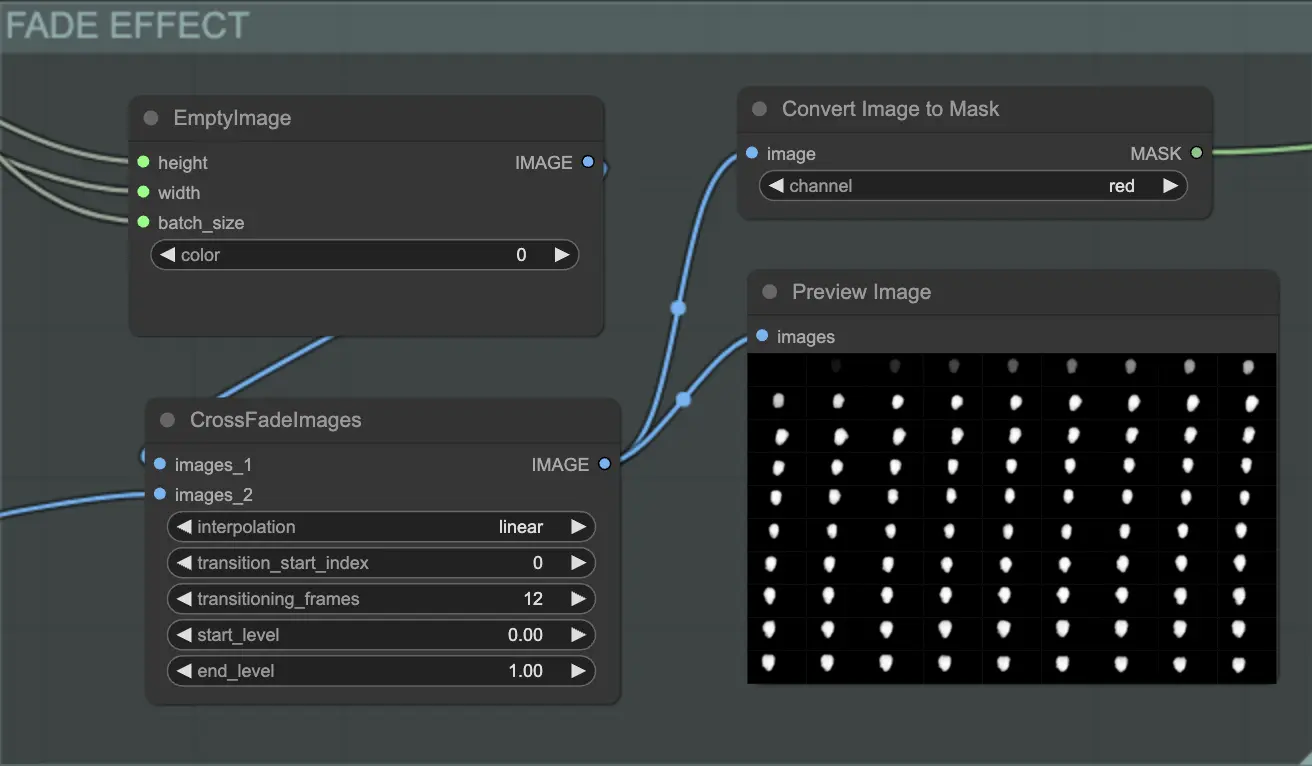
3. Enhancing Realism with the Fade Effect#
To elevate the visual fidelity of the transformation and ensure a natural transition between the applied effects and the original footage, incorporating a Fade effect is paramount. This technique is designed to blend the edges of the visual effects seamlessly into the untouched parts of the video, creating a gradual shift rather than an abrupt change. Implementing the Fade effect contributes to the realism of the transformation, making the transition from human to zombie (or any other effect) appear more fluid and believable. By carefully adjusting the intensity and duration of the Fade, you can achieve a perfect balance that enhances the overall impact of the visual transformation, providing viewers with a captivating and immersive experience.
This workflow also uses AnimateDiff and ControlNet; for more information about how to use them, please check the following link.
4. Overview of AnimateDiff#
Please check out the details on How to use AnimateDiff in ComfyUI
5. Overview of ControlNet#
Please check out the details on How to use ControlNet in ComfyUI
This workflow is inspired by Mickmumpitz. For more information, please visit his YouTube channel.