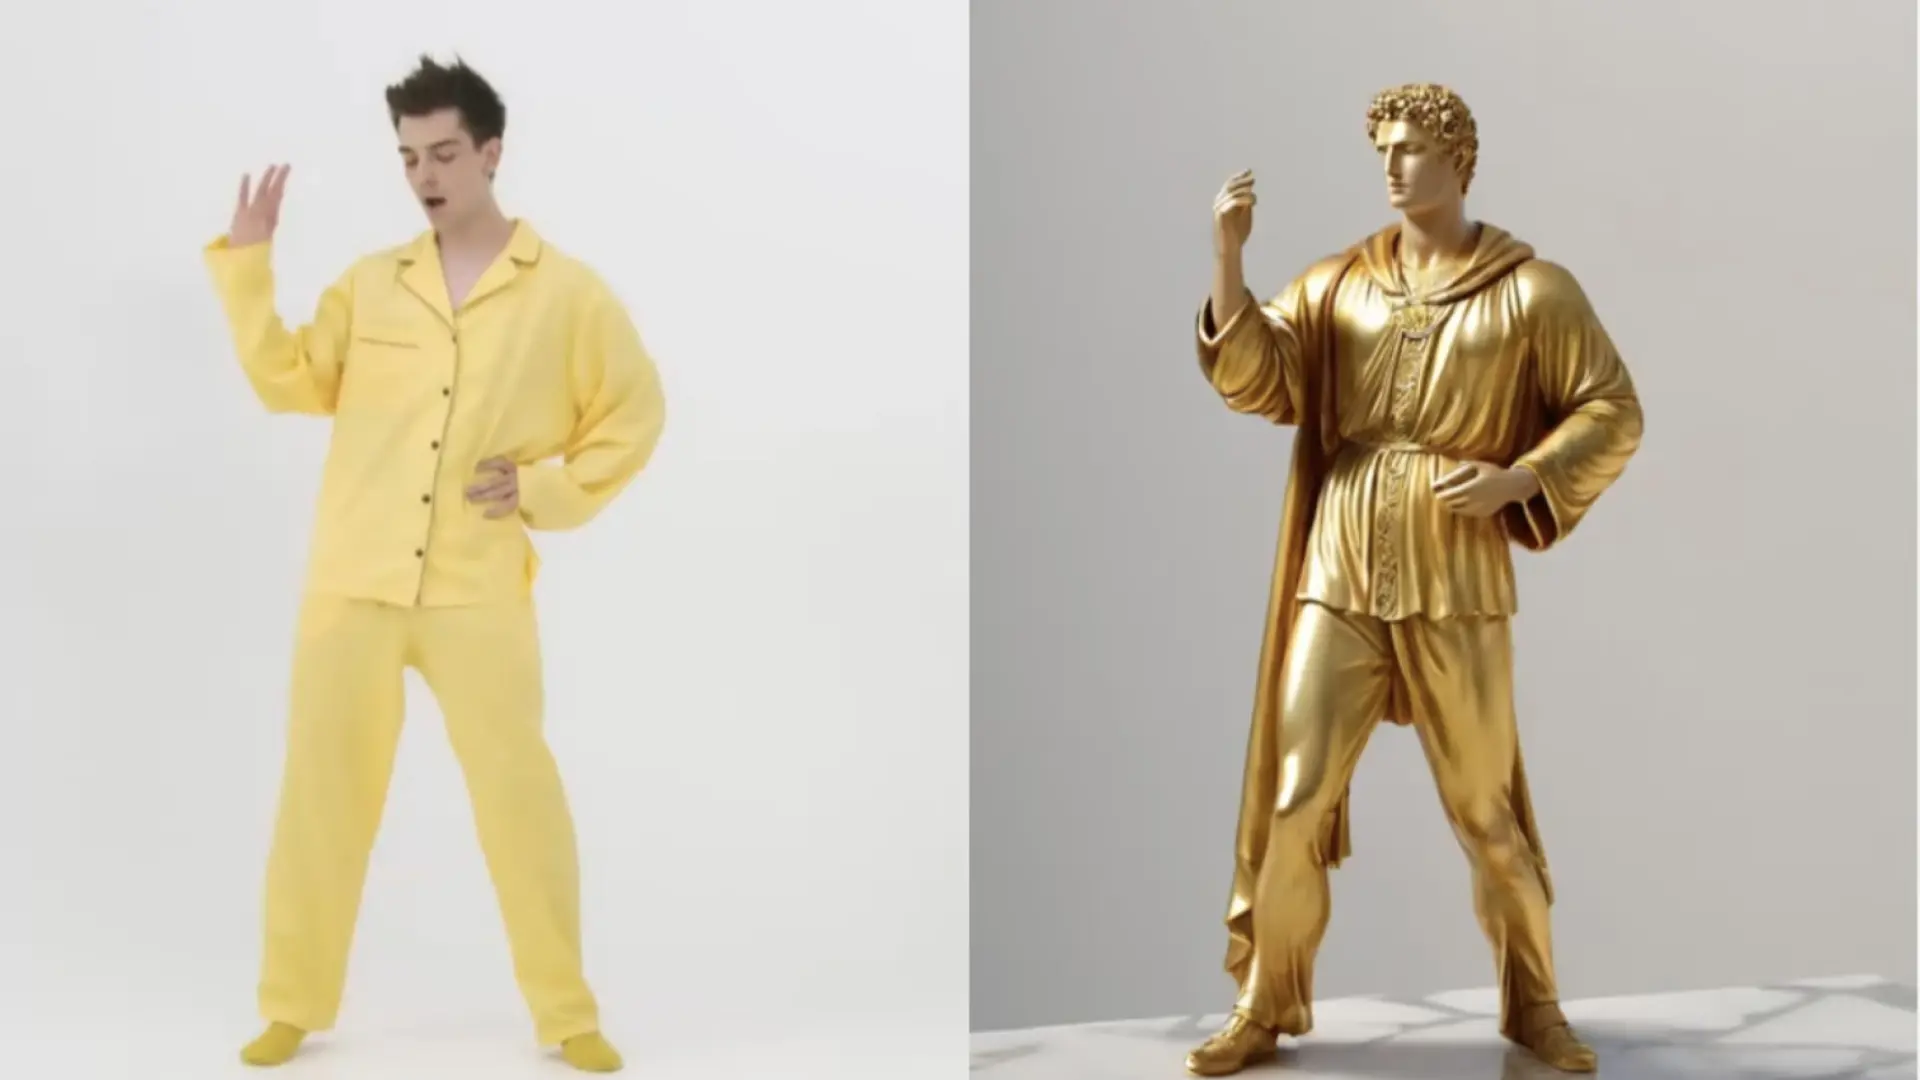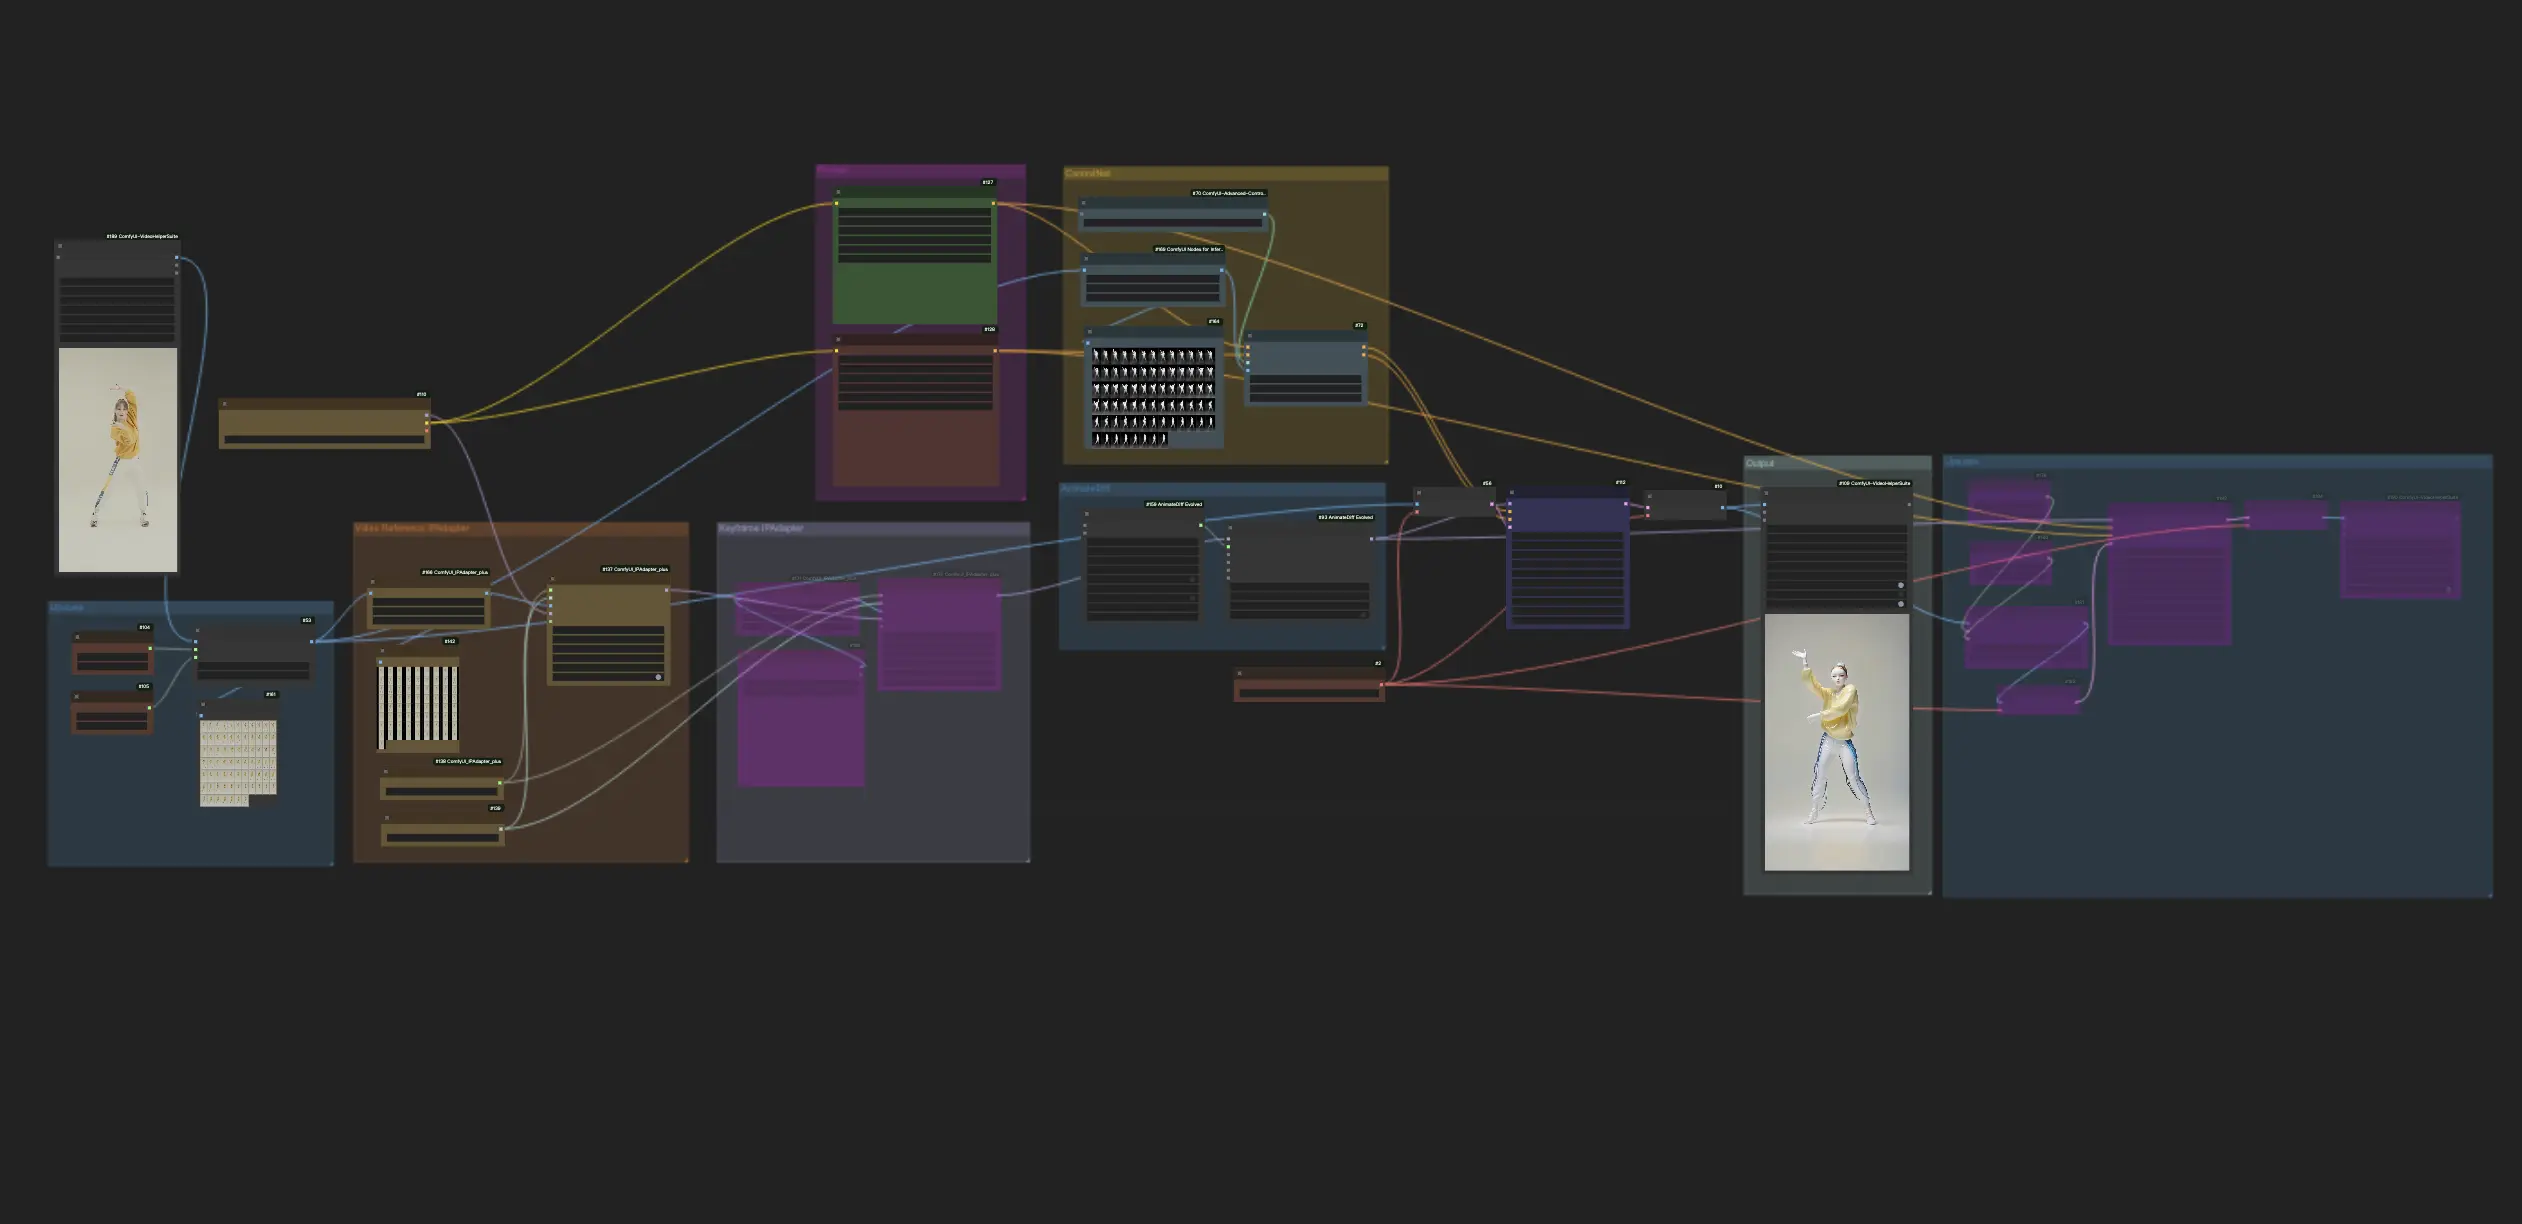
1. ComfyUI Workflow: AnimateDiff + ControlNet | Ceramic Art Style#
This workflow utilizes AnimateDiff, ControlNet focusing on depth, and specific Lora to skillfully transform videos into a Ceramic Art Style. You are encouraged to use different prompts to achieve various art styles, turning your ideas into reality.
2. How to Use AnimateDiff#
AnimateDiff is designed to animate static images and text prompts into dynamic videos, leveraging Stable Diffusion models and a specialized motion module. It automates the animation process by predicting seamless transitions between frames, making it accessible to users without coding skills .
2.1 AnimateDiff Motion Modules#
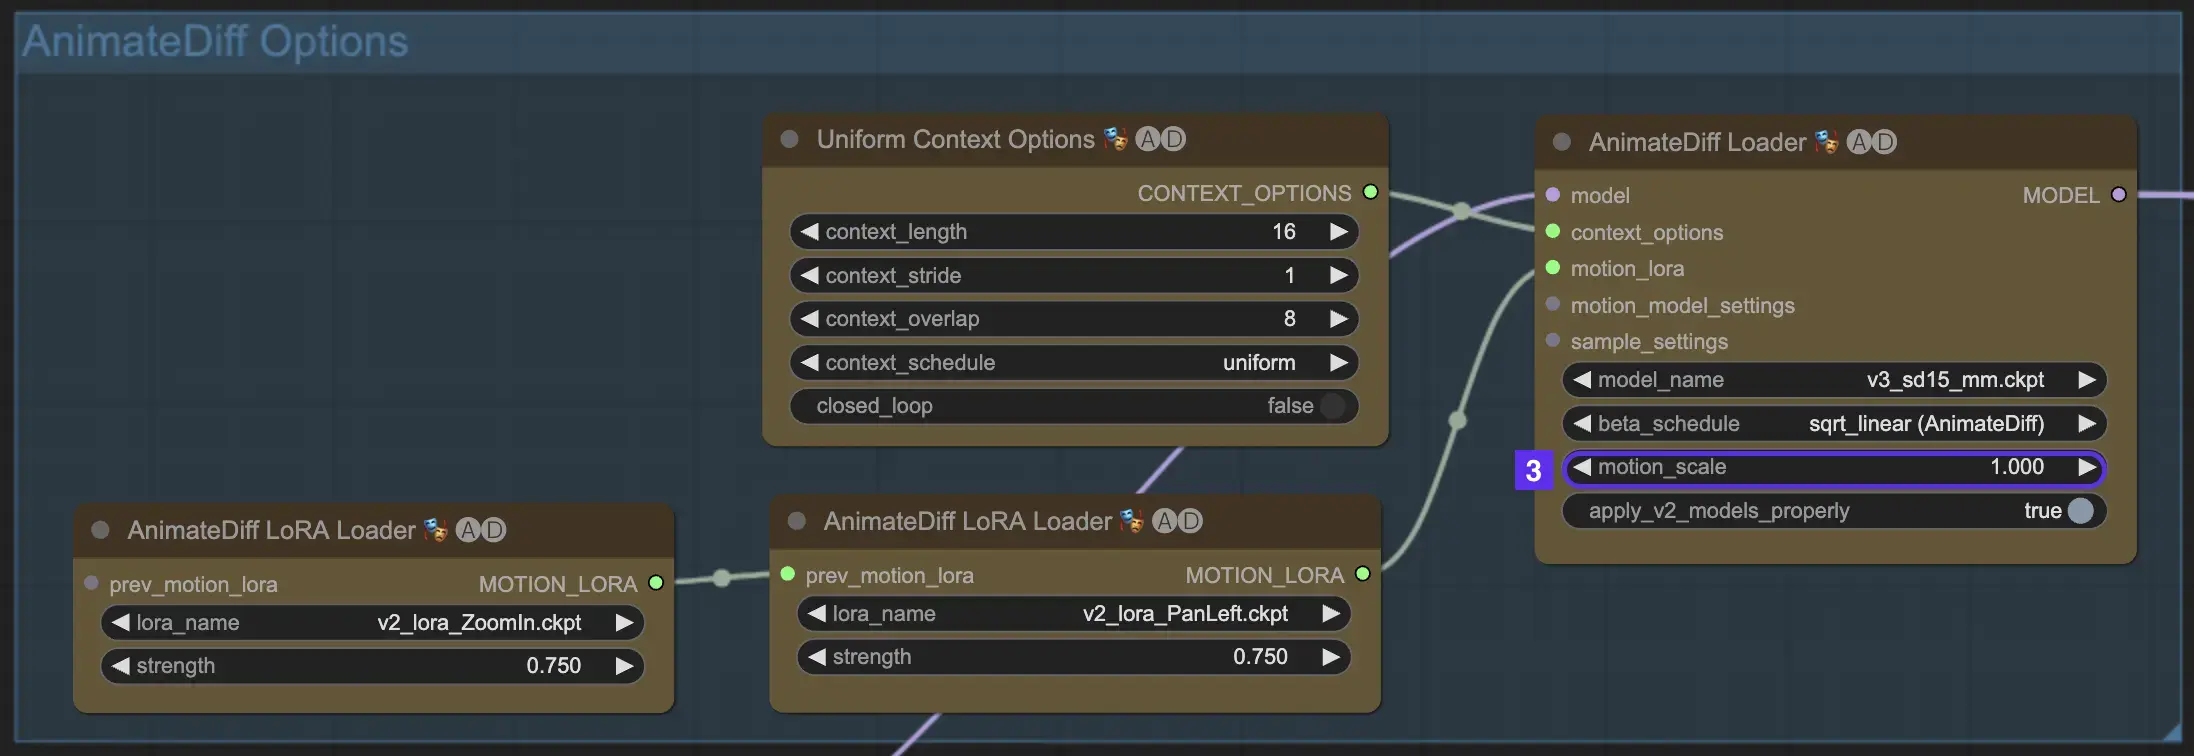
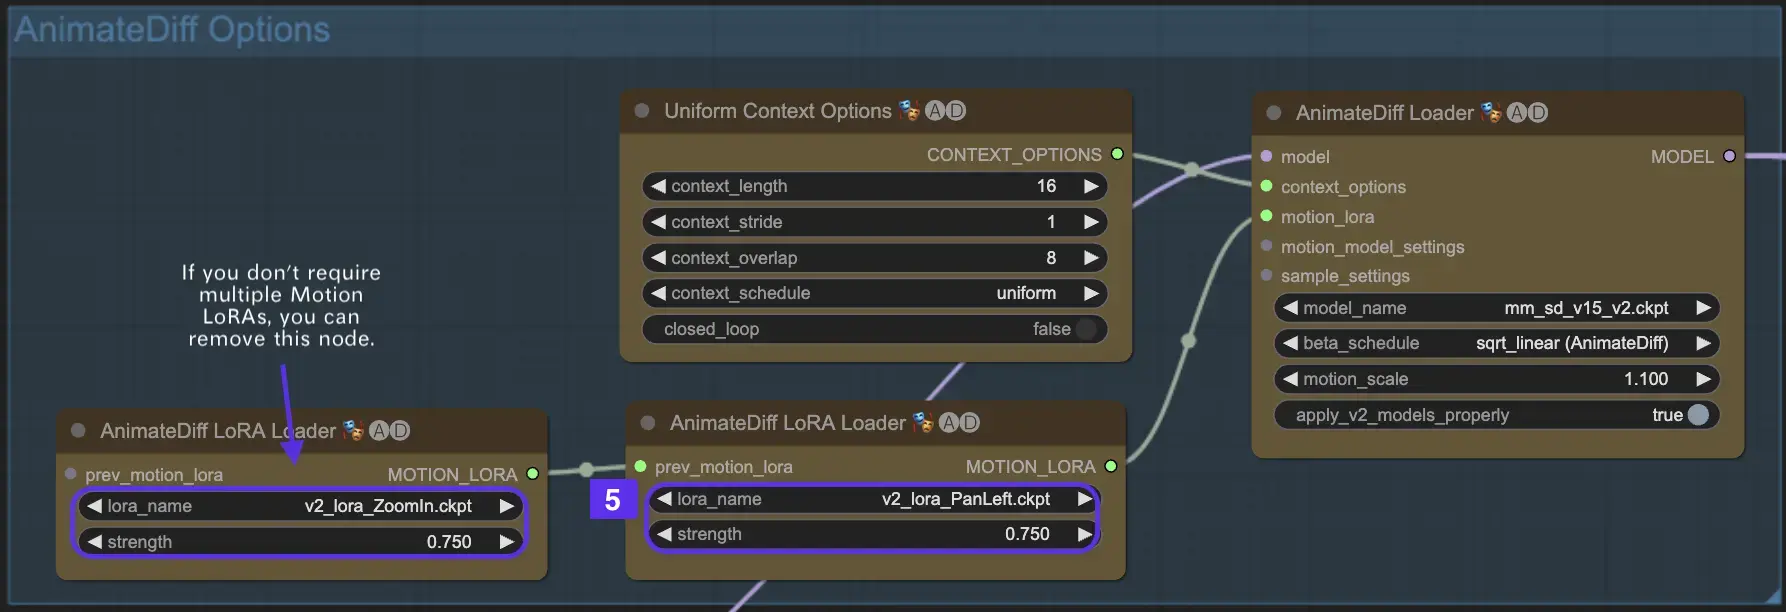
To begin, select the desired AnimateDiff motion module from the model_name dropdown:
- Use v3_sd15_mm.ckpt for AnimateDiff V3
- Use mm_sd_v15_v2.ckpt for AnimateDiff V2
- Use mm_sdxl_v10_beta.ckpt for AnimateDiff SDXL
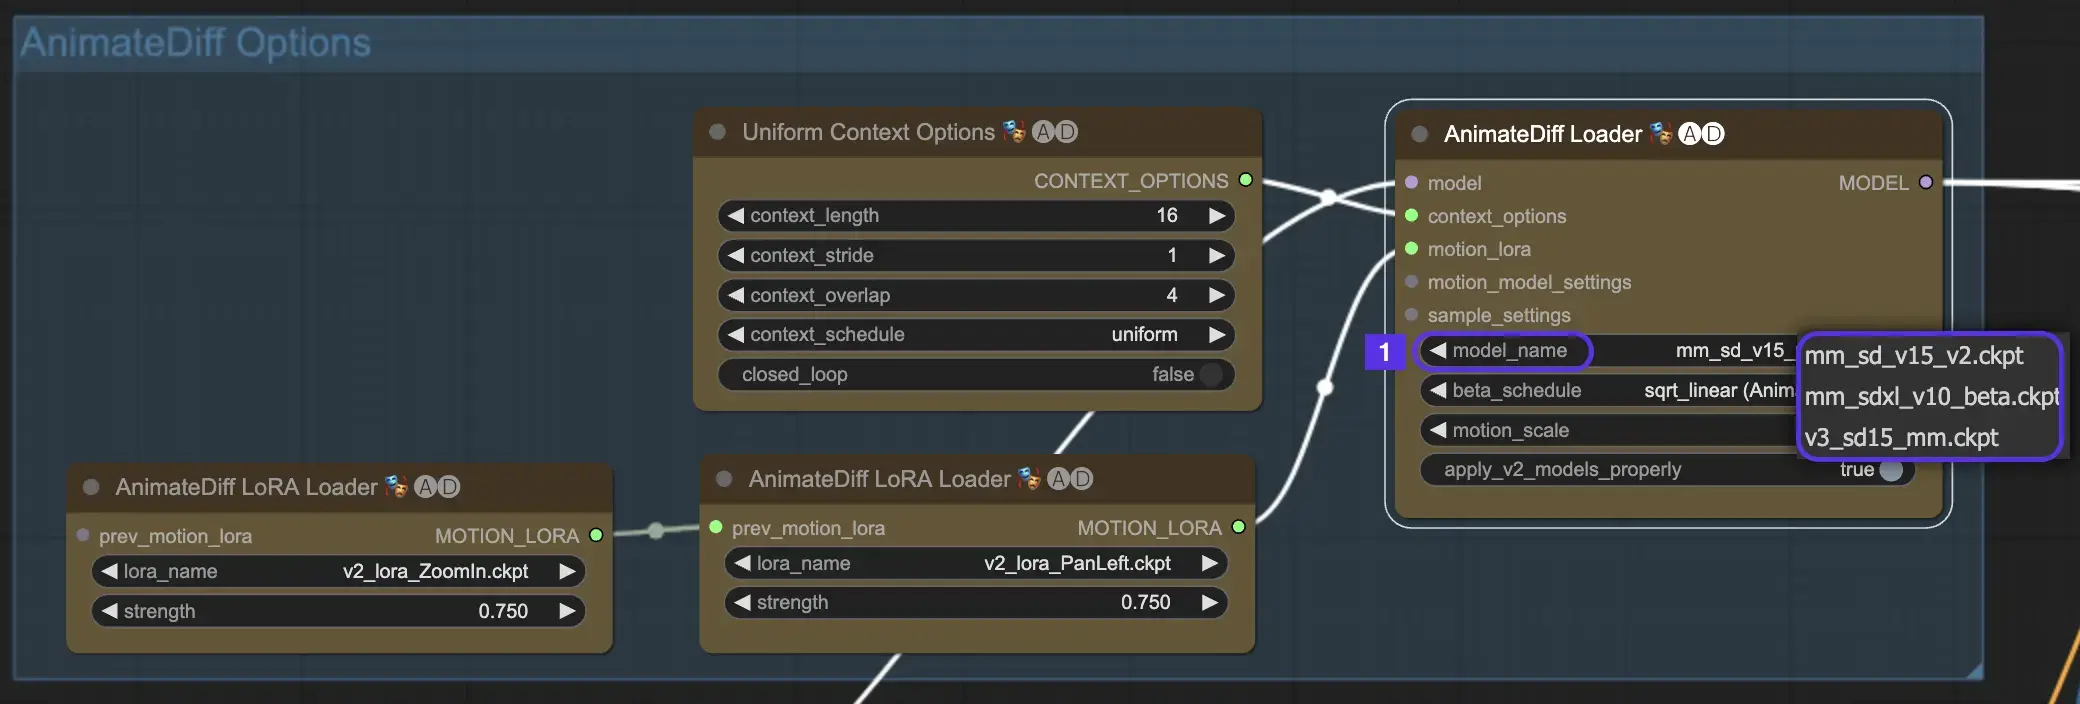
2.2 Beta Schedule#
The Beta Schedule in AnimateDiff is crucial for adjusting the noise reduction process throughout animation creation.
For versions V3 and V2 of AnimateDiff, the sqrt_linear setting is recommended, although experimenting with the linear setting can yield unique effects.
For AnimateDiff SDXL, the linear setting (AnimateDiff-SDXL) is advised.
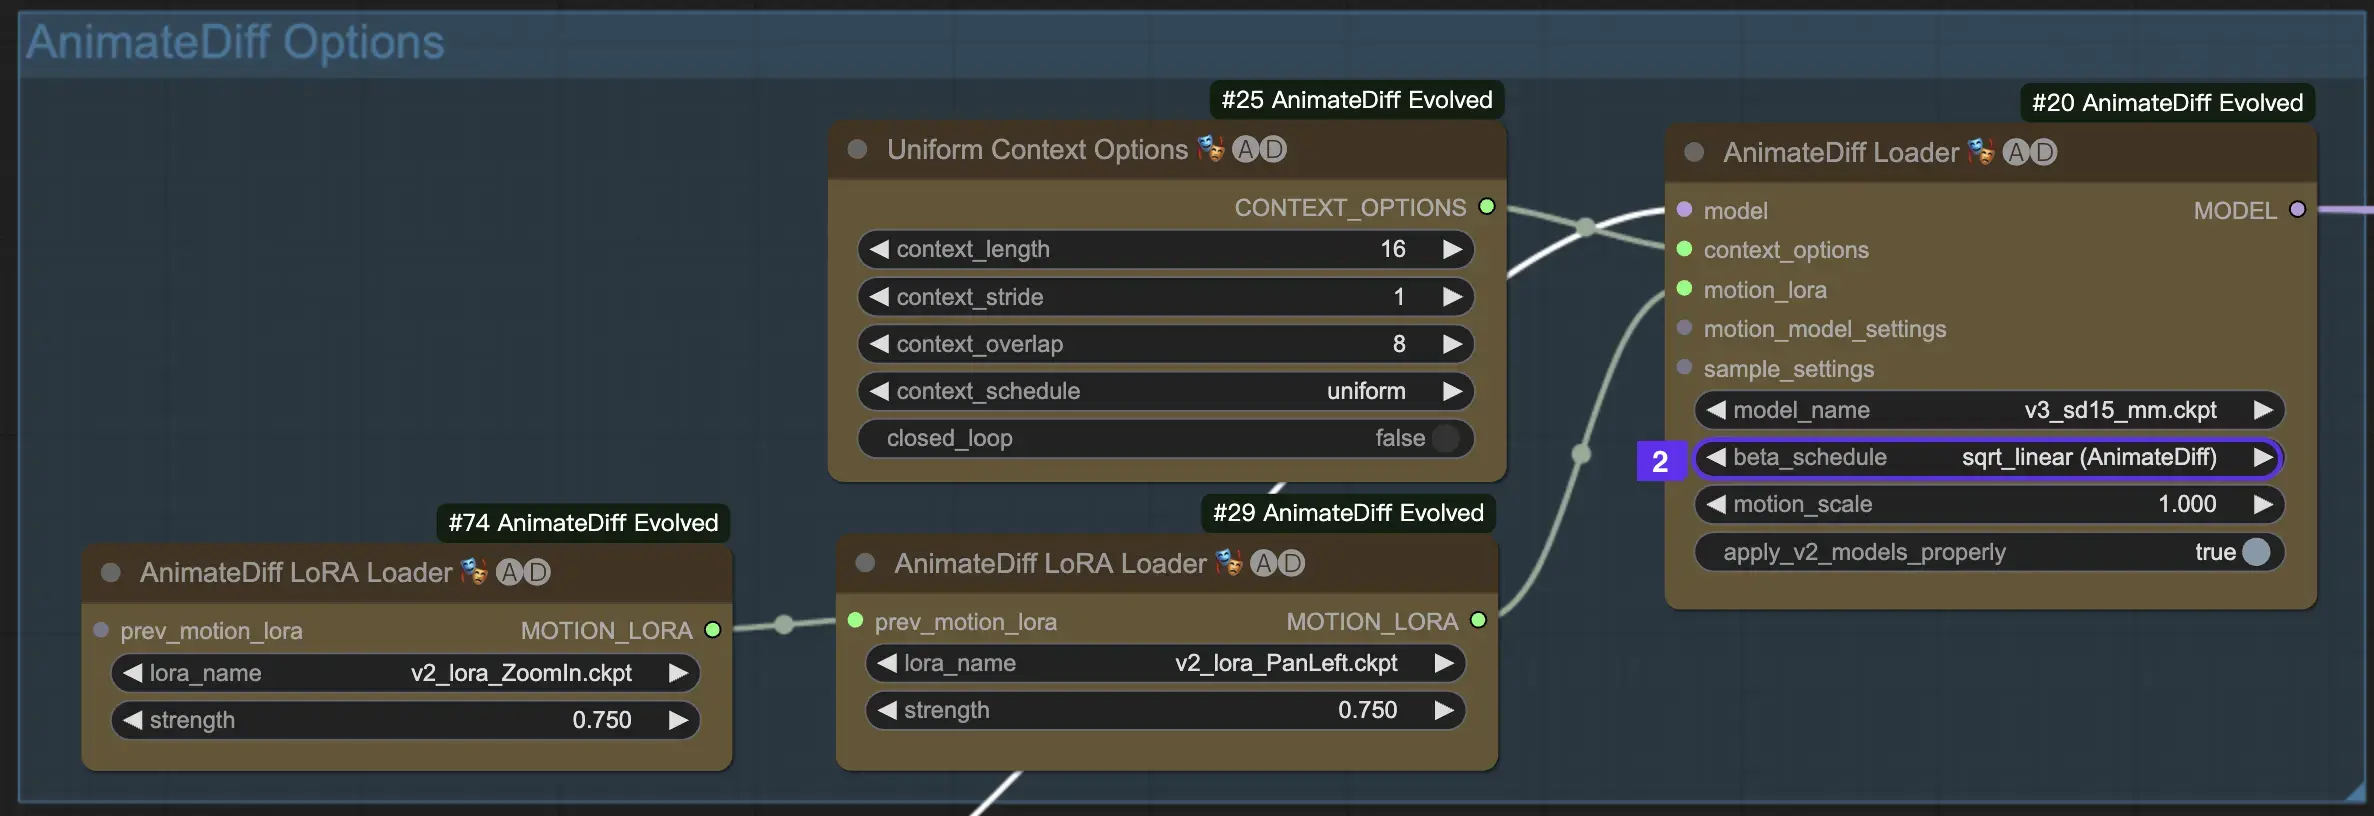
2.3 Motion Scale#
The Motion Scale feature in AnimateDiff allows for the adjustment of motion intensity in your animations. A Motion Scale under 1 results in more subtle motion, whereas a scale over 1 amplifies movement.
2.4 Context Length#
The Uniform Context Length in AnimateDiff is essential for ensuring seamless transitions between scenes defined by your Batch Size. It acts like an expert editor, seamlessly connecting scenes for fluid narration. Setting a longer Uniform Context Length ensures smoother transitions, while a shorter length offers quicker, more distinct scene changes, beneficial for certain effects. The standard Uniform Context length is set to 16.

2.5 Utilizing Motion LoRA for Enhanced Camera Dynamics (Specific to AnimateDiff v2)#
Motion LoRAs, compatible solely with AnimateDiff v2, introduce an additional layer of dynamic camera movement. Achieving the optimal balance with the LoRA weight, typically around 0.75, ensures smooth camera motion free from background distortions.
Moreover, chaining various Motion LoRA models allows for complex camera dynamics. This enables creators to experiment and discover the ideal combination for their animation, elevating it to a cinematic level.
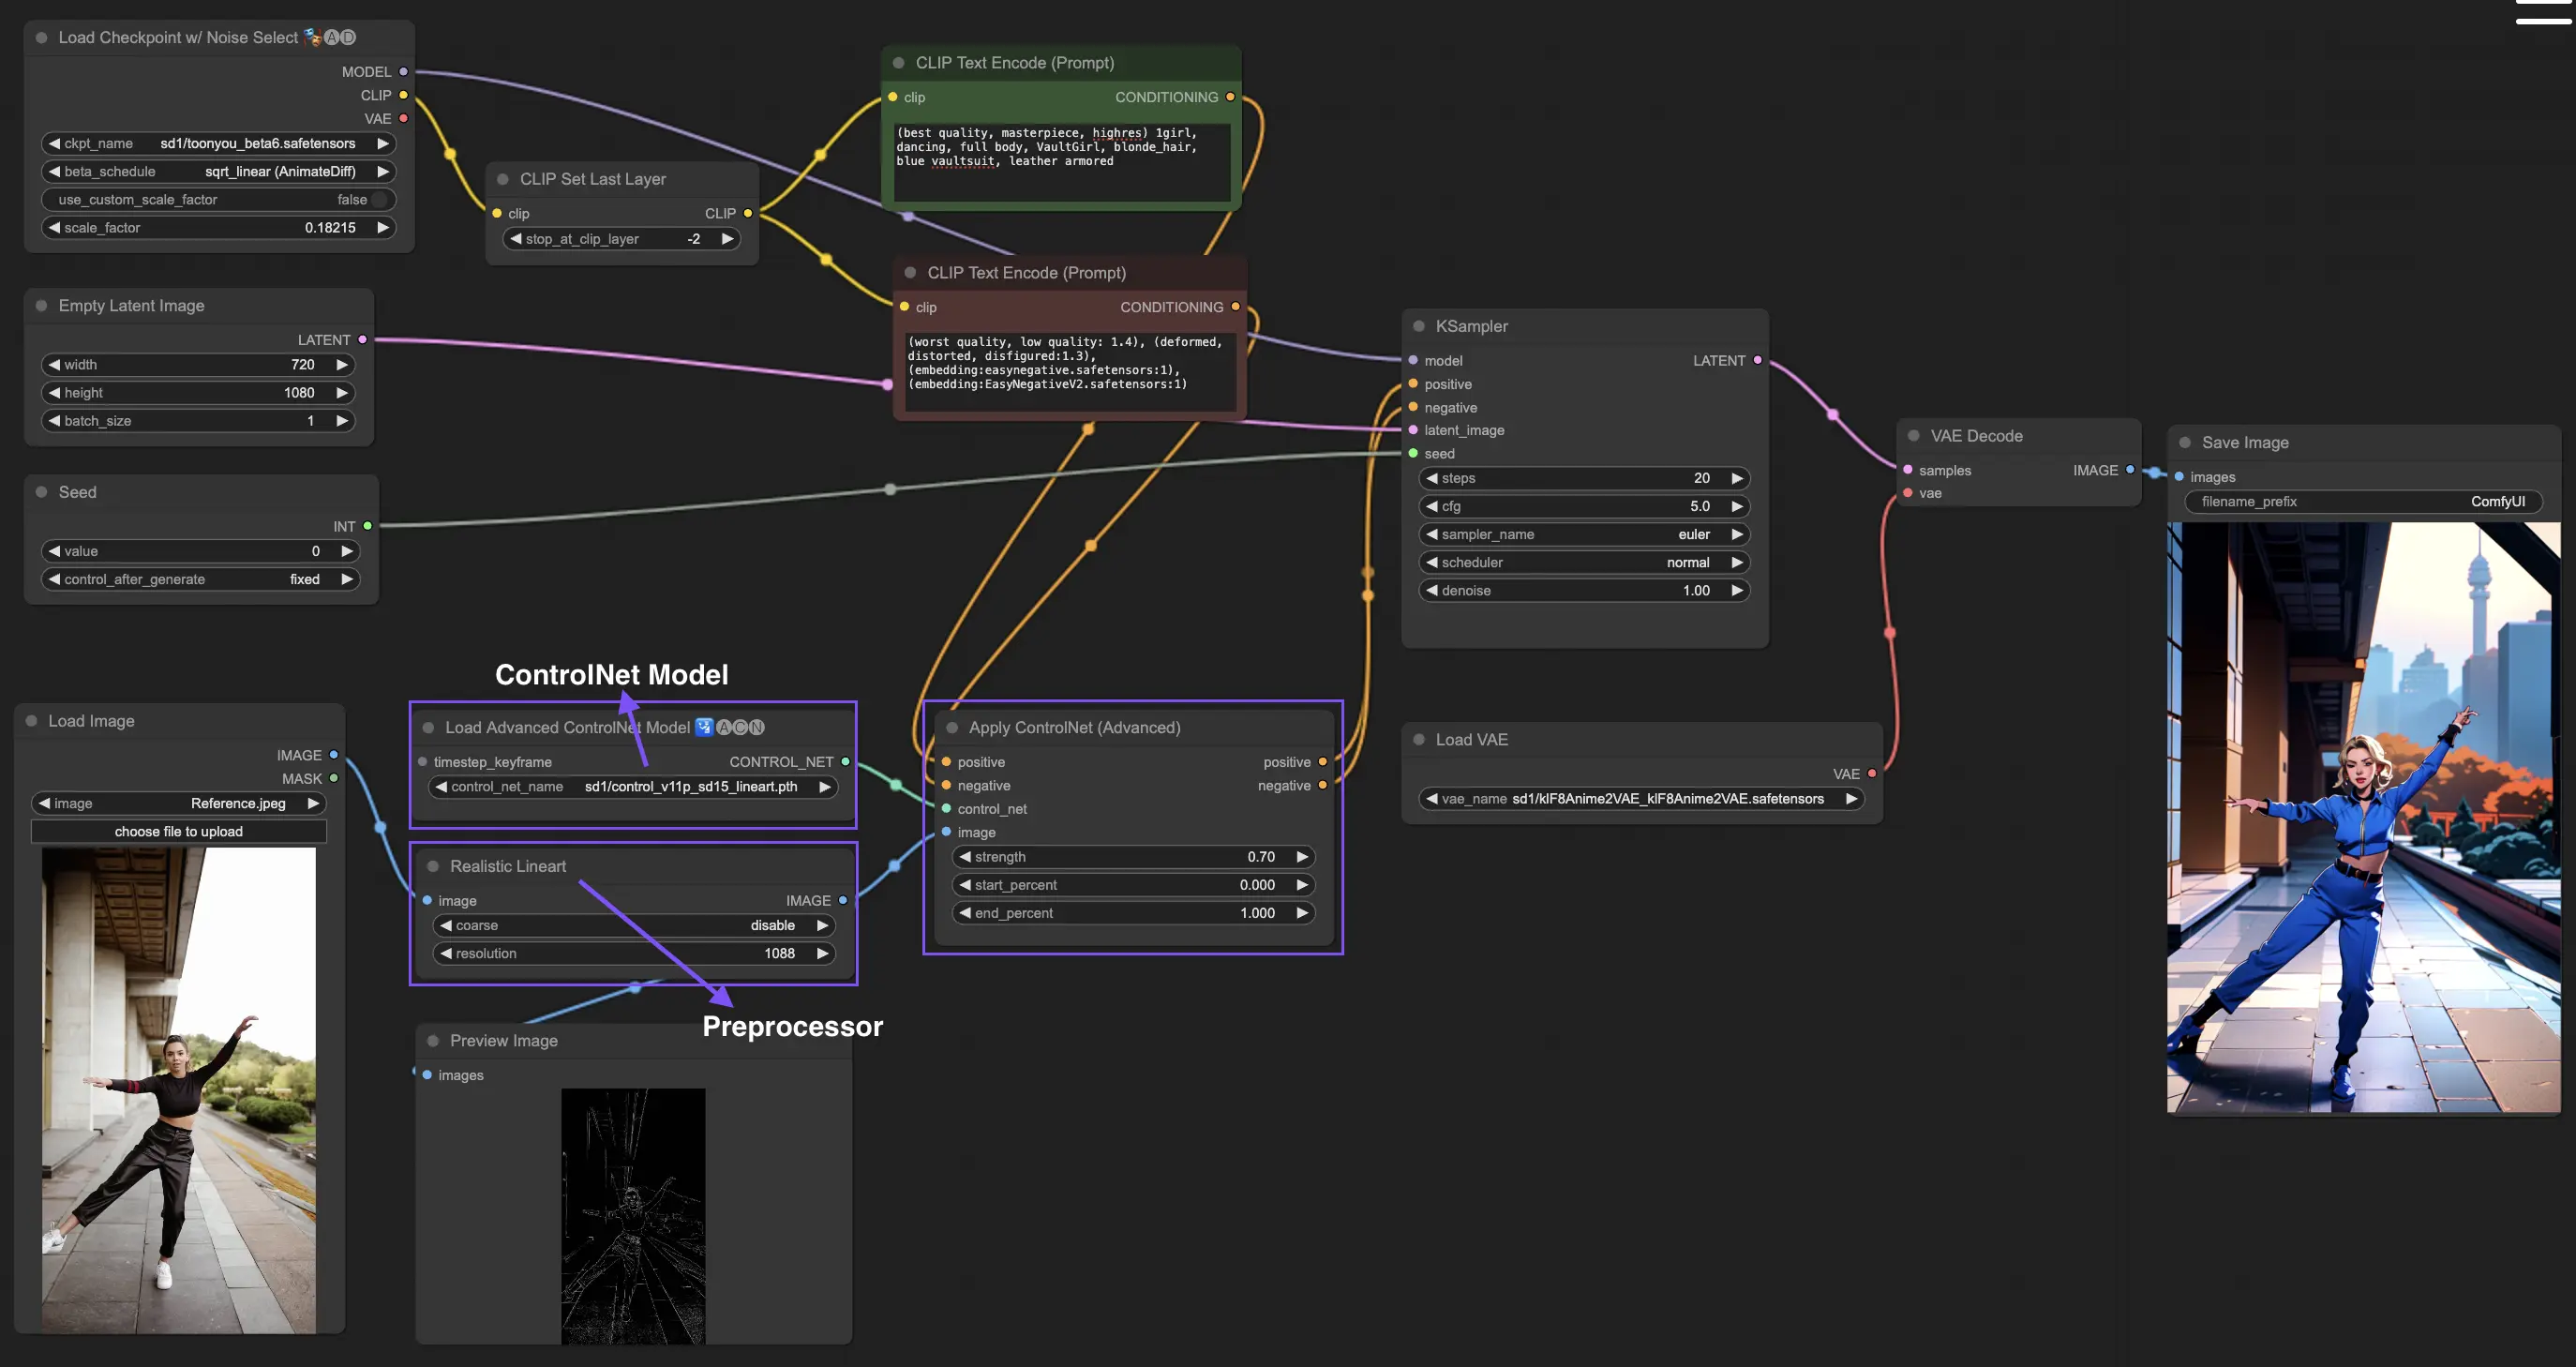
3. How to Use ControlNet#
ControlNet enhances image generation by introducing precise spatial control to text-to-image models, allowing users to manipulate images in sophisticated ways beyond just text prompts, by utilizing vast libraries from models like Stable Diffusion for intricate tasks such as sketching, mapping, and segmenting visuals.
The following is the simplest workflow using ControlNet.
3.1 Loading the "Apply ControlNet" Node#
Start your image crafting by loading the "Apply ControlNet" Node in ComfyUI, setting the stage for combining visual and textual elements in your design.
3.2 Inputs of "Apply ControlNet" Node#
Use Positive and Negative Conditioning to shape your image, select a ControlNet model to define style traits, and preprocess your image to ensure it matches the ControlNet model requirements, thereby making it ready for transformation.
3.3 Outputs of "Apply ControlNet" Node#
The node outputs guide the diffusion model, offering a choice between refining the image further or adding more ControlNets for enhanced detail and customization based on the interaction of ControlNet with your creative inputs.
3.4 Tuning "Apply ControlNet" for Best Results#
Control the influence of ControlNet on your image through settings like Determining Strength, Adjusting Start Percent, and Setting End Percent to finely tune the image's creative process and outcome.
For more detailed information, please check out How to use ControlNet in ComfyUI
This workflow is inspired by MDMZ with some modifications. For more information, please visit his YouTube channel.