
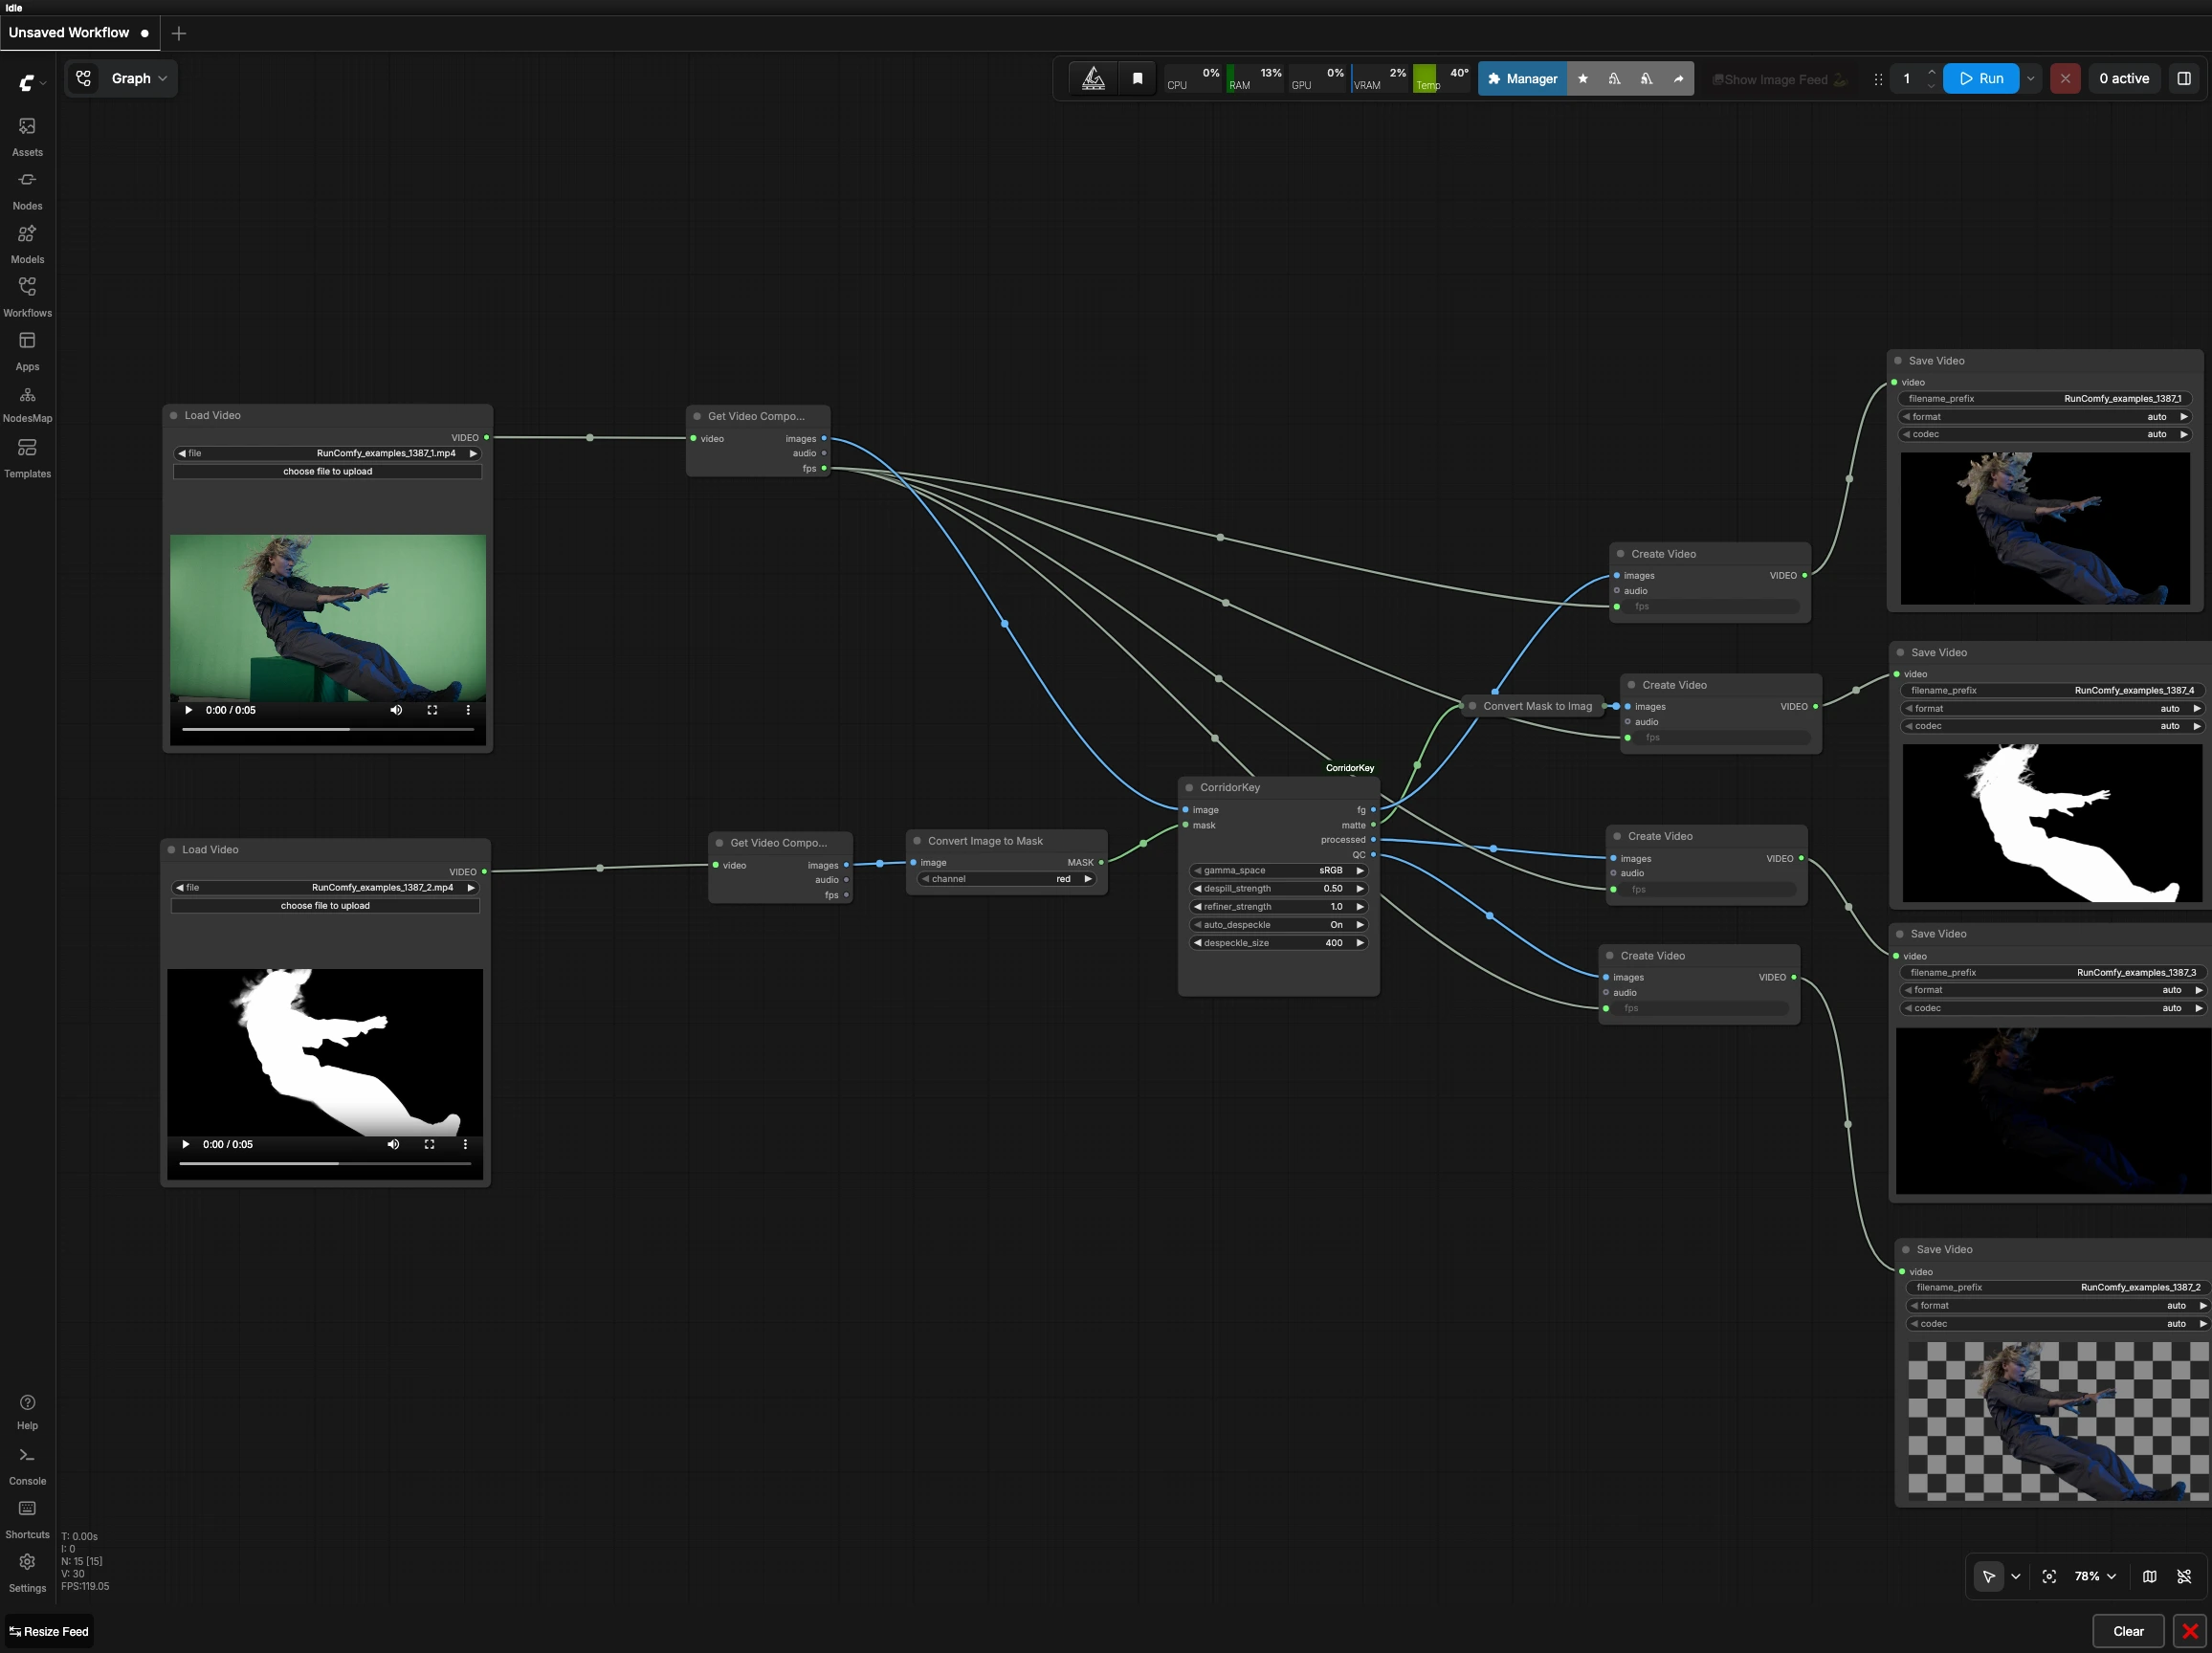

CorridorKey ComfyUI: Guided Video Keying and Matting#
This CorridorKey ComfyUI workflow turns a source video plus a coarse mask pass into clean foreground plates, a high-quality matte, and review previews for fast iteration. It is a controllable, editor-friendly keying pipeline built around the CorridorKey custom node and model, intended for live-action shots where you want precision and stability rather than a one-click background remover.
The graph ships with four deliverables: a foreground-only plate, a grayscale matte, a processed preview, and a QC overlay. It keeps your original frame rate for seamless round-tripping into NLEs and compositors. The CorridorKey ComfyUI node is provided by SeanBRVFX/ComfyUI-CorridorKey and loads weights from nikopueringer/CorridorKey_v1.0.
Key models in Comfyui CorridorKey ComfyUI workflow#
- CorridorKey v1.0. A guided keying model that refines a user-supplied coarse mask into a detailed, temporally consistent matte across frames. It focuses on retaining fine structures such as hair and motion-blurred edges while minimizing halos and holes. Model weights are hosted on Hugging Face for streamlined use inside ComfyUI.
How to use Comfyui CorridorKey ComfyUI workflow#
This workflow takes two aligned clips of identical duration, resolution, and fps: your source plate and a coarse mask pass. It then converts the mask frames to a single-channel matte, runs CorridorKey to refine per-frame alphas, and assembles four synchronized review outputs.
Stage 1 — Load footage and mask#
Load your source plate in LoadVideo (#26) and a matching coarse mask clip in LoadVideo (#29). The two clips must match in frame count, fps, and dimensions to ensure perfect sync. A coarse mask can be a rough roto, a thresholded pass, or any region-of-interest matte that covers the subject with some tolerance. Keeping the mask temporally stable, even if rough, makes the refinement more consistent shot to shot.
Stage 2 — Split frames and prep the mask#
Both videos are unpacked to frames and fps using GetVideoComponents (#27, #30). The mask clip is converted to a single-channel matte with ImageToMask (#31). By default the node reads the red channel, which suits masks encoded as solid red graphics; switch the channel if your mask is grayscale or keyed to green or blue. Aim for a mask that includes all subject detail but avoids large background regions to reduce false positives later.
Stage 3 — Guided keying with CorridorKey#
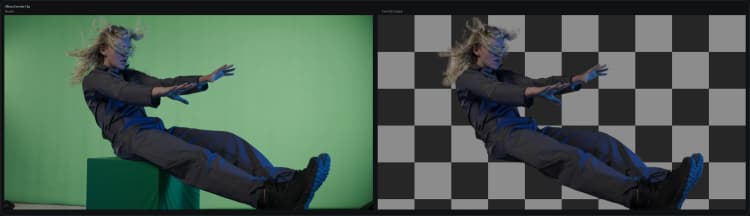
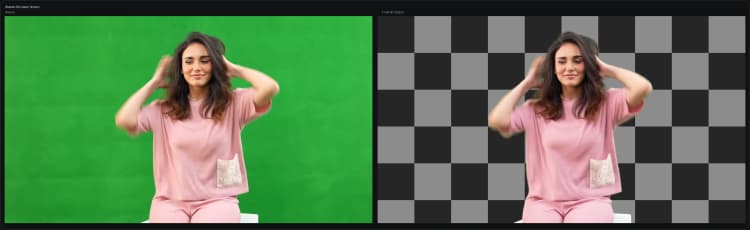
Frames from the source plate feed the image input and the converted matte feeds the mask input of CorridorKey (#28). The model refines edges, fills small holes, and balances detail retention against noise, using the coarse mask as strong spatial guidance. It emits four outputs per frame: fg for the foreground plate, matte for the refined alpha, processed for a straightforward visual preview, and QC for an at-a-glance overlay that highlights problem areas. Use QC to spot halos, transparency errors, or edge chatter before committing to exports.
Stage 4 — Assemble and save deliverables#
The refined streams are turned back into videos while inheriting the original fps. CreateVideo (#33) builds the foreground plate from fg and SaveVideo (#32) writes it to disk. The matte mask is converted to viewable frames with MaskToImage (#35), then exported via CreateVideo (#34) and SaveVideo (#36) as a grayscale reference. The processed and QC branches are likewise assembled with CreateVideo (#37, #39) and saved using SaveVideo (#38, #40) for quick review and shot-to-shot quality checks.
Key nodes in Comfyui CorridorKey ComfyUI workflow#
CorridorKey (#28)#
This is the centerpiece that transforms a rough guide into a production-ready matte and foreground. Treat the guide mask as the main steering signal: if it is too tight you may clip hair and motion blur, and if it is too loose the key can creep into the background. Keep your input color space consistent across the plate and mask, and rely on the QC output to judge edge integrity before exporting. When refining tricky shots, iterate on the coarse mask rather than over-tweaking downstream steps.
ImageToMask (#31)#
This node extracts a single-channel matte from the mask clip. Match its channel selector to how your mask is encoded, for example red for solid-red graphics or the appropriate channel for color-coded mattes. If your mask is grayscale, select the luminance-appropriate channel so white represents subject and black represents background. A clean binary or near-binary input here greatly improves CorridorKey’s stability.
Optional extras#
- Ensure both inputs share identical fps, resolution, and frame count to avoid drift or frame slips in the outputs.
- Prefer constant-frame-rate sources and avoid letterboxing or pillarboxing in either input clip.
- If you see halos in
QC, expand the coarse mask slightly and re-run; if edges look choked, loosen the mask just enough to include wisps and motion blur. - Export both the foreground plate and the matte; in your NLE or compositor, use the matte as the alpha for the foreground plate for exact control.
- For batch work, keep your mask naming and encoding consistent so
ImageToMaskdoes not require per-shot changes.
Links
- CorridorKey custom node: SeanBRVFX/ComfyUI-CorridorKey
- CorridorKey model weights: nikopueringer/CorridorKey_v1.0
Acknowledgements#
This workflow implements and builds upon the following works and resources. We gratefully acknowledge SeanBRVFX for ComfyUI-CorridorKey and nikopueringer for CorridorKey_v1.0 for their contributions and maintenance. For authoritative details, please refer to the original documentation and repositories linked below.
Resources#
- SeanBRVFX/ComfyUI-CorridorKey
- Source repo: SeanBRVFX/ComfyUI-CorridorKey
- nikopueringer/CorridorKey_v1.0
- Model source: nikopueringer/CorridorKey_v1.0
Note: Use of the referenced models, datasets, and code is subject to the respective licenses and terms provided by their authors and maintainers.
