


Z-Image text-to-image workflow for ComfyUI#
This ComfyUI workflow showcases Z-Image, a next‑generation diffusion transformer designed for fast, high‑fidelity image generation. Built on a scalable single‑stream architecture with around 6 billion parameters, Z-Image balances photorealism, strong prompt adherence, and bilingual text rendering.
Out of the box, the graph is set up for Z-Image Base to maximize quality while remaining efficient on common GPUs. It also plays well with the Z-Image Turbo variant when speed matters, and its structure makes it easy to extend toward Z-Image Edit for image‑to‑image tasks. If you want a dependable, minimal graph that turns clear prompts into clean results, this Z-Image workflow is a solid starting point.
Key models in Comfyui Z-Image workflow#
- Z-Image Base diffusion transformer (bf16). Core generator that denoises latents into images with Z-Image’s single‑stream topology and prompt control. Model page • bf16 weights
- Qwen 3 4B text encoder. Encodes prompts for Z-Image with strong bilingual coverage and clear tokenization for text rendering. encoder weights
- Z-Image autoencoder VAE. Compresses and reconstructs images between pixel space and the Z-Image latent space. VAE weights
How to use Comfyui Z-Image workflow#
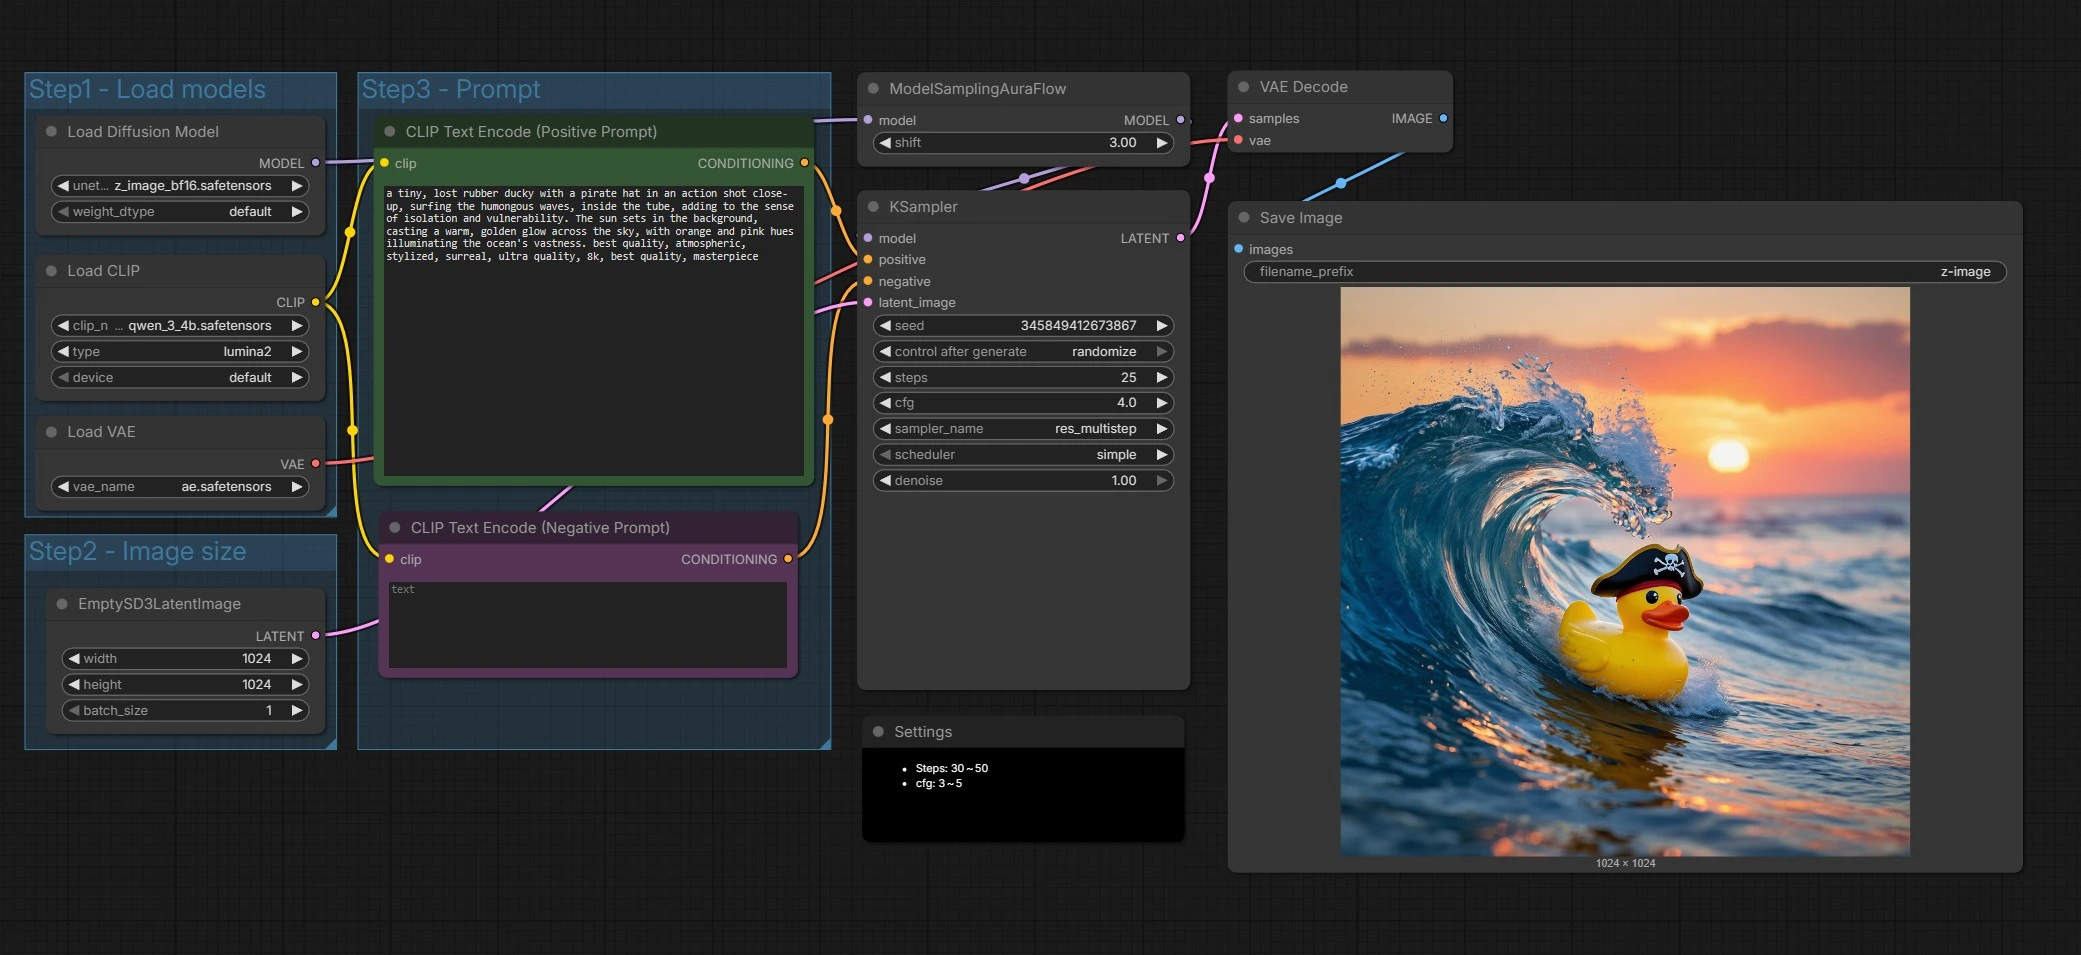
At a high level, the graph loads Z-Image components, prepares a latent canvas, encodes your positive and negative prompts, runs a sampler tuned for Z-Image, then decodes and saves the result. You mainly provide the prompt and choose the output size; the rest is wired for sensible defaults.
Step1 - Load models#
This group initializes the Z-Image UNet, the Qwen 3 4B text encoder, and the VAE so all components align. The UNETLoader (#66) points to Z-Image Base by default, which favors fidelity and editing headroom. The CLIPLoader (#62) brings in the Qwen-based encoder that handles multilingual prompts and text tokens well. The VAELoader (#63) sets the autoencoder used later for decoding. Swap weights here if you want to try Z-Image Turbo for faster drafts.
Step2 - Image size#
This group sets up the latent canvas via EmptySD3LatentImage (#68). Choose the width and height you want to generate at, and keep aspect ratio in mind for composition. Z-Image performs well across common creative sizes, so pick dimensions that match your storyboards or delivery format. Larger sizes increase detail and compute cost.
Step3 - Prompt#
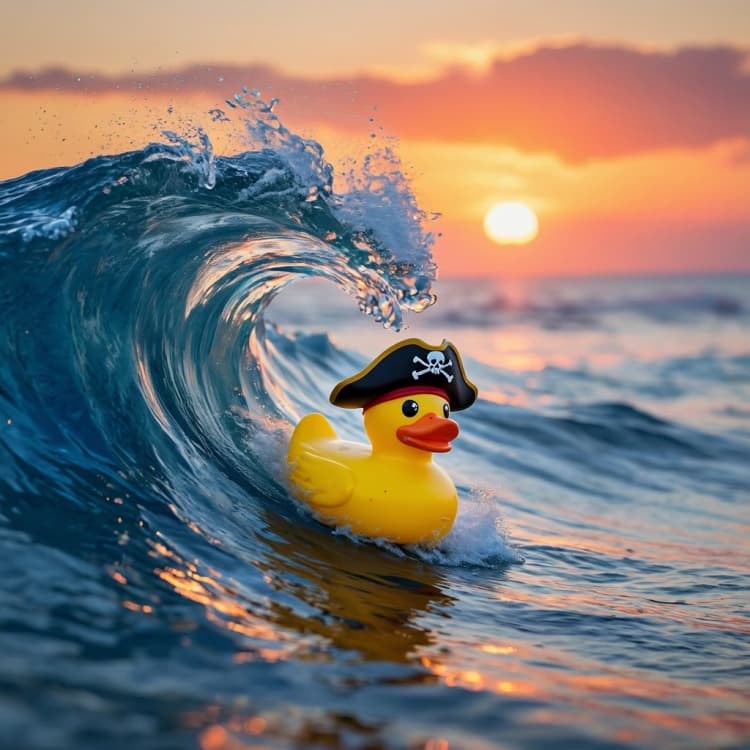
Here you write your story. The CLIP Text Encode (Positive Prompt) (#67) node takes your scene description and style directives for Z-Image. The CLIP Text Encode (Negative Prompt) (#71) helps steer away from artifacts or unwanted elements. Z-Image is tuned for bilingual text rendering, so you can include text content in multiple languages directly in the prompt when needed. Keep prompts specific and visual for the most consistent outcomes.
Sample and denoise#
ModelSamplingAuraFlow (#70) applies a sampling policy aligned with Z-Image’s single‑stream design, then KSampler (#69) drives the denoising process to turn noise into an image that matches your prompts. The sampler combines your positive and negative conditioning with the latent canvas to iteratively refine structure and details. You can trade speed for quality here by adjusting the sampler settings as described below. This stage is where Z-Image’s prompt adherence and text clarity really show.
Decode and save#
VAEDecode (#65) converts the final latent into an RGB image. SaveImage (#9) writes files using the prefix set in the node so your Z-Image outputs are easy to find and organize. This completes a full pass from prompt to pixels.
Key nodes in Comfyui Z-Image workflow#
UNETLoader (#66)#
Loads the Z-Image backbone that performs the actual denoising. Swap to another Z-Image variant here when exploring speed or editing use cases. If you change variants, keep the encoder and VAE compatible to avoid color or contrast shifts.
CLIP Text Encode (Positive Prompt) (#67)#
Encodes the main description for Z-Image. Write concise, visual phrases that specify subject, lighting, camera, mood, and any on‑image text. For text rendering, put the desired words in quotes and keep them short for best legibility.
CLIP Text Encode (Negative Prompt) (#71)#
Defines what to avoid so Z-Image can focus on the right details. Use it to suppress blur, extra limbs, messy typography, or off‑style elements. Keep it brief and topical so it does not overconstrain composition.
EmptySD3LatentImage (#68)#
Creates the latent canvas where Z-Image will paint. Choose dimensions that suit the final usage and keep them multiples of 64 px for efficient memory use. Wider or taller canvases influence composition and perspective, so adjust prompts accordingly.
ModelSamplingAuraFlow (#70)#
Selects a sampler preset that matches Z-Image’s training and latent space. You rarely need to change this unless you are testing alternative samplers. Leave it as provided for stable, artifact‑free results.
KSampler (#69)#
Controls the quality–speed tradeoff for Z-Image. Increase steps for more detail and stability, decrease for faster drafts. Keep cfg moderate to balance prompt adherence with natural textures; typical values in this graph are steps: 30 to 50 and cfg: 3 to 5. Set a fixed seed for reproducibility or randomize it to explore variations.
VAEDecode (#65)#
Transforms the final latent from Z-Image into an RGB image. If you ever change the VAE, keep it matched to the model family to preserve color accuracy and sharpness.
SaveImage (#9)#
Writes the result with a clear filename prefix so Z-Image outputs are easy to catalog. Adjust the prefix to separate experiments, model variants, or aspect ratios.
Optional extras#
- Use Z-Image Turbo for rapid ideation, then switch back to Z-Image Base and raise steps for final renders.
- For bilingual prompts and on‑image text, keep wording short and high contrast in the prompt to help Z-Image render crisp typography.
- Lock the seed when comparing small prompt edits so differences reflect your changes rather than new noise.
- If you see oversaturation or halos, lower
cfgslightly or strengthen the negative prompt to regain balance.
Acknowledgements#
This workflow implements and builds upon the following works and resources. We gratefully acknowledge Comfy-Org for the Z-Image Day-0 ComfyUI workflow template for their contributions and maintenance. For authoritative details, please refer to the original documentation and repositories linked below.
Resources#
- Comfy-Org/Z-Image Day-0 support in ComfyUI
- GitHub: Comfy-Org/workflow_templates
- Docs / Release Notes: Source
Note: Use of the referenced models, datasets, and code is subject to the respective licenses and terms provided by their authors and maintainers.
