

MiniMax H3 Fun Control: controllable reference-image-to-video generation in ComfyUI#
This RunComfy-ready workflow brings MiniMax H3 Fun Control to ComfyUI for controllable image-to-video generation. It can follow structure passes such as depth, canny, pose, HED, or MLSD while preserving either a first-frame reference or persistent character/style references across the video.
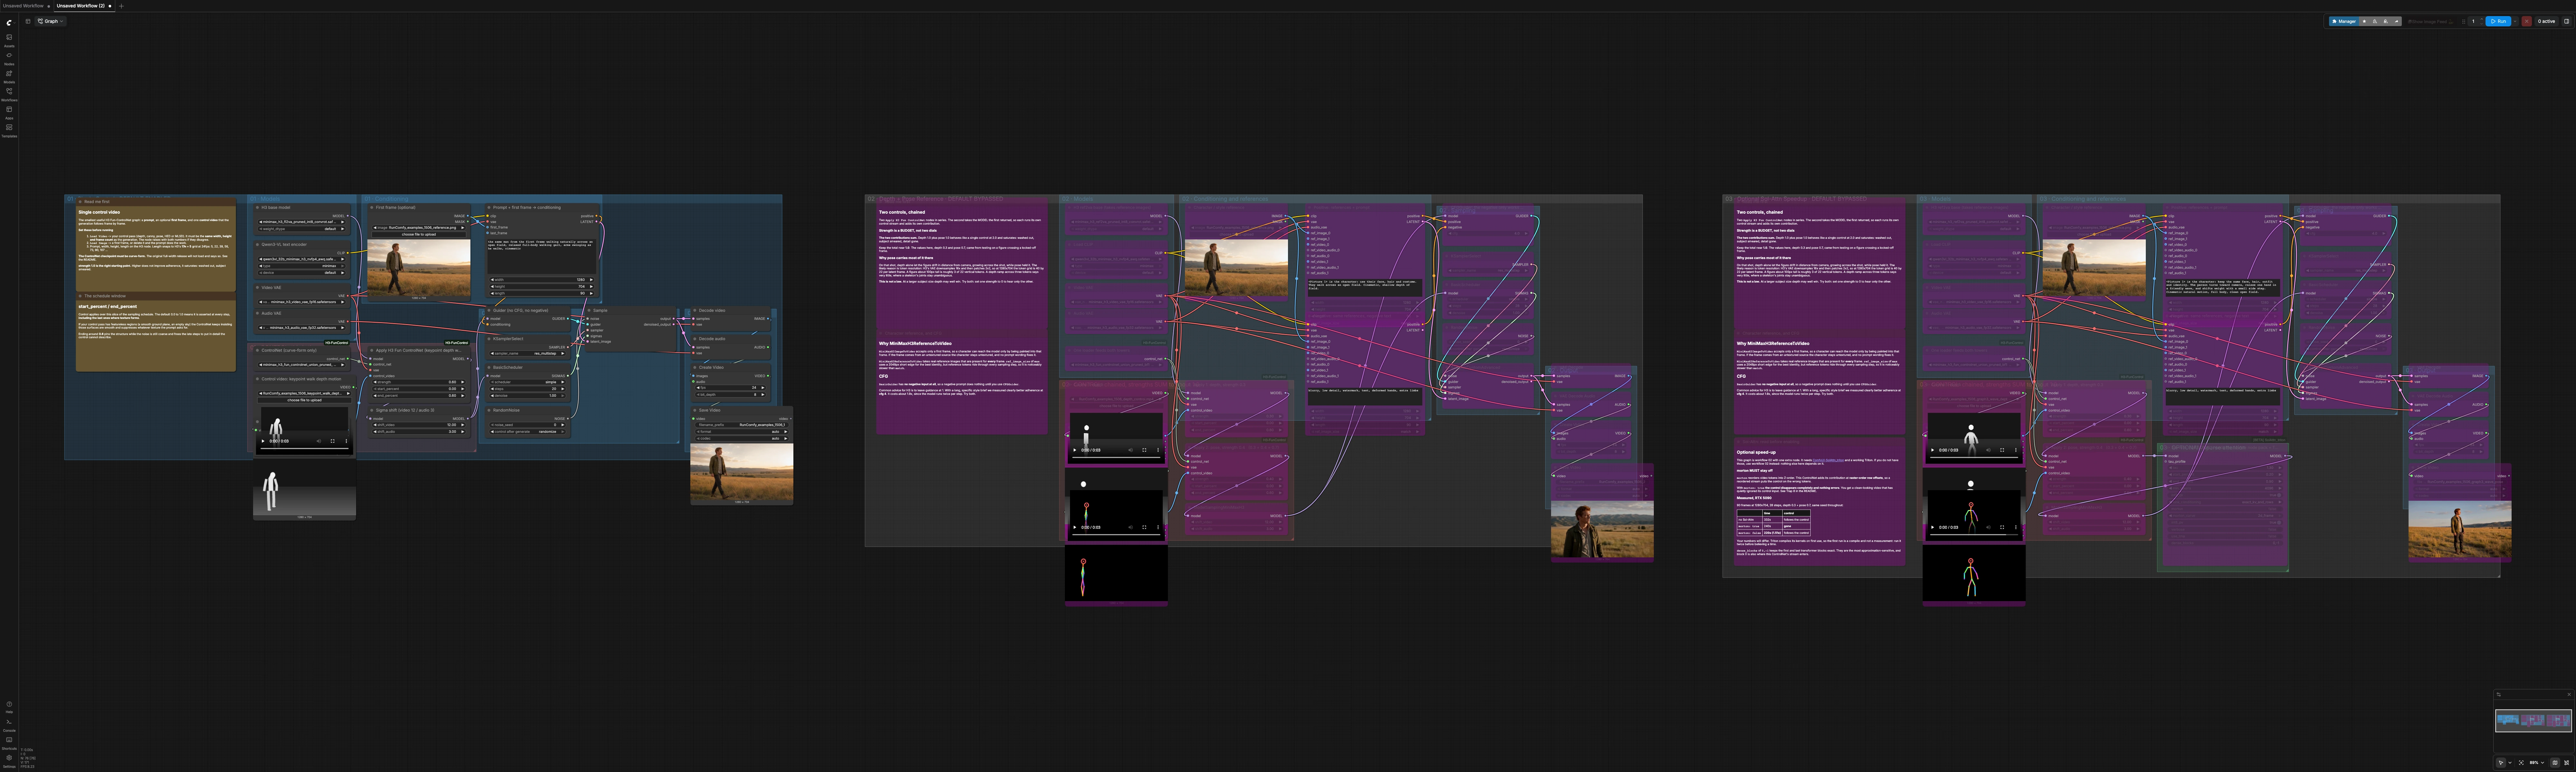
The canvas includes three prepared branches in one workflow. The first branch is enabled by default for a simple single-control setup. The second branch adds chained depth-plus-pose control with reference images and negative prompting. The third branch mirrors the reference branch while adding the optional SolAttn acceleration path. After loading the workflow, enable the branch you want to run and keep the others bypassed.
Key models in the MiniMax H3 Fun Control workflow#
- MiniMax H3 base UNet and reference-to-video UNet These are the main video backbones. The
fl2vapath is used for prompt-and-first-frame image-to-video generation, while theref2vapath supports persistent image references for stronger identity and style consistency. Community-packaged weights for ComfyUI are available in Kijai/MiniMax-H3-experimental. - MiniMax H3 Video VAE and Audio VAE These encode and decode the latent video and audio streams used by MiniMax H3. The Video VAE turns sampled latents back into frames, while the Audio VAE keeps the graph compatible with H3’s video/audio pipeline.
- Qwen-VL text encoder The workflow uses a MiniMax-tuned Qwen-VL text encoder to parse prompts and provide text conditioning to the H3 model. For background on the model family, see Qwen2-VL.
- MiniMax H3 Fun ControlNet Union This curve-form ControlNet supports multiple control types, including depth, canny, HED, pose, and MLSD. It is the core model that lets the workflow steer motion, silhouettes, structure, and scene layout across frames. Use the curve-form checkpoint from MiniMax-H3-Fun-Controlnet-Union.
How to use the MiniMax H3 Fun Control workflow#
The workflow is organized into three prepared branches. Run only one branch at a time unless you intentionally want to test multiple outputs. The default canvas keeps the single-control branch enabled and bypasses the two advanced branches so the workflow can open cleanly and run immediately.
Branch 1 — Single Control, enabled by default#
Use this branch when you want the simplest MiniMax H3 Fun Control setup: one control video guides one image-to-video generation path.
Models#
This branch loads the MiniMax H3 base UNet, the Qwen-VL text encoder, the H3 Video VAE, the H3 Audio VAE, and the MiniMax H3 Fun ControlNet Union. You usually do not need to change these nodes unless you are intentionally swapping to another compatible checkpoint set.
Control video#
Load one control video that matches your intended output width, height, and frame count. The control can be depth, canny, pose, HED, MLSD, or another supported pass from the Fun ControlNet Union model.
Control strength works like an adherence budget. A value around 0.6 to 1.0 is a practical starting range for a single control stream. Higher values can force the structure more strongly, but may also wash out detail or make the output look over-constrained.
The control schedule determines when the control is active during sampling. Ending the control window around 0.6 often works well because it locks the motion and layout early, then gives later denoising steps room to restore texture, lighting, and natural detail.
Conditioning#
Write the positive prompt and optionally provide a first frame. When a first frame is provided, the model uses it as the initial visual reference and tends to preserve the composition more strongly. Without a first frame, the prompt and control video drive the result.
Set width, height, and length in the conditioning node. MiniMax H3 follows its own valid frame-count grid at 24 fps, so keep the provided defaults unless you are sure the new length is compatible.
Sampling and output#
This branch uses a basic guider. Because the basic guider has no negative-conditioning input, negative prompt text will not have the same effect here as it does in the CFG branches. If you need stronger negative prompting, use Branch 2 or Branch 3.
The sampled latents are decoded with the H3 Video VAE and saved as a video output. If the motion follows the control but the result feels too rigid, reduce control strength or shorten the control end percentage. If the result ignores the control, raise the strength gradually.
Branch 2 — Depth + Pose Reference, bypassed by default#
Use this branch when identity, style, and body motion all matter. It combines reference-image conditioning with two chained control streams.
Models#
This branch uses the MiniMax H3 reference-to-video UNet. Unlike the first-frame path, reference-to-video conditioning can keep image references present throughout generation, which is useful for preserving a character’s face, hair, outfit, or visual style.
It shares the Qwen-VL text encoder, H3 VAEs, and MiniMax H3 Fun ControlNet Union checkpoint.
Depth and pose controls#
Two Apply H3 Fun ControlNet nodes are chained together. The first applies depth control, and the second applies pose control.
Treat the two strengths as a combined budget. If depth is set to 0.3 and pose is set to 0.4, the combined control pressure is about 0.7. Pushing the total far above 1.0 can make the subject smeared, flat, or over-constrained.
Depth is useful for body volume, rough scene geometry, and camera placement. Pose is useful for limb articulation and clearer body movement. If a result looks wrong, test each control separately by setting the other strength to zero, then combine them again once you understand which control is doing the useful work.
References and prompting#
Use MiniMaxH3ReferenceToVideo to provide one or more reference images along with the prompt. The reference images help preserve identity and style across frames.
The ref_image_size setting controls how much reference detail is used. match is faster and often good enough for style transfer or loose identity. max can improve identity preservation, but costs more compute.
This branch also includes a negative conditioning path with CFGGuider, so negative prompt text actually affects generation. Keep the same references connected to the positive and negative branches so classifier-free guidance subtracts unwanted features without fighting the identity reference.
Sampling and output#
This branch uses CFGGuider, which evaluates positive and negative conditioning during sampling. Guidance improves prompt and negative adherence, but increases compute cost.
Keep the seed fixed while tuning depth strength, pose strength, CFG, and control end percentage. Change one variable at a time so you can tell which setting caused the improvement.
Branch 3 — Optional SolAttn Speedup, bypassed by default#
Use this branch when you want the same reference-guided depth-plus-pose setup as Branch 2, with an optional sparse-attention acceleration path.
Models and controls#
Branch 3 mirrors Branch 2’s model path: reference-to-video UNet, Qwen-VL text encoder, H3 VAEs, and the MiniMax H3 Fun ControlNet Union.
It also uses chained depth and pose control. The tuning logic is the same as Branch 2: keep the combined control strength near a reasonable budget, usually around 0.7 to 1.0, and tune depth and pose separately before combining them.
References and prompting#
Reference-image conditioning works the same way as Branch 2. Use consistent references in the positive and negative branches, and choose match or max depending on whether speed or identity preservation matters more for your clip.
SolAttn patch#
The optional SolAttnPatch node accelerates attention-heavy parts of the MiniMax H3 workflow. It requires the SolAttn Triton extension and a working Triton setup. If the node pack or Triton dependency is missing, leave this branch bypassed and use Branch 2 instead.
Keep morton disabled. Reordering tokens with Morton/Z-order can misalign where the ControlNet contribution lands, which may produce a clean-looking video that quietly ignores the control input. The prepared workflow keeps this setting off.
The first SolAttn run may include Triton compilation overhead. For speed comparisons, run once to warm up the kernels, then compare subsequent runs with the same seed and settings.
Key nodes in the workflow#
Apply H3 Fun ControlNet#
This node adds a control stream to the current model. It receives control frames extracted from a control video and applies them during the selected sampling window.
Important settings:
strengthcontrols how strongly the model follows the control.start_percentcontrols when the control begins.end_percentcontrols when the control fades out.- For single-control runs, start around
0.6to1.0. - For chained controls, keep the combined strength near
1.0or lower.
Ending control around 0.6 is often useful because it locks motion and structure early while allowing later steps to recover texture and realism.
MiniMaxH3ImageToVideo#
This node builds image-to-video conditioning from a text prompt and optional first frame. Use it when a single first-frame reference is enough and you want the simpler Branch 1 workflow.
MiniMaxH3ReferenceToVideo#
This node provides persistent reference-image conditioning. Use it when the output needs to preserve a character, outfit, face, style, or product identity across the whole video.
ref_image_size: match is faster. ref_image_size: max uses larger reference tokens and can improve identity, but costs more compute.
CFGGuider#
This node makes negative conditioning effective. Branch 1 uses a basic guider, so negative text is not strongly applied there. Branches 2 and 3 use CFGGuider, making them better choices when you need to suppress artifacts, unwanted limbs, text, watermarks, or style drift.
Sigma shift#
The sigma shift node adjusts the video and audio diffusion schedules before sampling. Keep it in the chain unless you are intentionally experimenting with H3’s schedule behavior.
SolAttnPatch#
This optional node accelerates the reference branch through sparse attention. Leave morton off, keep conservative exact-block settings when quality matters, and compare output with a fixed seed before deciding whether the speedup is acceptable for your content.
BasicScheduler#
The scheduler controls the sigma schedule and step count. More steps can help controlled shots resolve more cleanly, while fewer steps improve speed. Tune scheduler settings together with control strength and the control end percentage.
Practical tips#
- Match the control video resolution and frame count to the generation settings.
- Use the curve-form MiniMax H3 Fun ControlNet Union checkpoint; incompatible full-width variants will not load in the H3 Fun Control loader.
- If the output copies visible pose or stick-figure artifacts, reduce pose strength, use a cleaner control source, or switch to depth/canny-style control.
- If the output follows motion but looks flat, reduce the control end percentage toward
0.6. - If identity matters, prefer Branch 2 or Branch 3 with reference images.
- If you need negative prompting, use Branch 2 or Branch 3.
- If SolAttn seems to weaken control, check that
mortonis disabled before changing strengths. - Run one branch at a time. Keeping unused branches bypassed avoids unnecessary queue time and makes debugging easier.
Recommended branch choice#
| Goal | Recommended branch | | --- | --- | | Fastest simple control test | Branch 1 | | Single control video with a first-frame reference | Branch 1 | | Stronger identity or style preservation | Branch 2 | | Depth plus pose control | Branch 2 | | Negative prompting with CFG | Branch 2 or Branch 3 | | Depth plus pose with optional speedup | Branch 3 | | SolAttn / Triton speed testing | Branch 3 |
Project resources#
- ComfyUI-H3-FunControl
- MiniMax-H3-Fun-Controlnet-Union
- MiniMax-H3-experimental
- ComfyUI-SolAttn_triton
- RunComfy Cloud Save workflow
Acknowledgements#
This workflow builds on the work of wyzborrero for the ComfyUI-H3-FunControl custom node, alibaba-pai for the MiniMax H3 Fun ControlNet Union model, Kijai for the ComfyUI-packaged MiniMax H3 experimental weights, and kijai for the optional SolAttn Triton acceleration node.
Use of the referenced models, code, and assets is subject to the licenses and terms provided by their respective authors and maintainers.