


HiDream O1 T2I ComfyUI workflow for high‑resolution text‑to‑image#
This HiDream O1 T2I ComfyUI workflow gives you a compact, ready‑to‑run pipeline for text‑to‑image creation powered by the HiDream O1 Image model. It focuses on three essentials that matter in production: streamlined model loading, clean prompt conditioning, and high‑resolution sampling. The graph is intentionally small so you can read, reuse, and remix it quickly inside RunComfy.
Use HiDream O1 T2I when you need cinematic prompts, stylized illustration, product visuals, or fast editorial concept frames. The dedicated HiDream O1 ComfyUI nodes make it easy to inspect what happens at each step and to turn good generations into repeatable recipes.
Key models in Comfyui HiDream O1 T2I workflow#
- HiDream‑O1‑Image‑BF16. The core text‑to‑image diffusion model used by this workflow. BF16 weights balance visual quality with efficient inference, making it practical for high‑resolution outputs and iterative prompt exploration. See the model card on Hugging Face: HiDream‑O1‑Image‑BF16.
Execution is driven by the official node suite for this model: HiDream_O1‑ComfyUI.
How to use Comfyui HiDream O1 T2I workflow#
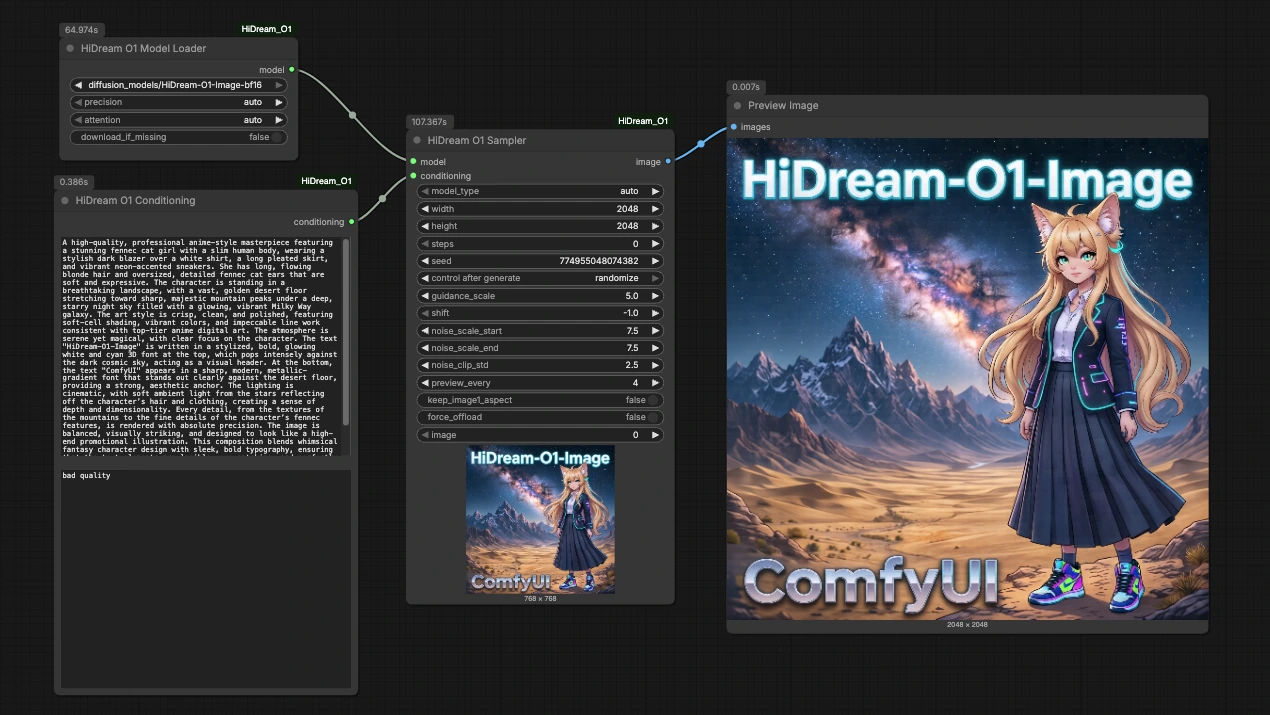
This HiDream O1 T2I pipeline flows from model load to prompt conditioning to high‑resolution sampling, then previews the result. Each stage is simple to edit and safe to iterate.
HiDreamO1ModelLoader (#2)#
This node loads the HiDream O1 Image BF16 weights and prepares the model for inference. Keep device and precision on automatic unless you have a specific memory or performance reason to change them. If you maintain multiple variants, point this node to the weights you want for the session. Its single output provides the model handle used by the sampler.
HiDreamO1Conditioning (#9)#
Write your positive prompt here and, optionally, a concise negative prompt to steer the sampler away from unwanted traits. The node encapsulates text encoding tailored for HiDream O1, so you can focus on phrasing rather than token plumbing. Start with a clear subject, style, and scene, then iterate with small edits to isolate what actually improves results. The template prompt in the graph demonstrates a cinematic, illustration‑oriented style you can replace with your own brief.
HiDreamO1Sampler (#8)#
This is the high‑resolution engine of the HiDream O1 T2I workflow. It receives the model and conditioning, then performs diffusion sampling. Control image size, step count, guidance, and seed to balance fidelity, style strength, and reproducibility. Use a fixed seed while exploring prompts to make A/B comparisons fair, then randomize when you want variety. If you upscale the canvas, consider adjusting guidance and steps modestly rather than dramatically to keep render times predictable.
PreviewImage (#5)#
Preview the generated image and save from the viewer. Outputs include ComfyUI metadata that captures the graph and key sampler inputs, which is helpful for audit and reproducibility. When you are satisfied with the look, duplicate the sampler and run variations in parallel for quick option sets.
Key nodes in Comfyui HiDream O1 T2I workflow#
HiDreamO1ModelLoader (#2)#
Role: Loads HiDream‑O1‑Image‑BF16 weights and initializes them for ComfyUI. Adjust only what you must: select the weights location you want to use, and leave device and precision on automatic for most sessions. If you swap model variants, keep naming consistent so downstream presets remain valid.
HiDreamO1Conditioning (#9)#
Role: Builds the model‑specific conditioning from your text. Two inputs matter most: prompt and negative_prompt. Keep the positive prompt structured as subject, attributes, scene, and style tags. Use a short negative prompt to remove common defects rather than a long laundry list, which can over‑constrain composition.
HiDreamO1Sampler (#8)#
Role: Generates the final image. The parameters that most affect outcomes are the sampler schedule, width, height, diffusion steps, guidance strength, and seed. Practical tuning tips:
- Lock
seedwhile editing prompts to judge changes fairly, then unlock for variety. - Increase
widthandheightgradually; a small bump often yields big gains in detail without heavy cost. - Use moderate guidance for balance; very high values can crush nuance, while very low values drift off‑prompt.
- When raising resolution, consider a slight step increase instead of large jumps.
Optional extras#
- Start small, then scale. Find a compelling look at a modest size, lock the seed, then raise resolution for the keeper.
- For product visuals, pair a clear subject with a neutral scene and keep the negative prompt minimal to avoid over‑filtering materials.
- For cinematic frames, combine a subject with lens, lighting, and time‑of‑day cues; small phrasing changes often beat large step changes.
- Save reusable presets by duplicating the
HiDreamO1Conditioningnode with your house style, then rewire it into new graphs. - Treat the HiDream O1 T2I workflow as a building block. Because the three core nodes are cleanly separated, it is easy to bolt on upscalers, control networks, or post‑effects later without disturbing your prompt craft.
Acknowledgements#
This workflow implements and builds upon the following works and resources. We gratefully acknowledge drbaph for the HiDream-O1-Image-BF16 model, drbaph for the HiDream_O1-ComfyUI nodes, and @Ai Verse the creator of the referenced YouTube workflow for their contributions and maintenance. For authoritative details, please refer to the original documentation and repositories linked below.
Resources#
- YouTube/Workflow reference
- Docs / Release Notes: YouTube video @Ai Verse
- drbaph/HiDream-O1-Image-BF16
- Hugging Face: drbaph/HiDream-O1-Image-BF16
- drbaph/HiDream_O1-ComfyUI
- GitHub: drbaph/HiDream_O1-ComfyUI
Note: Use of the referenced models, datasets, and code is subject to the respective licenses and terms provided by their authors and maintainers.


