


Nota Importante : Flujos de Trabajo y Modelos Soportados#
La nube de RunComfy no está limitada a FLUX.1-dev ControlNet para Reallusion AI Render. Puedes cambiar puntos de control, ControlNets, LoRAs, VAEs, y nodos relacionados para ejecutar flujos de trabajo y modelos adicionales de Reallusion listados a continuación.
- FusionX WanVACE
- Wan2.1 Fun 1.3B Control
- Wan2.1 VACE 1.3B
- Wan2.1 VACE FusionX 14B
- Flux.1 Dev ControlNet
...
Obtén Más Flujos de Trabajo de Reallusion ComfyUI: Obtén más plantillas de flujo de trabajo que puedes descargar y ejecutar en RunComfy. Haz clic en el botón "Workflows" y prueba más.
1. ¿Qué es Reallusion AI Render?#
Reallusion es un desarrollador de software de creación y animación de personajes 2D/3D en tiempo real, conocido por iClone y Character Creator, utilizado en cine/TV, juegos, archviz, gemelos digitales y simulación AI.
Reallusion AI Render es un puente fluido entre el software de animación 3D y los flujos de trabajo de generación de contenido impulsados por AI. Piénsalo como un asistente de renderizado AI que escucha los datos de diseño, pose, cámara o iluminación directamente desde iClone o Character Creator, y luego utiliza ese contexto para crear automáticamente imágenes o videos detallados dentro de ComfyUI. Esta integración reúne las herramientas de creación 3D en tiempo real de Reallusion con la arquitectura de procesamiento AI basada en nodos de ComfyUI, haciendo que la narración basada en imágenes y videos sea impulsada por artistas y guiada estrechamente por datos 3D. Reallusion AI Render admite entradas multimodales como mapas de profundidad, mapas normales, detección de bordes (Canny), datos de pose 3D e imágenes de estilo a través de IPAdapter. Y gracias a sus nodos personalizados de Core, ControlNet, Additional Image y Upscale, permite a animadores y desarrolladores renderizar salidas consistentes, estilizadas y de alta calidad completamente bajo control de plugins, sin necesidad de navegar manualmente por ComfyUI.
Al interpretar instrucciones estructuradas y combinarlas con ajustes preestablecidos de parámetros internos, Reallusion AI Render transforma la generación basada en indicaciones en un proceso de producción preciso y replicable. Está hecho a medida para creadores en cine, juegos o narración comercial que necesitan personajes consistentes, control de estilo detallado y renderizado de secuencias asistido por AI con precisión de fotogramas.
2. Características Clave y Beneficios de los Flujos de Trabajo de Reallusion AI Render#
Integración Directa de Plugin: Reallusion AI Render funciona de manera nativa con iClone y Character Creator a través de un plugin dedicado, permitiendo retroalimentación y control en tiempo real sin salir de tus herramientas de producción.
ControlNet Guiado por 3D: Mapea sin problemas datos de profundidad, pose, normales y bordes directamente desde tu escena 3D en ComfyUI con los nodos ControlNet de Reallusion AI Render, logrando consistencia cinematográfica y control a nivel de toma.
Soporte de Estilo Multi-Imagen: El flujo de trabajo de Reallusion AI Render incluye nodos de Additional Image que soportan mezcla de estilos flexible y dirección basada en referencias, facilitando la reutilización de looks o la ejecución de renderizado IP-Adaptive avanzado.
Flujo de Trabajo de Escalado Inteligente: Un nodo dedicado de UpscaleData permite a los creadores definir la resolución de salida dentro del plugin Reallusion AI Render, asegurando que los renders finales coincidan con las especificaciones del proyecto sin conjeturas.
Automatización Completa del Flujo de Trabajo: A diferencia de los flujos de trabajo genéricos de ComfyUI, Reallusion AI Render está diseñado para la automatización, parámetros como modelo, pasos de muestreo, CFG y sincronización de audio se pasan programáticamente, listos para renderizado por lotes o ajustes preestablecidos personalizados.
Consistencia de Personaje Lista para Producción: Junto con el entrenamiento de LoRA y herramientas de creación de IP, Reallusion AI Render preserva la integridad facial y la fidelidad visual a través de secuencias de video, haciéndolo ideal para narración impulsada por AI.
3. Cómo Usar Reallusion AI Render en ComfyUI#
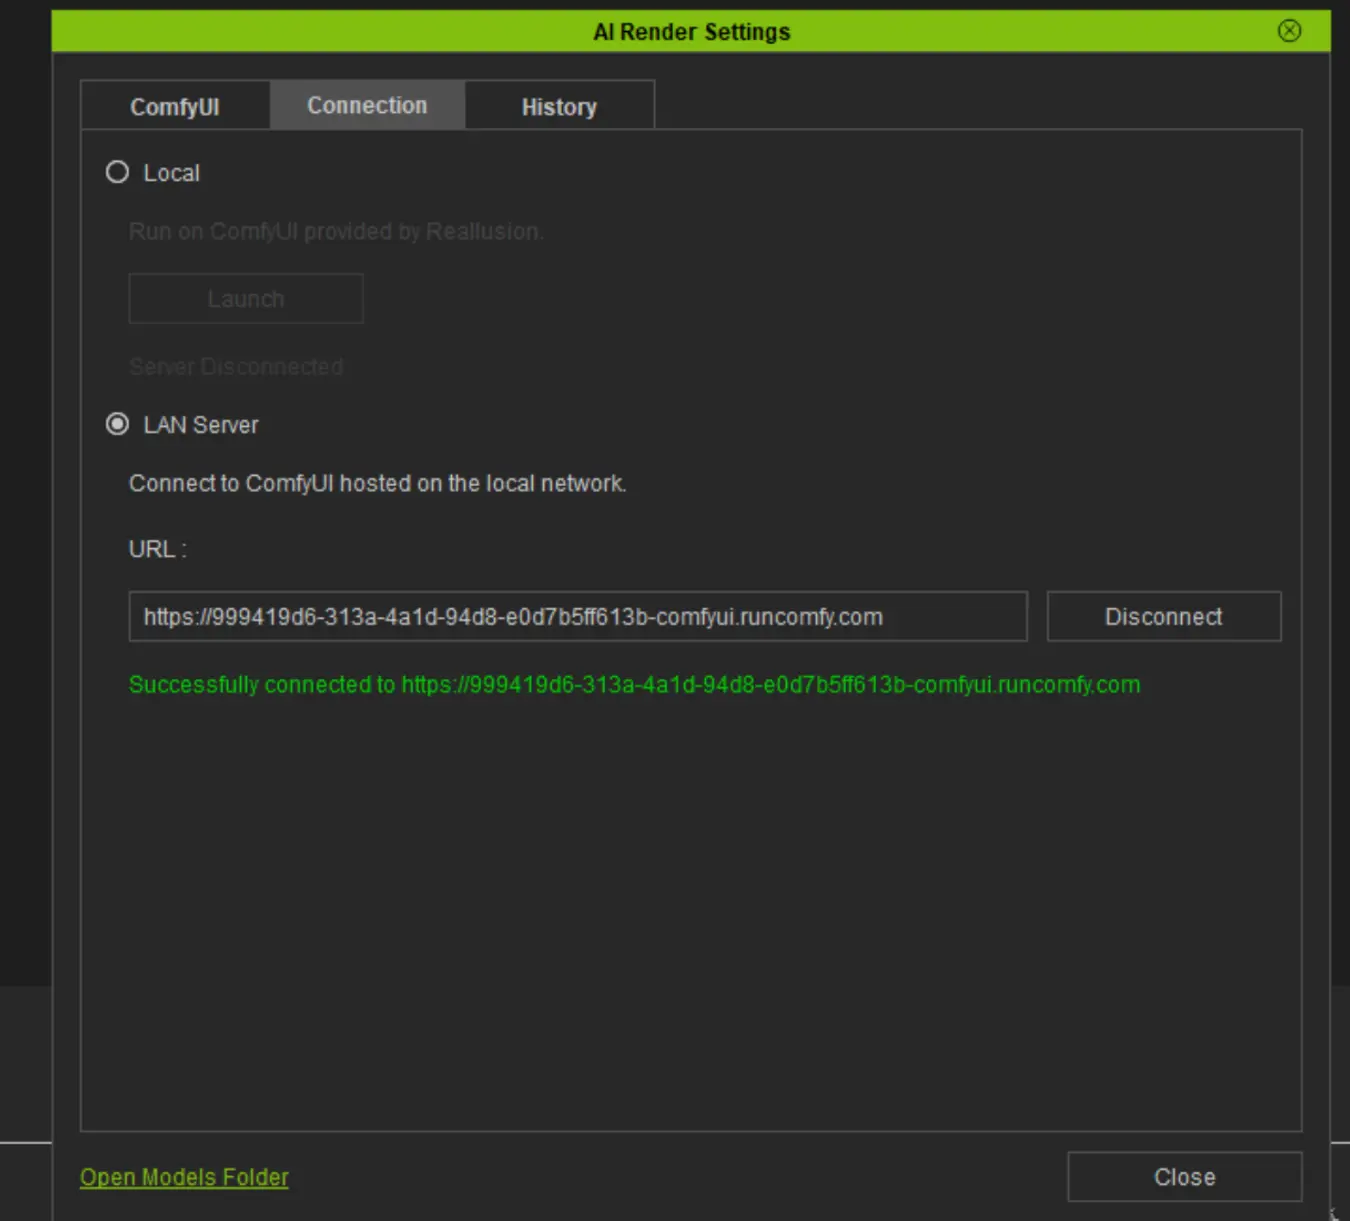
Cómo conectar AI Render a la máquina RunComfy: ⭐IMPORTANTE
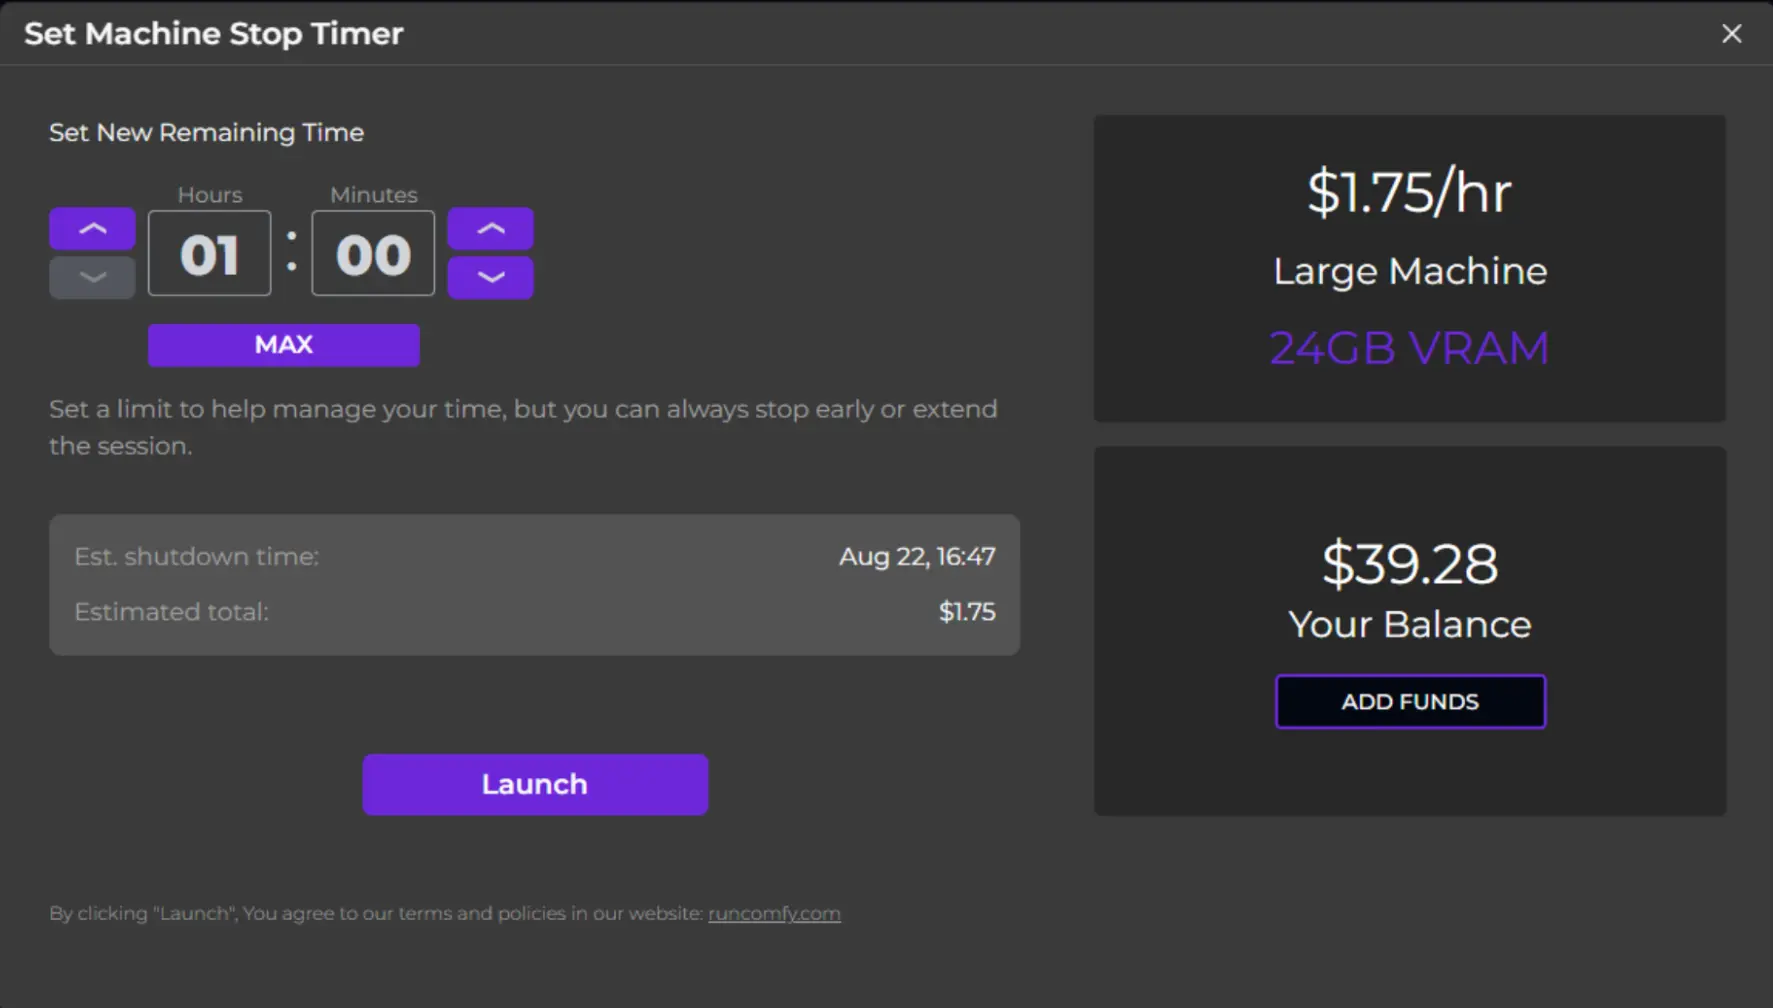
Paso 1. Haz clic en _Run Workflow_ para iniciar la máquina.
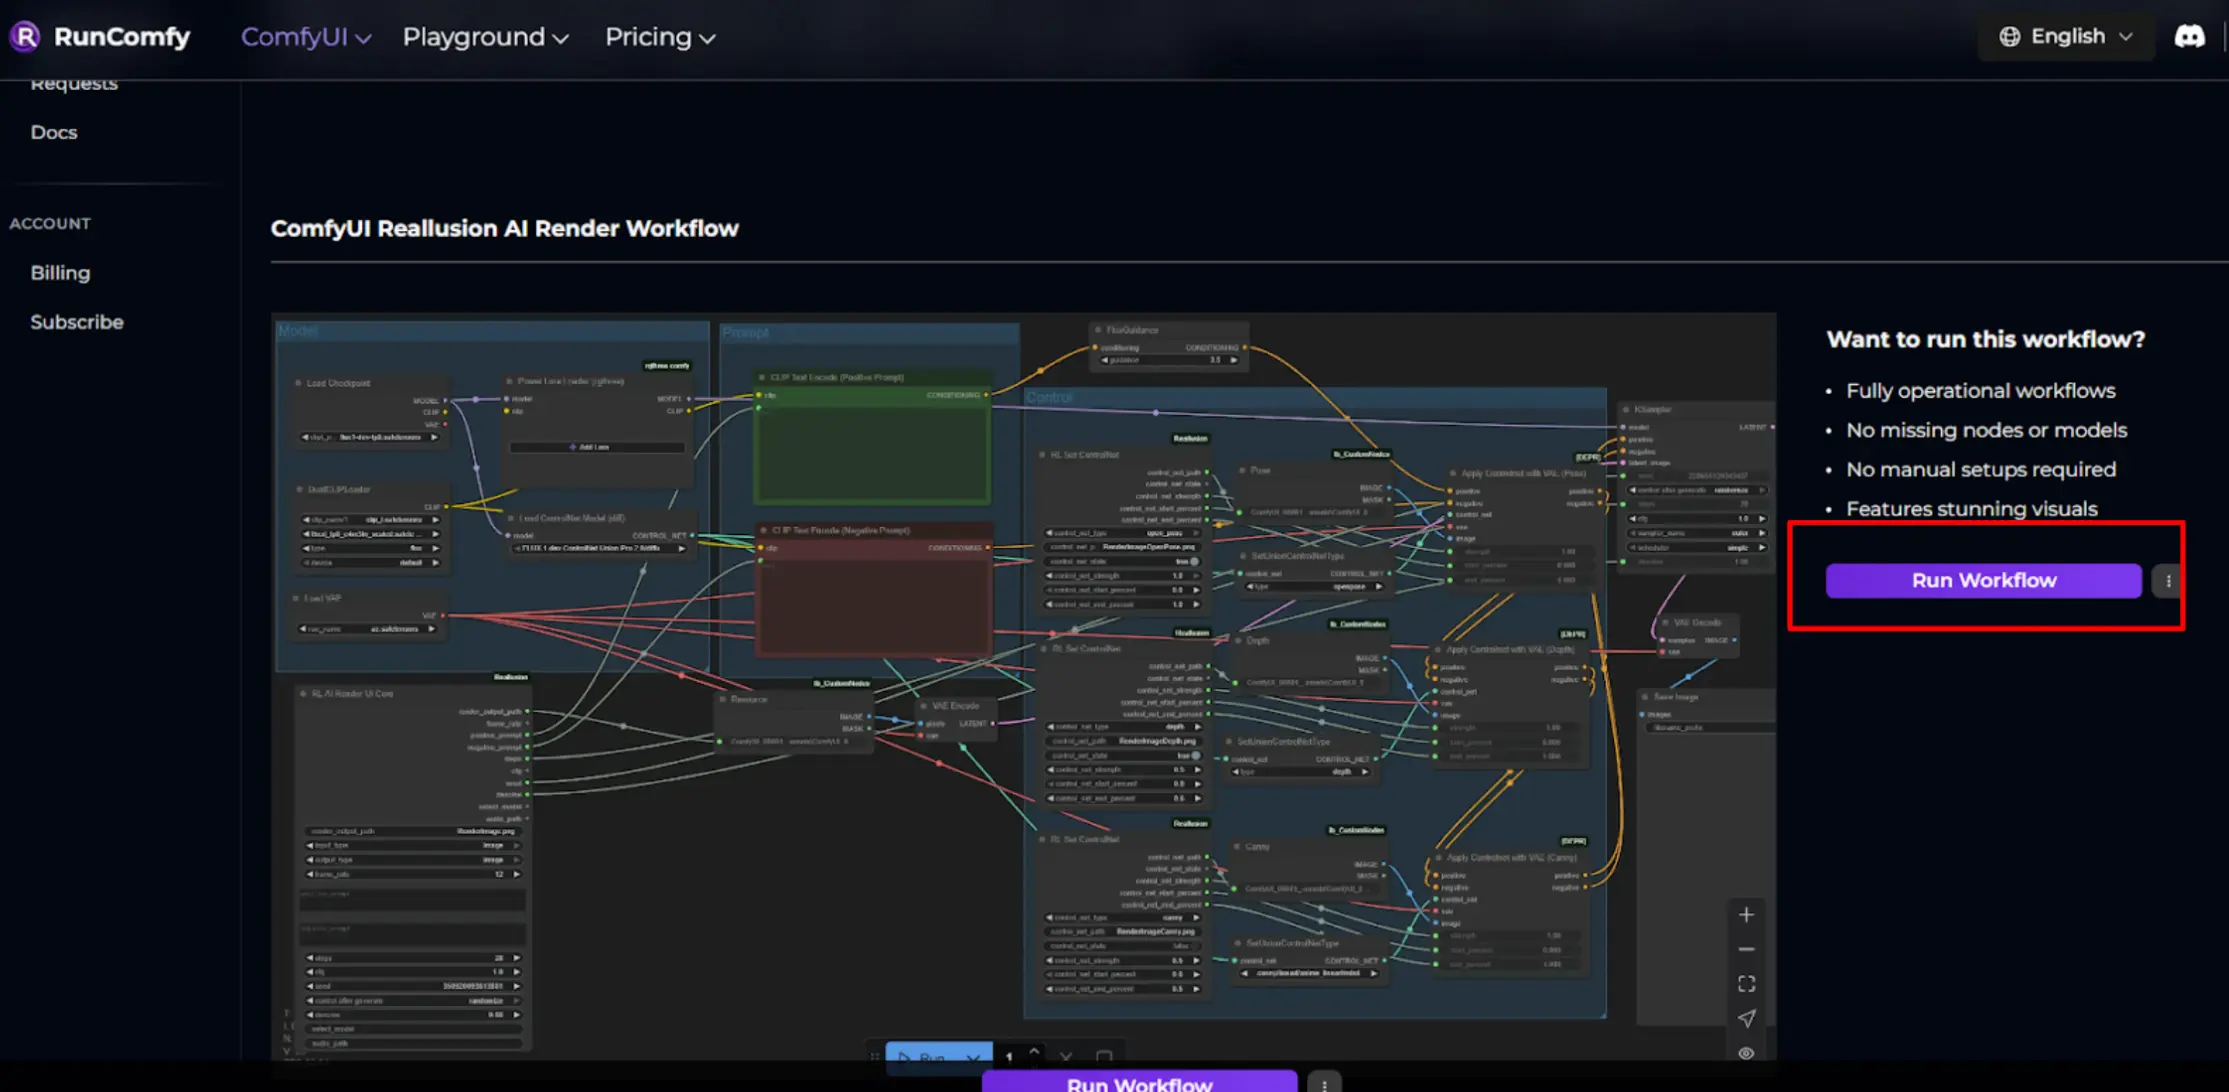
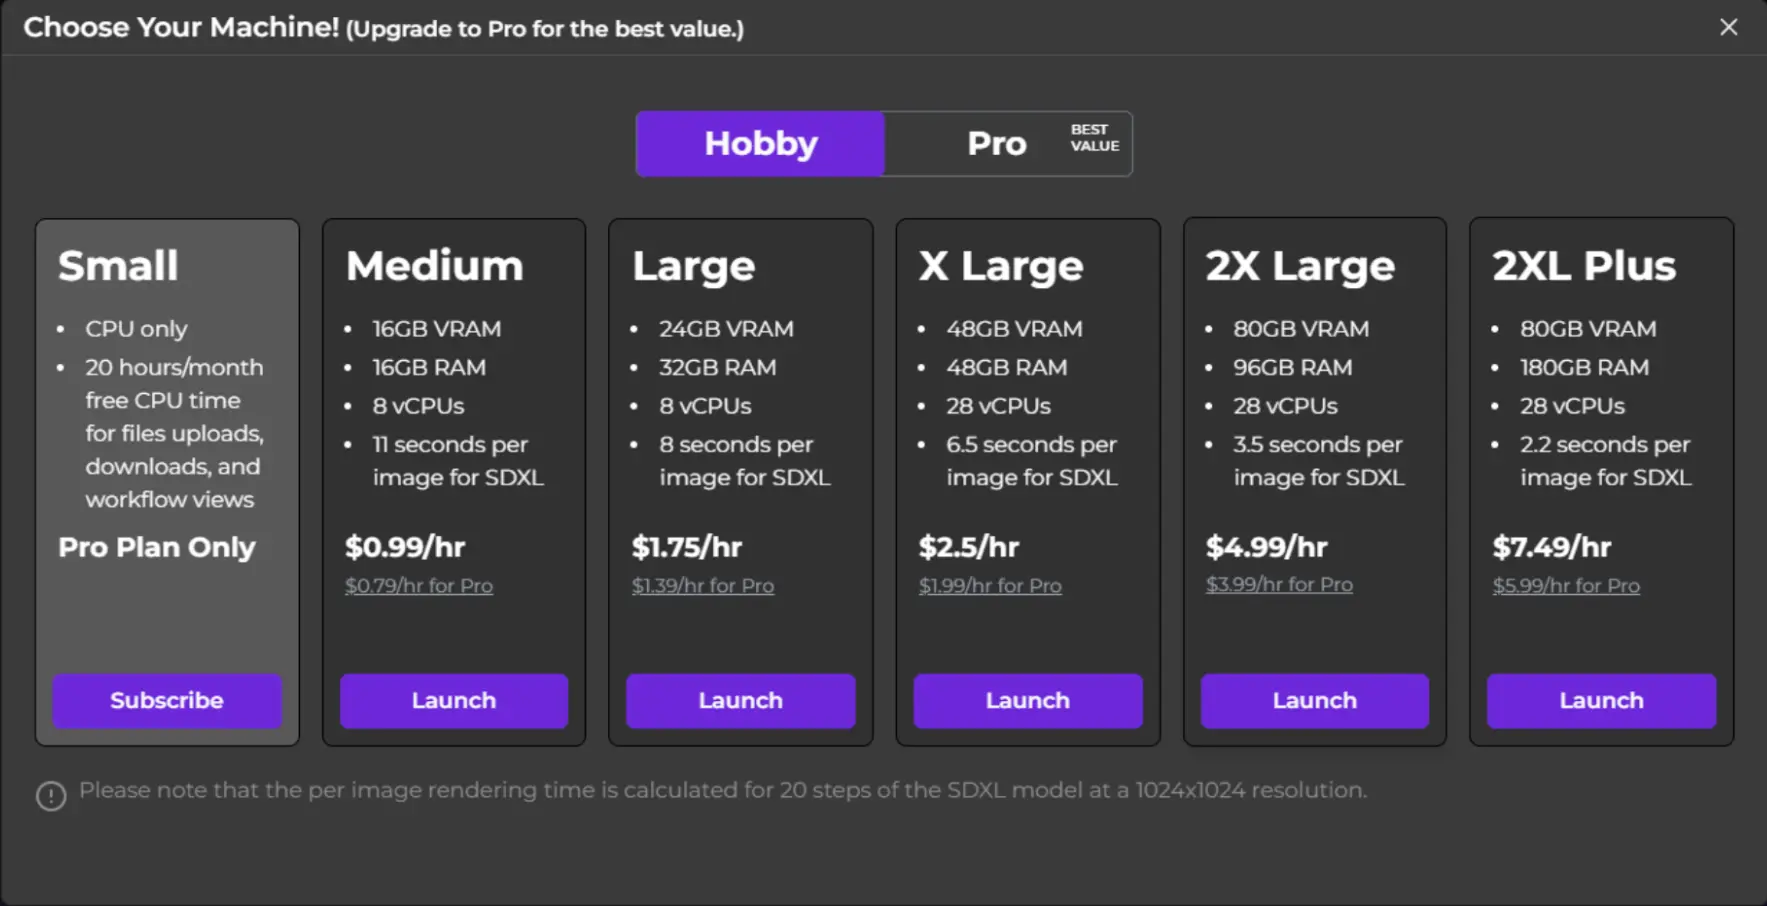
Paso 2. Selecciona el nivel de máquina y establece el tiempo de uso.
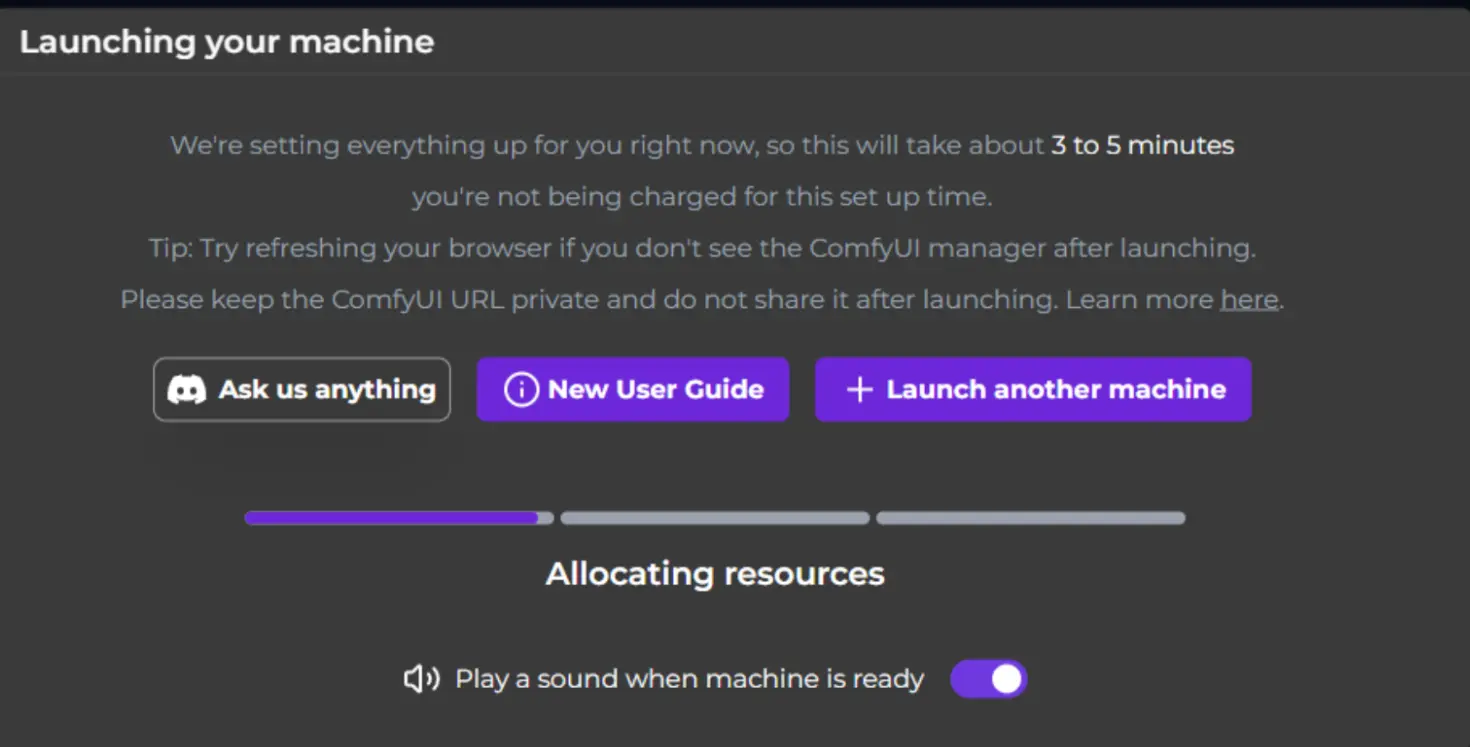
Paso 3. Espera a que la máquina se inicie hasta que veas ComfyUI completamente cargado.
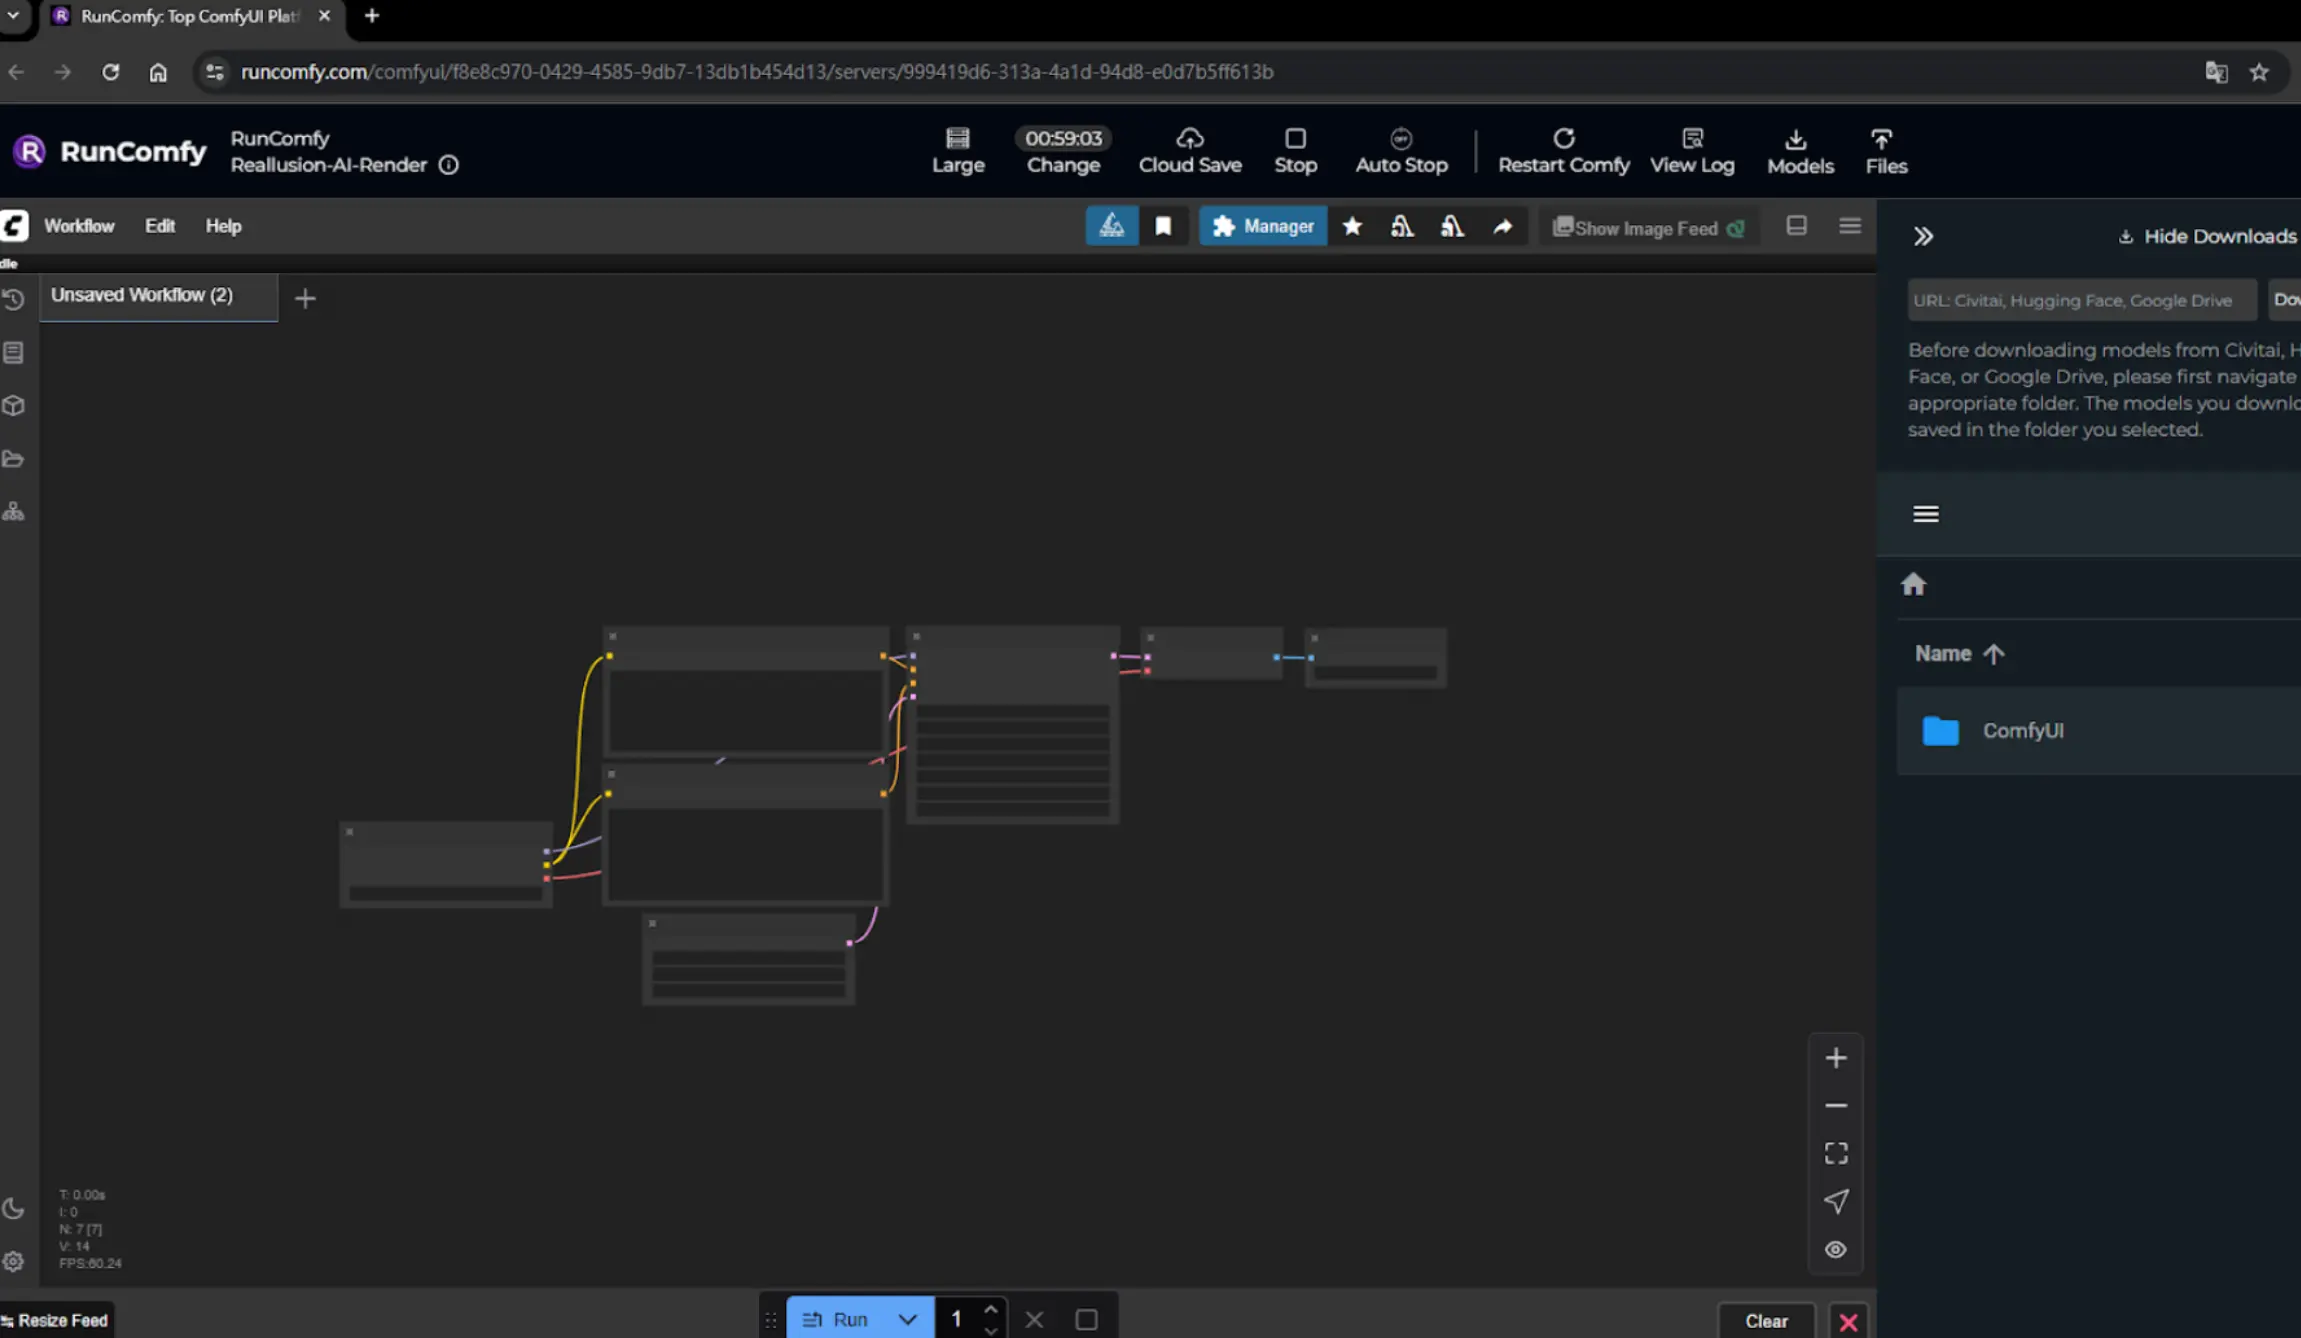
Paso 4. Conecta AI Render a la máquina RunComfy.
Copia la última parte de la URL de RunComfy mostrada, luego ve a AI Render Settings -> Server Mode, e ingresa la URL en este formato:

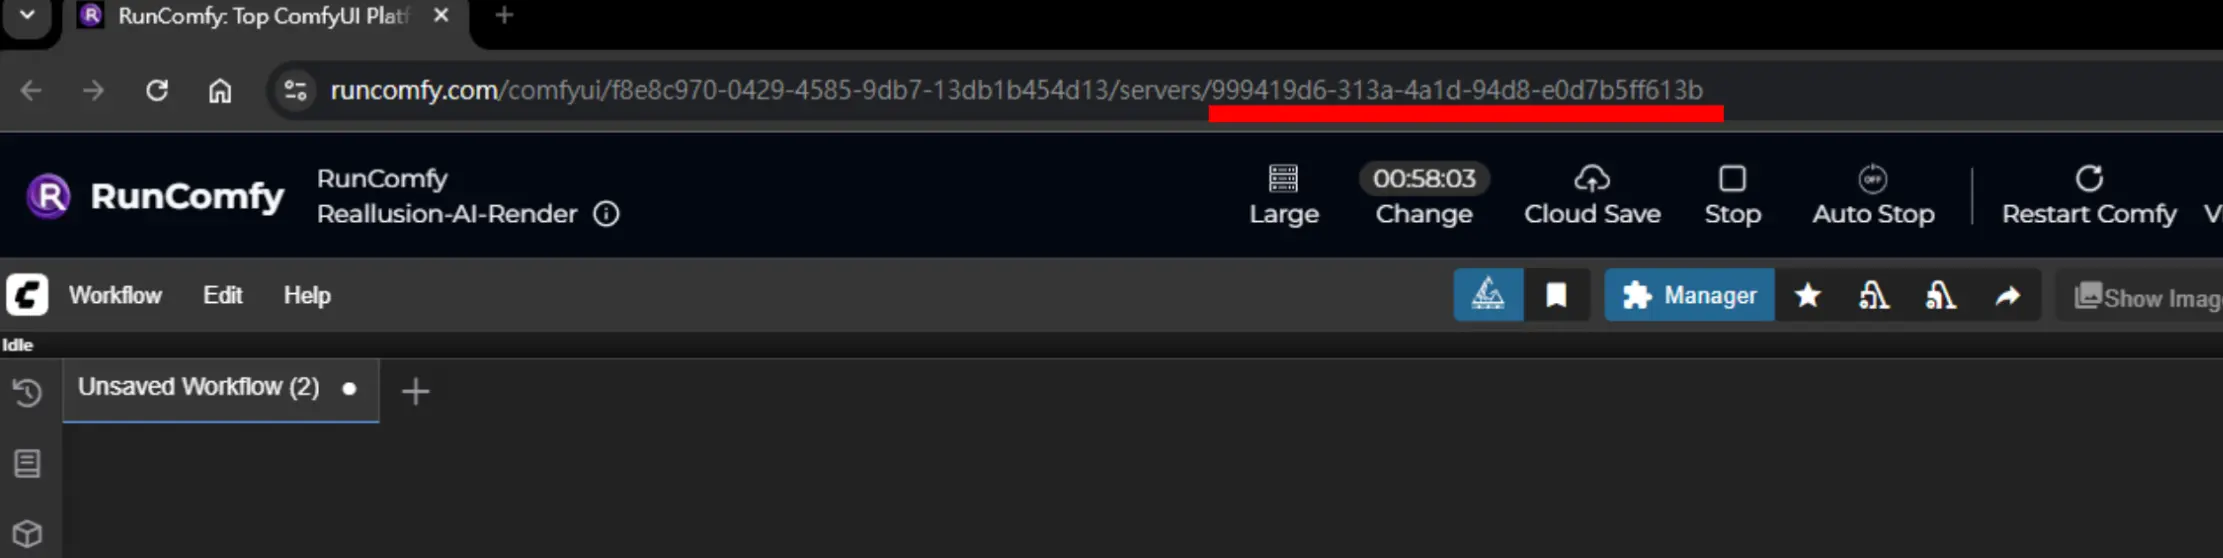
⚠️ Nota: Este ID cambia cada vez que inicias una nueva máquina.
Una vez que veas "Successfully connected", la conexión está completa y puedes comenzar a usarlo.
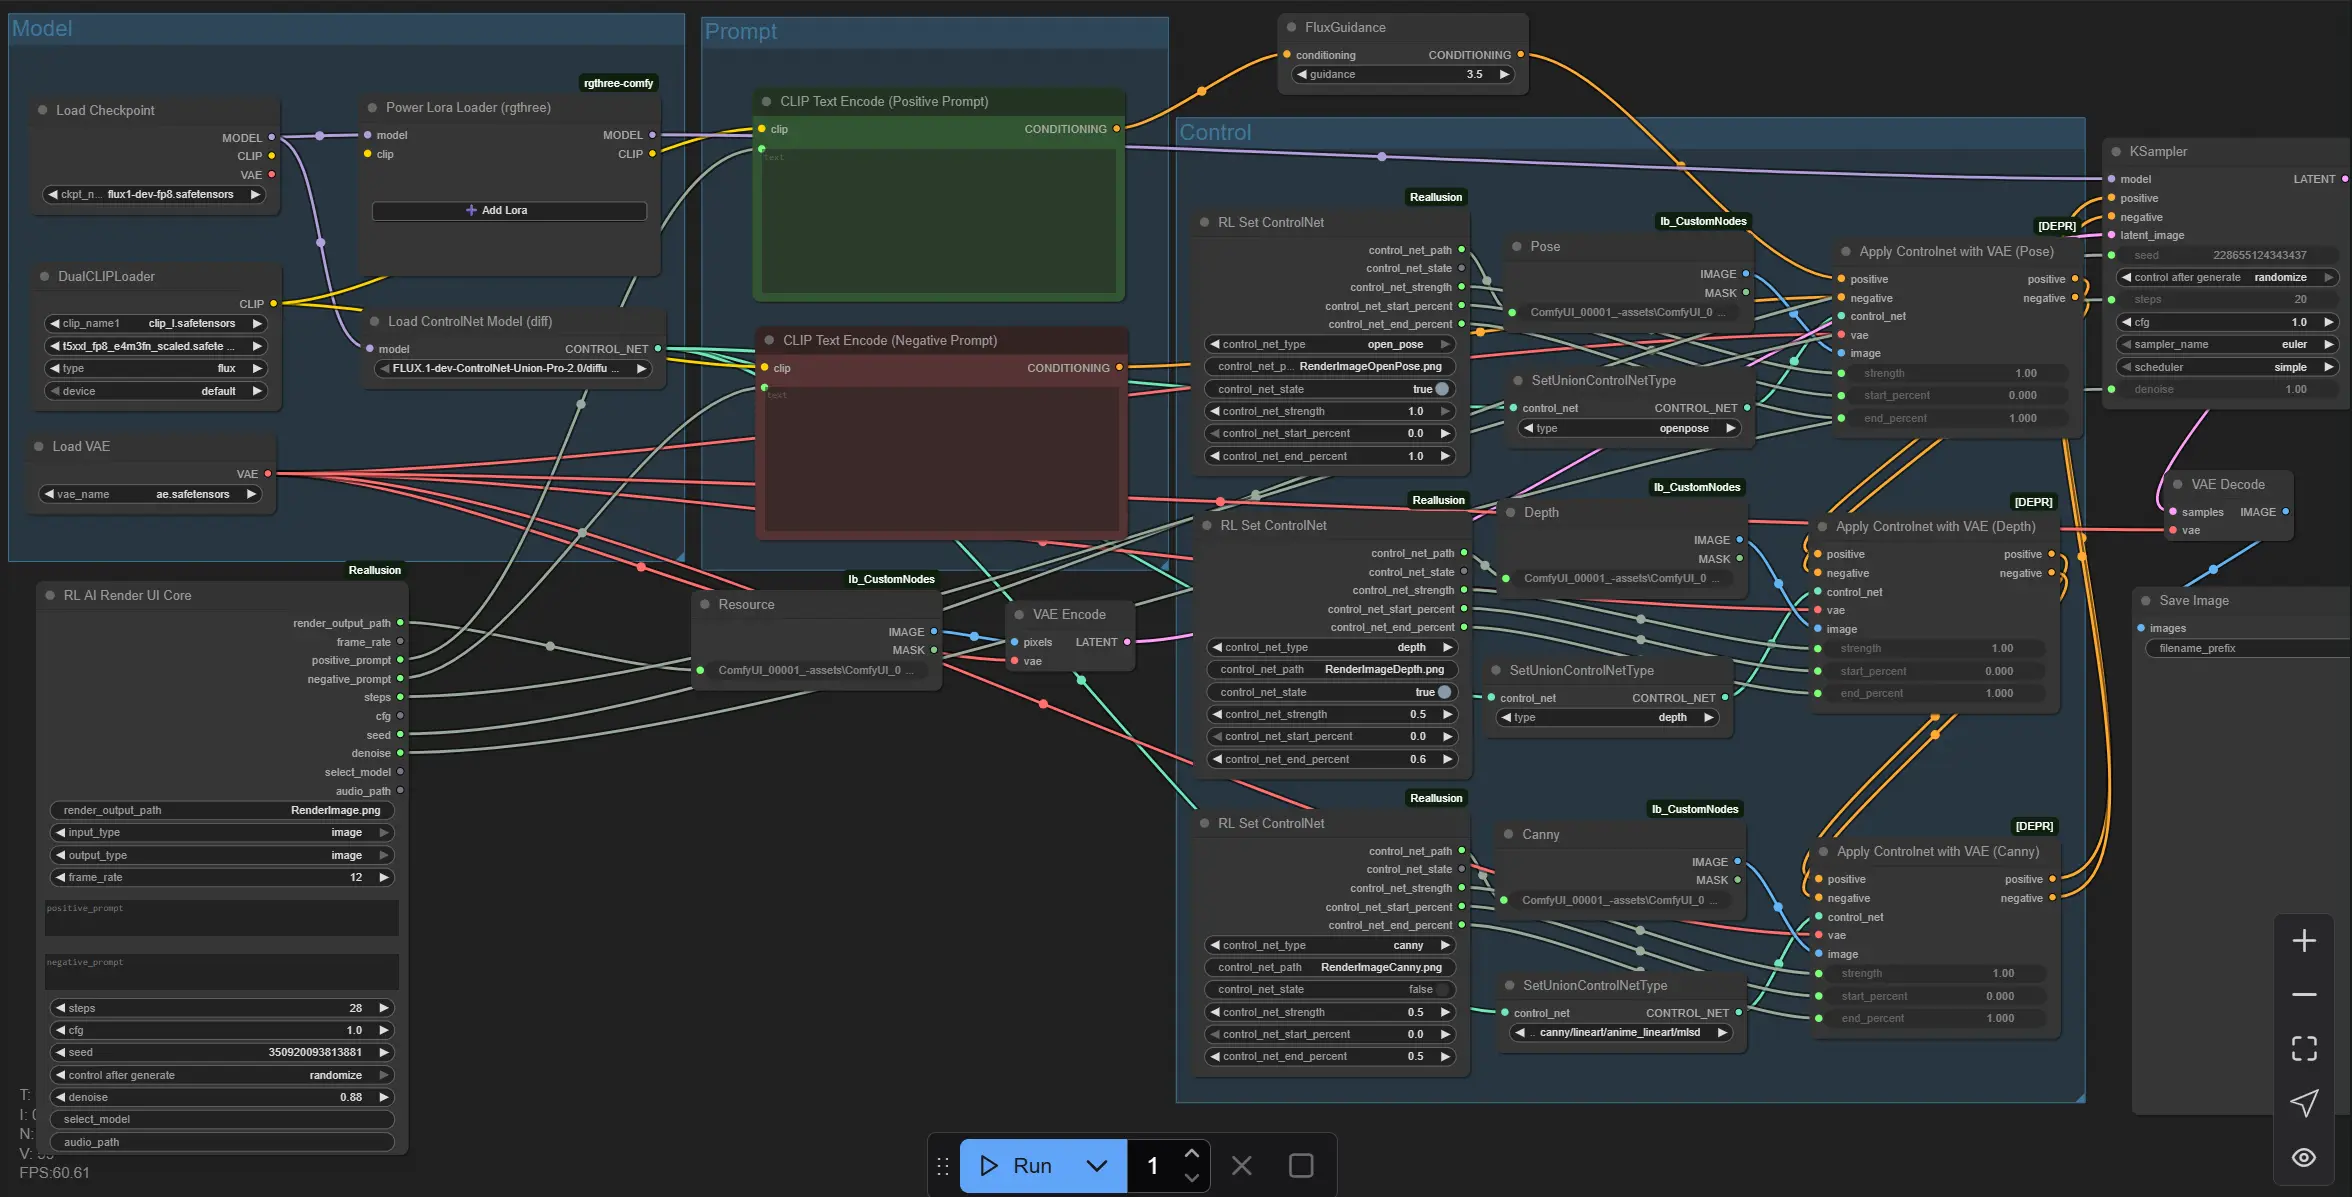
Configuraciones Esenciales de Nodos
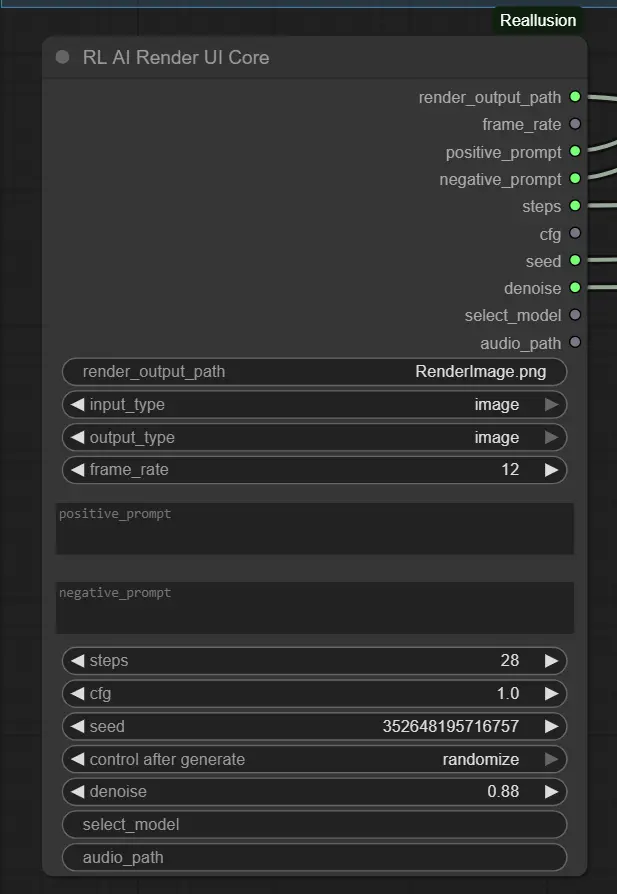
1. Configuraciones de Prompt y Calidad – Nodo RL AI Render UI Core Este nodo recopila los parámetros principales del Plugin AI Render.
- positive_prompt / negative_prompt: Describe tus características deseadas y no deseadas (por defecto: vacío).
- steps: Cuántas iteraciones para refinar la imagen. Comienza con 28 para calidad/velocidad equilibradas.
- cfg: Adherencia al estilo. Usa 1.0 para flexibilidad, incrementa ligeramente para más influencia de la indicación.
- denoise: Controla cuánto cambiar la imagen. Usa 0.88 para actualizaciones estilizadas, menos para cambios sutiles.
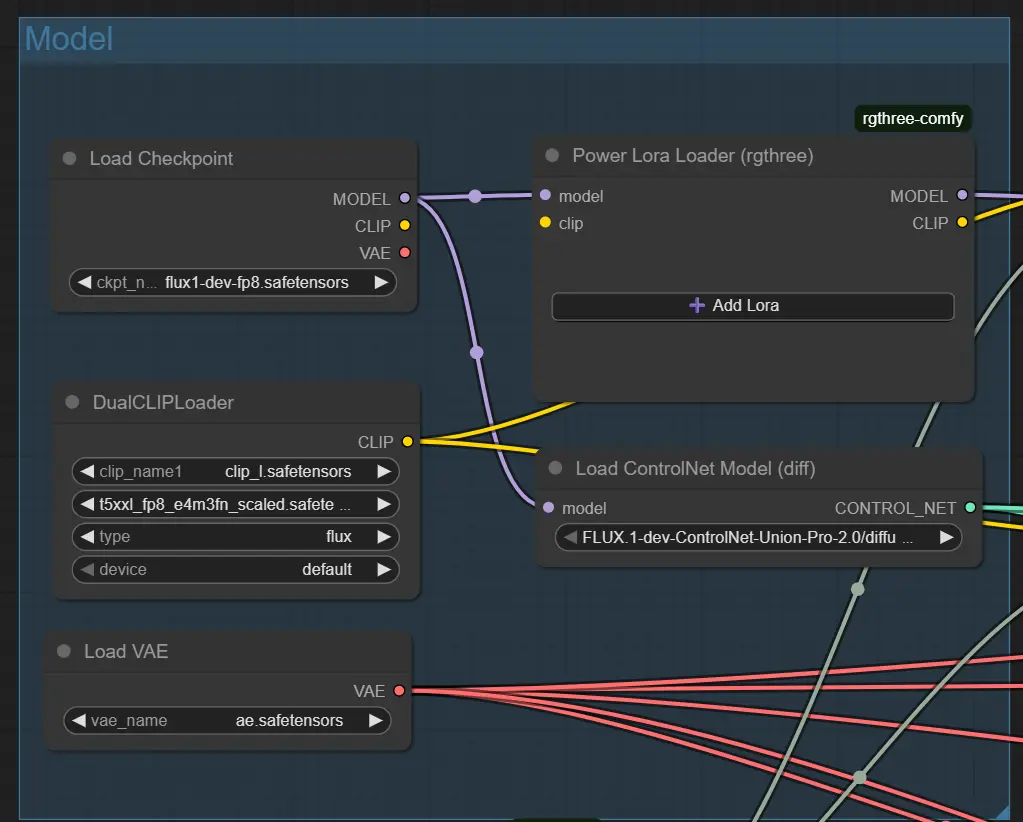
2. Configuraciones del Modelo Base – Nodo Load Checkpoint
Esto carga tu modelo elegido (por ejemplo, Flux 1 Dev ControlNet).
ckpt_name: Debe coincidir con el modelo esperado por tu estilo (por defecto: flux1-dev-fp8.safetensors).
Usa modelos que soporten IPAdapter o ControlNet para mejores resultados.
3. Guía de Estructura – Nodos ControlNet (Pose, Depth, Canny) Cada nodo ControlNet carga un archivo de entrada específico (por ejemplo, imagen de pose); solo activo si el control está habilitado.
- control_net_strength: Nivel de influencia (Pose a menudo usa 1.0, Depth usualmente 0.5).
- Ajusta start_percent y end_percent para controlar cuándo la guía se desvanece en la generación. <img src="https://cdn.runcomfy.net/workflow_assets/1270/readme03.webp" alt="Reallusion AI Render - Workflow ControlNet" width="350"/>
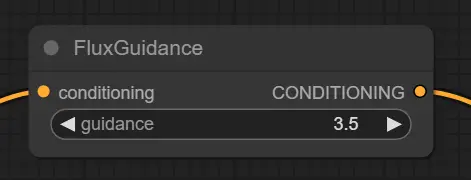
4. Condicionamiento de Prompt – Nodo Flux Guidance Ajusta cómo el prompt da forma a la generación de imágenes.
- guidance: Más alto = más ajustado al prompt. Recomienda 3.5 para un buen equilibrio.
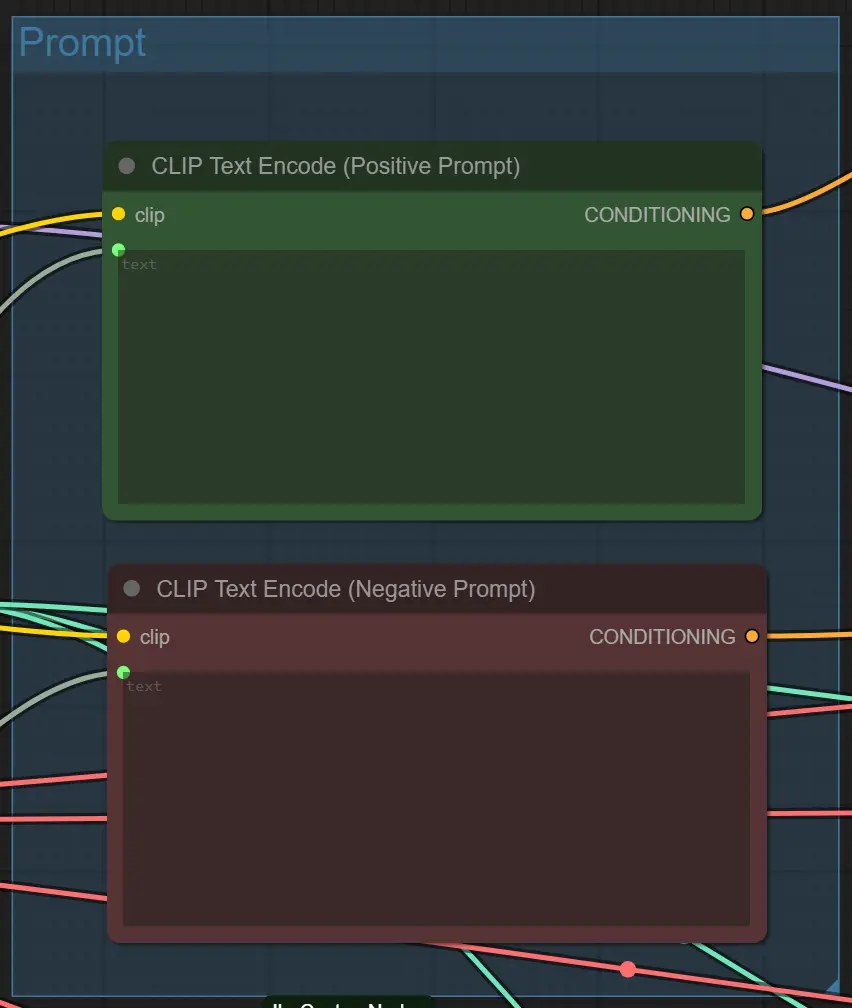
5. Codificación de Texto de Prompt – Nodos CLIP Text Encode Genera guía vectorial a partir de tus prompts.
- No es necesario cambiar manualmente. Acepta texto del plugin.
Consejos Avanzados para Nodos
Claridad del Prompt Evita prompts demasiado complejos o vagos. Usa estilos directos como cinematic lighting, anime, o cyberpunk alley. Sé específico para resultados más controlados.
Equilibrio de Denoise y Estructura Si ControlNet está habilitado (por ejemplo, Depth + Pose), un denoise alto como 0.88 puede interrumpir la estructura. Prueba 0.6–0.75 cuando preservar el diseño es una prioridad.
Empareja Entradas con ControlNet Solo habilita un ControlNet si existe una imagen guía correspondiente (por ejemplo, RenderImageDepth.png para Depth). La falta de coincidencia puede causar prompts fallidos o resultados vacíos.
4. Reconocimiento#
Este flujo de trabajo integra el modelo Flux-FP8 desarrollado por Kijai con técnicas de optimización de rendimiento delineadas por el equipo de Reallusion en su guía oficial de flujo de trabajo de renderizado AI. Reconocimiento especial a Kijai por su contribución al desarrollo del modelo y a Reallusion por compartir valiosas ideas que mejoran la eficiencia del renderizado AI en flujos de trabajo de ComfyUI.
5. Más Recursos Sobre Reallusion AI Render#
Explora recursos técnicos y documentación relacionada con Reallusion AI Render.
- Documentos de Configuración / Inicio Rápido – Guía paso a paso para configurar flujos de trabajo de AI Render en ComfyUI. Diapositivas de Presentación
- Visión General Técnica – Visión general de la integración y características en la beta abierta de AI Render. Anuncio del Producto
- Guía de Optimización de Flujos de Trabajo – Consejos para maximizar el rendimiento y personalizar AI Render en entornos de producción. Consejos de Rendimiento
- iClone – Página oficial para el software iClone. Sitio Web de iClone
- Character Creator – Página oficial para Character Creator de Reallusion. Sitio Web de Character Creator
- Foro de Beta Abierta de AI Render – Discusiones y actualizaciones en el foro oficial de Reallusion. Enlace al Foro
- Tutorial de Instalación de AI Render – Guía en video sobre la configuración de AI Render. Tutorial de YouTube
- Tutorial de Flujo de Trabajo de Imagen a Imagen con AI Render – Guía en video del flujo de trabajo de imagen a imagen. Tutorial de YouTube
- Tutorial de Flujo de Trabajo de Video a Video con AI Render – Guía en video del flujo de trabajo de video a video. Tutorial de YouTube
