Virtual Try-On in ComfyUI with Qwen Image Edit#
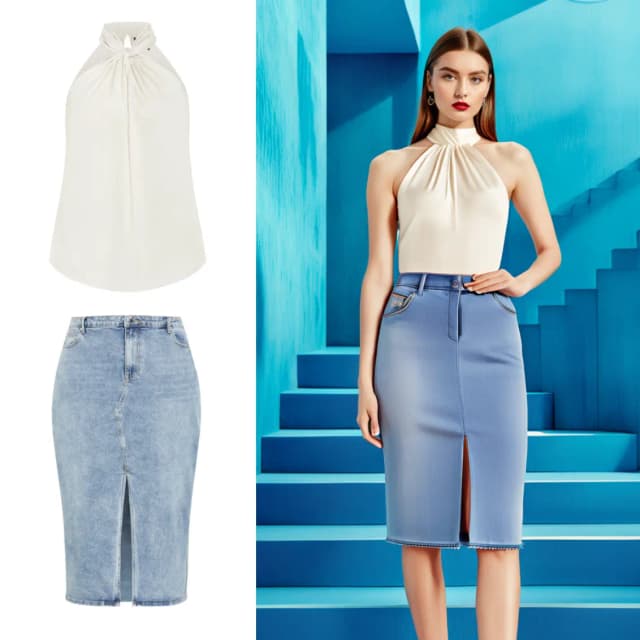
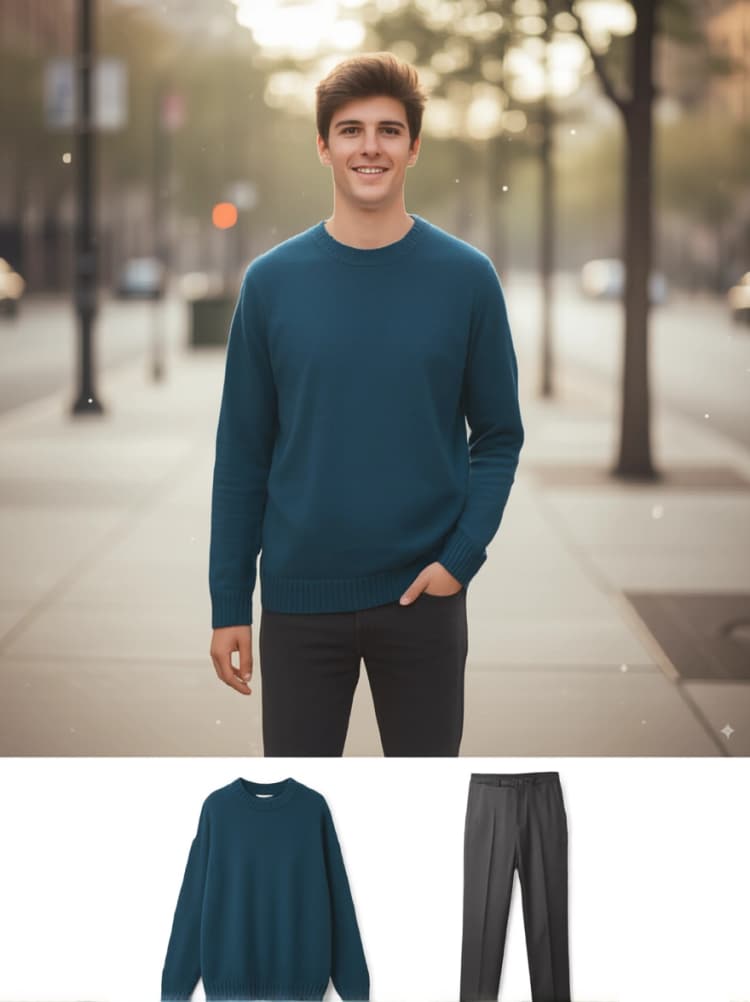
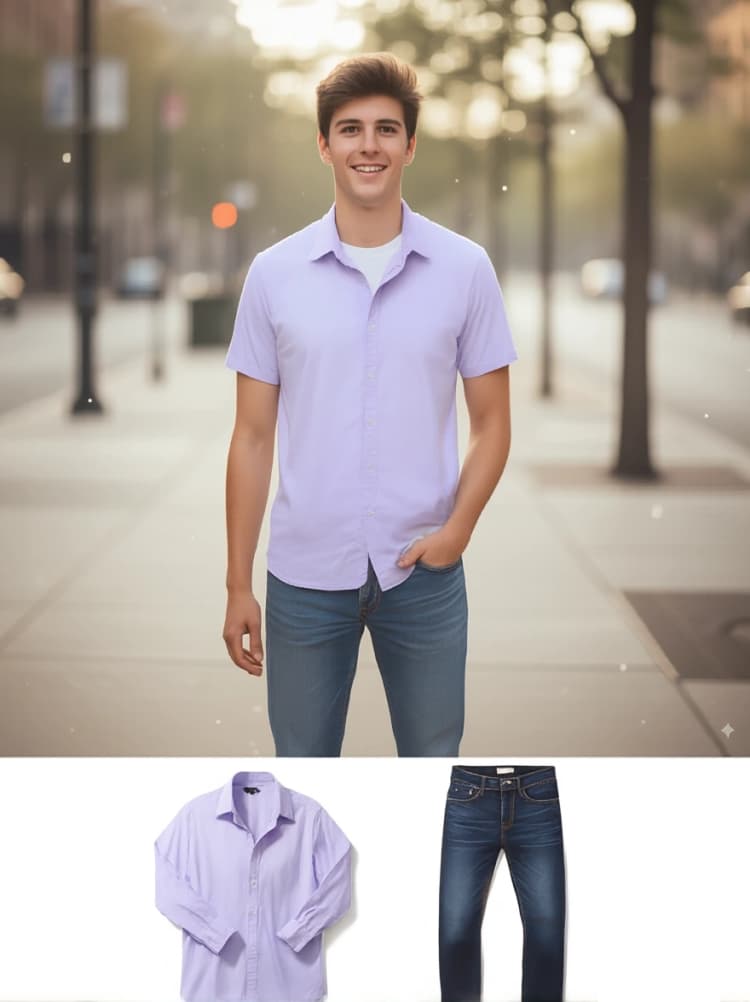
This Virtual Try-On workflow generates realistic visuals of a person wearing selected garments by combining a subject photo with one or more clothing images. It is designed for fashion, e-commerce, and content teams who need fast outfit previews without manual compositing or photoshoots. The result is a clean, well-fitted render that respects body shape, pose, lighting, and fabric characteristics.
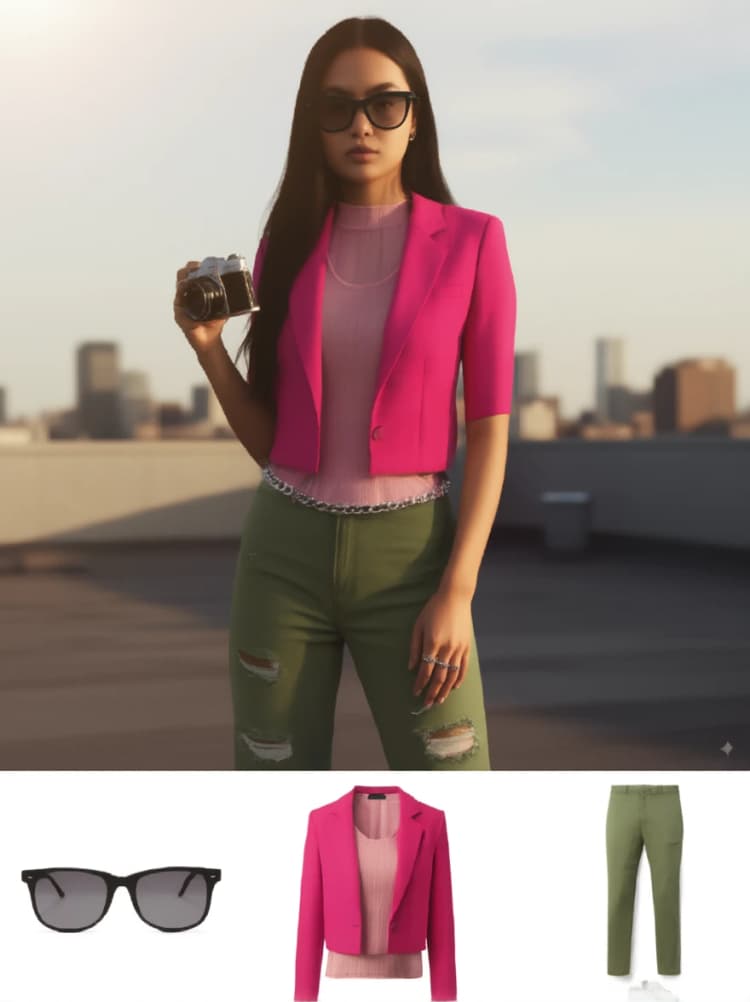
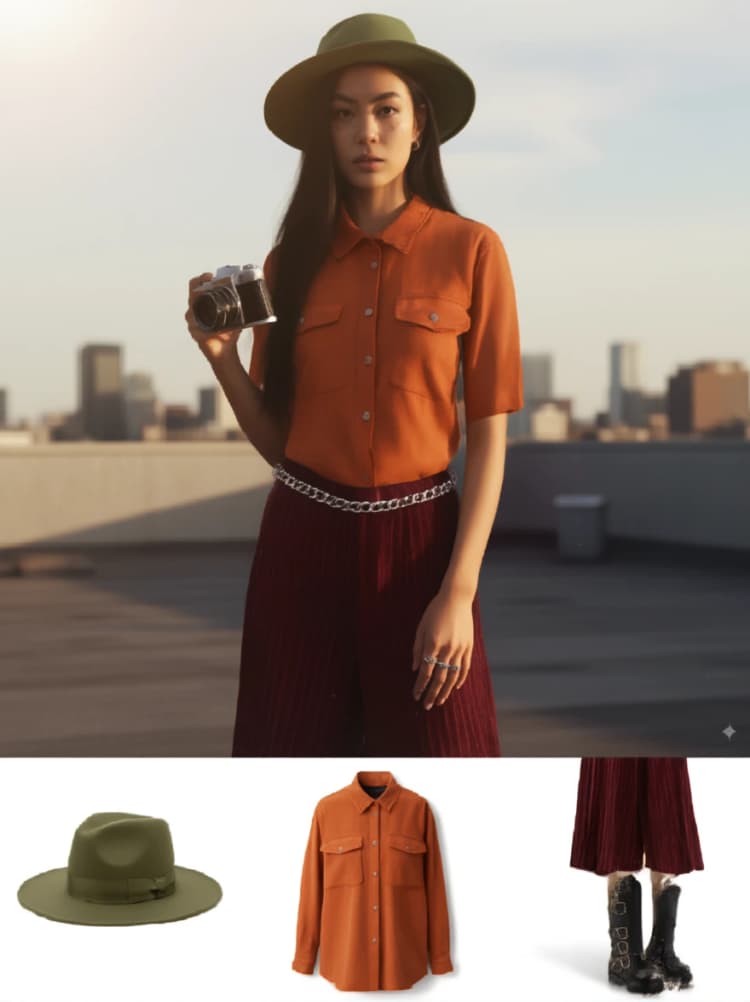
Under the hood, the graph conditions Qwen Image Edit with both your images and a natural language prompt, then guides the edit toward apparel transfer. You provide a person image and up to three garment images; the workflow arranges them into a single reference panel and performs an image edit that reliably places the chosen garments on the subject. A built-in side-by-side output makes it easy to inspect and iterate.
Key models in Comfyui Virtual Try-On workflow#
- Qwen-Image-Edit. The core diffusion editing model that supports both semantic edits and appearance-preserving edits, enabling clothing swaps that follow body pose and lighting while maintaining identity. Model card
- Qwen2.5-VL 7B. The vision-language encoder used for instruction following and visual understanding, which helps the model interpret your prompt and the reference panel. Model card
- Qwen Image VAE. The variational autoencoder used for encoding and decoding image latents, aligned with the Qwen Image family for stable results. Assets
- Virtual Try-On LoRA. A lightweight adapter specialized for apparel transfer that sharpens garment placement and fit dynamics. It biases editing toward clothing application while preserving the subject.
How to use Comfyui Virtual Try-On workflow#
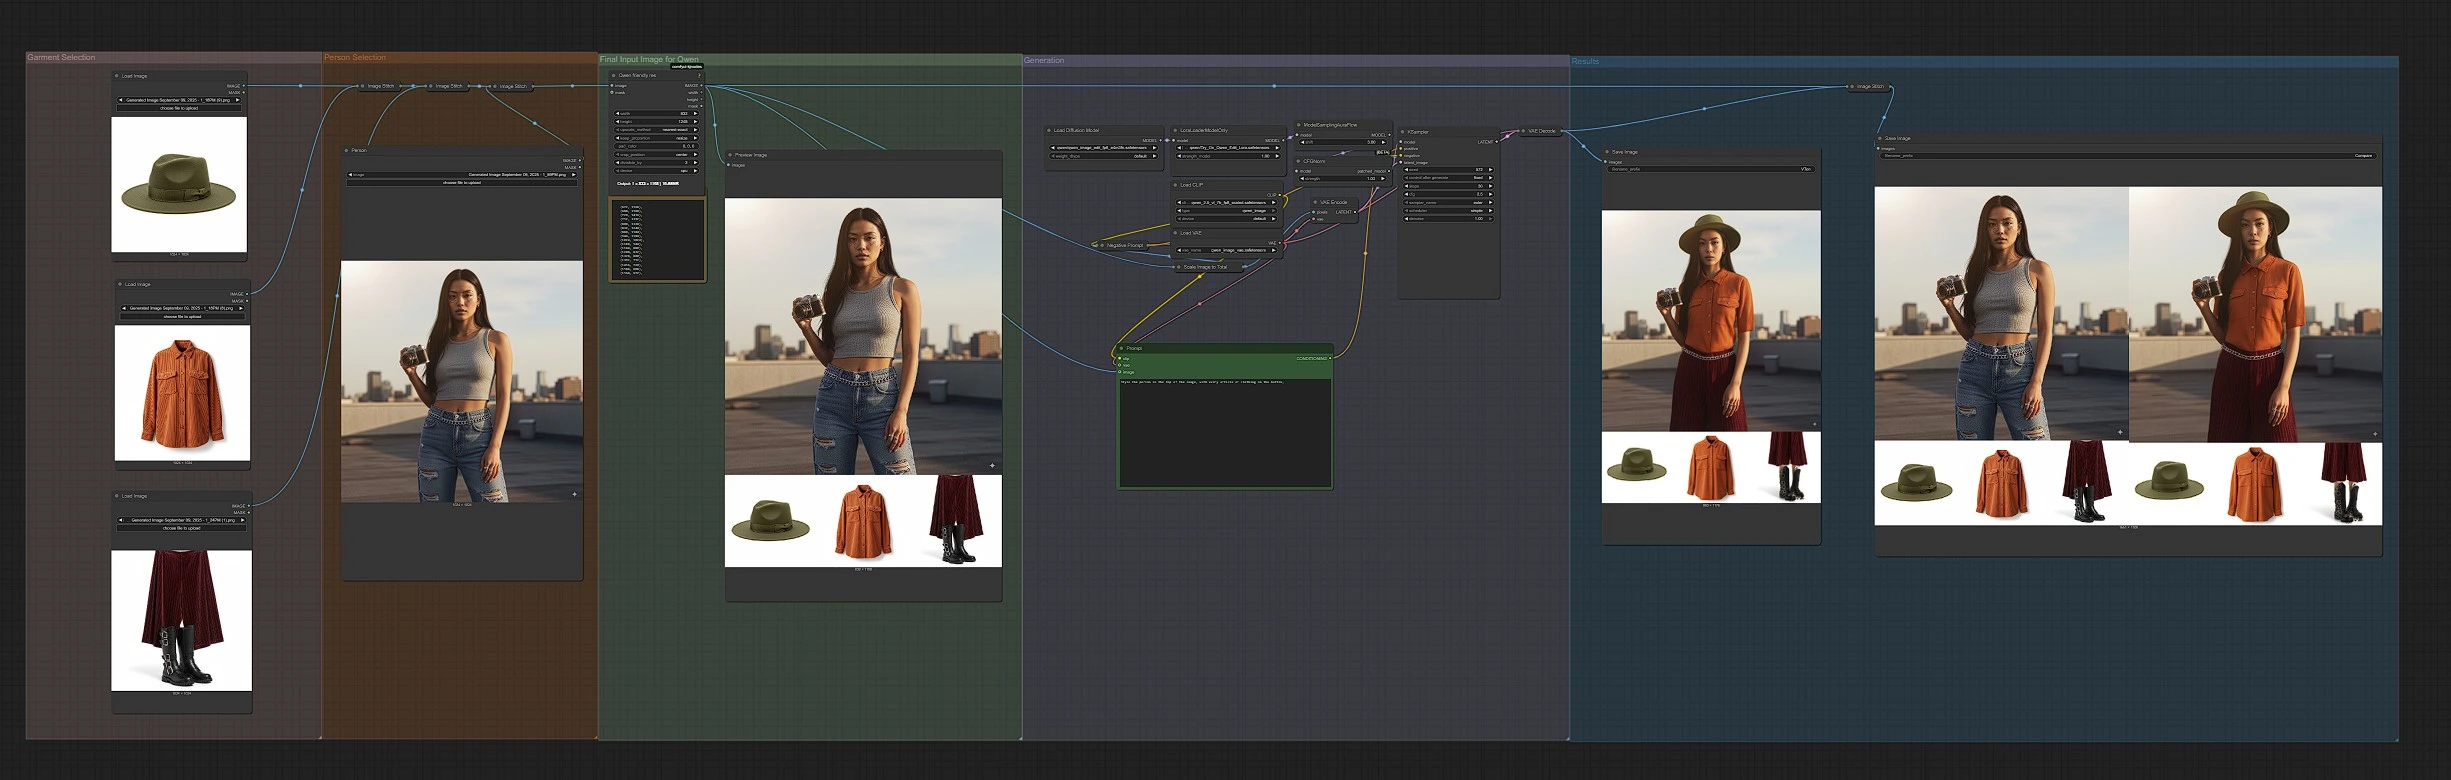
At a glance: the workflow arranges your inputs into a single image where the person sits at the top and garments appear below, then encodes this panel and runs Qwen Image Edit to produce the try-on result. The groups work in sequence from left to right: Garment Selection, Person Selection, Final Input Image for Qwen, Generation, and Results.
Garment Selection#
Upload up to three product photos to the garment LoadImage nodes (LoadImage (#175), LoadImage (#177), LoadImage (#179)). The workflow composes these with ImageStitch (#280) and ImageStitch (#282) to form a clean garment strip. Front-facing product shots with uncluttered backgrounds work best and make Virtual Try-On more reliable. Use one garment or multiple to let the prompt choose, and keep scale consistent across images.
Person Selection#
Add your subject photo to LoadImage (#170). The graph stacks the person image above the garment strip using ImageStitch (#284) so the layout matches the default instruction. A centered, front view with clear lighting increases realism. Aim for a compatible pose with the garments you intend to try on.
Final Input Image for Qwen#
The composite panel is standardized with Qwen friendly res (ImageResizeKJv2 (#196)) to a resolution favored by Qwen Image models, and optionally scaled via ImageScaleToTotalPixels (#115) for speed or detail. A PreviewImage (#240) shows exactly what the model will see. Use Prompt (TextEncodeQwenImageEdit (#121)) to describe the outfit you want on the person, for example: “Style the person in the top of the image using the jacket and shirt shown below.” If needed, add constraints in Negative Prompt (TextEncodeQwenImageEdit (#114)) to avoid artifacts like extra sleeves or mismatched patterns.
Generation#
The diffusion backbone loads Qwen-Image-Edit and applies the try-on LoRA using LoraLoaderModelOnly (#233), then runs the sampler KSampler (#122) to execute the edit. The model receives two aligned signals: visual semantics from the panel and prompt, and appearance from the encoded image latents, a design that Qwen Image Edit uses to balance identity and fidelity. This produces a realistic Virtual Try-On render that fits the subject’s pose and lighting.
Results#
VAEDecode (#119) converts the latent to an image that is saved as the primary Virtual Try-On output by SaveImage (#116). For quick assessment, ImageStitch (#250) creates a side-by-side “Compare” panel of the model’s input view and the final result, then SaveImage (#251) writes it to disk. Use the compare view to refine prompts, swap garments, or adjust inputs until the fit looks right.
Key nodes in Comfyui Virtual Try-On workflow#
Prompt (#121)#
Builds the conditioning that tells Qwen Image Edit how to dress the subject using the garments shown below. Write clear instructions that reference position and garment type, for example “Put the black blazer and white tee on the person, keep jewelry and hair unchanged.” If multiple garments are provided, you can specify which to use or let the model choose. Small wording changes can improve alignment and reduce over-editing.
Negative Prompt (#114)#
Provides guardrails to discourage unwanted edits. Add concise terms like “no extra sleeves, no logo changes, no background change” to preserve scene context and product details. Use this when you see artifacts such as duplicated collars, distorted patterns, or unintended color shifts.
Qwen friendly res (#196)#
Unifies the composite panel to Qwen-friendly dimensions for stable geometry and better garment alignment. Choose an aspect that matches your subject framing and leave headroom for the garment strip below. If you switch orientation, update the prompt so it still describes “person on top, garments on bottom.”
LoraLoaderModelOnly (#233)#
Applies the Virtual Try-On LoRA that strengthens clothing transfer behavior. If results look over-stylized or identity drifts, lower the LoRA weight. If garments are not transferring confidently, increase it slightly. Re-run with the same seed to compare changes reliably.
KSampler (#122)#
Controls detail and adherence to your instructions. Increase steps moderately for higher fidelity or lower them for faster previews. Adjust guidance scale if the edit is too weak or too aggressive, and set a fixed seed when you want repeatable Virtual Try-On results.
Optional extras#
- Write prompts that reflect the layout: “Style the person in the top of the image with the garments shown at the bottom.”
- Product shots with clean backgrounds and frontal views transfer most reliably in Virtual Try-On.
- Recommended Qwen-friendly sizes that work well: 832 x 1248, 1024 x 1024, 1248 x 832, 944 x 1104, 1184 x 880, 1328 x 800.
- For faster previews, reduce total pixels in
ImageScaleToTotalPixels(#115), then raise it for your final pass. - If the fit is close but textures misalign, try a small prompt tweak like “ensure sleeves align with arms” or “keep fabric drape natural.”
- For background preservation, add negatives such as “do not change background” and avoid style terms that imply scene restyling.
Helpful references about the underlying models:
- Qwen-Image-Edit model card: Hugging Face
- Qwen2.5-VL 7B model card: Hugging Face
- Qwen Image assets for ComfyUI: Hugging Face
- Qwen Image project overview: GitHub
Acknowledgements#
This workflow implements and builds upon the following works and resources. We gratefully acknowledge @BenjisAIPlayground of the Virtual Try-On Demo for the demo workflow. For authoritative details, please refer to the original documentation and repositories linked below.
Resources#
- YouTube/Virtual Try-On Demo
- Docs / Release Notes @BenjisAIPlayground: Virtual Try-On Demo
Note: Use of the referenced models, datasets, and code is subject to the respective licenses and terms provided by their authors and maintainers.