
1. Making Audio-Reactive Videos with ComfyUI and TouchDesigner#
Creating audio-reactive videos is all about blending sound with visuals into one seamless artistic vibe. It's super engaging and lets your visuals dance along with the beats. You can start by whipping up some visual content in ComfyUI—it’s a real time-saver for rendering. Then, bring those visuals into TouchDesigner to sync them up with your tunes and really make them pop.
2. Mastering the ComfyUI for Enhanced Visual Rendering#
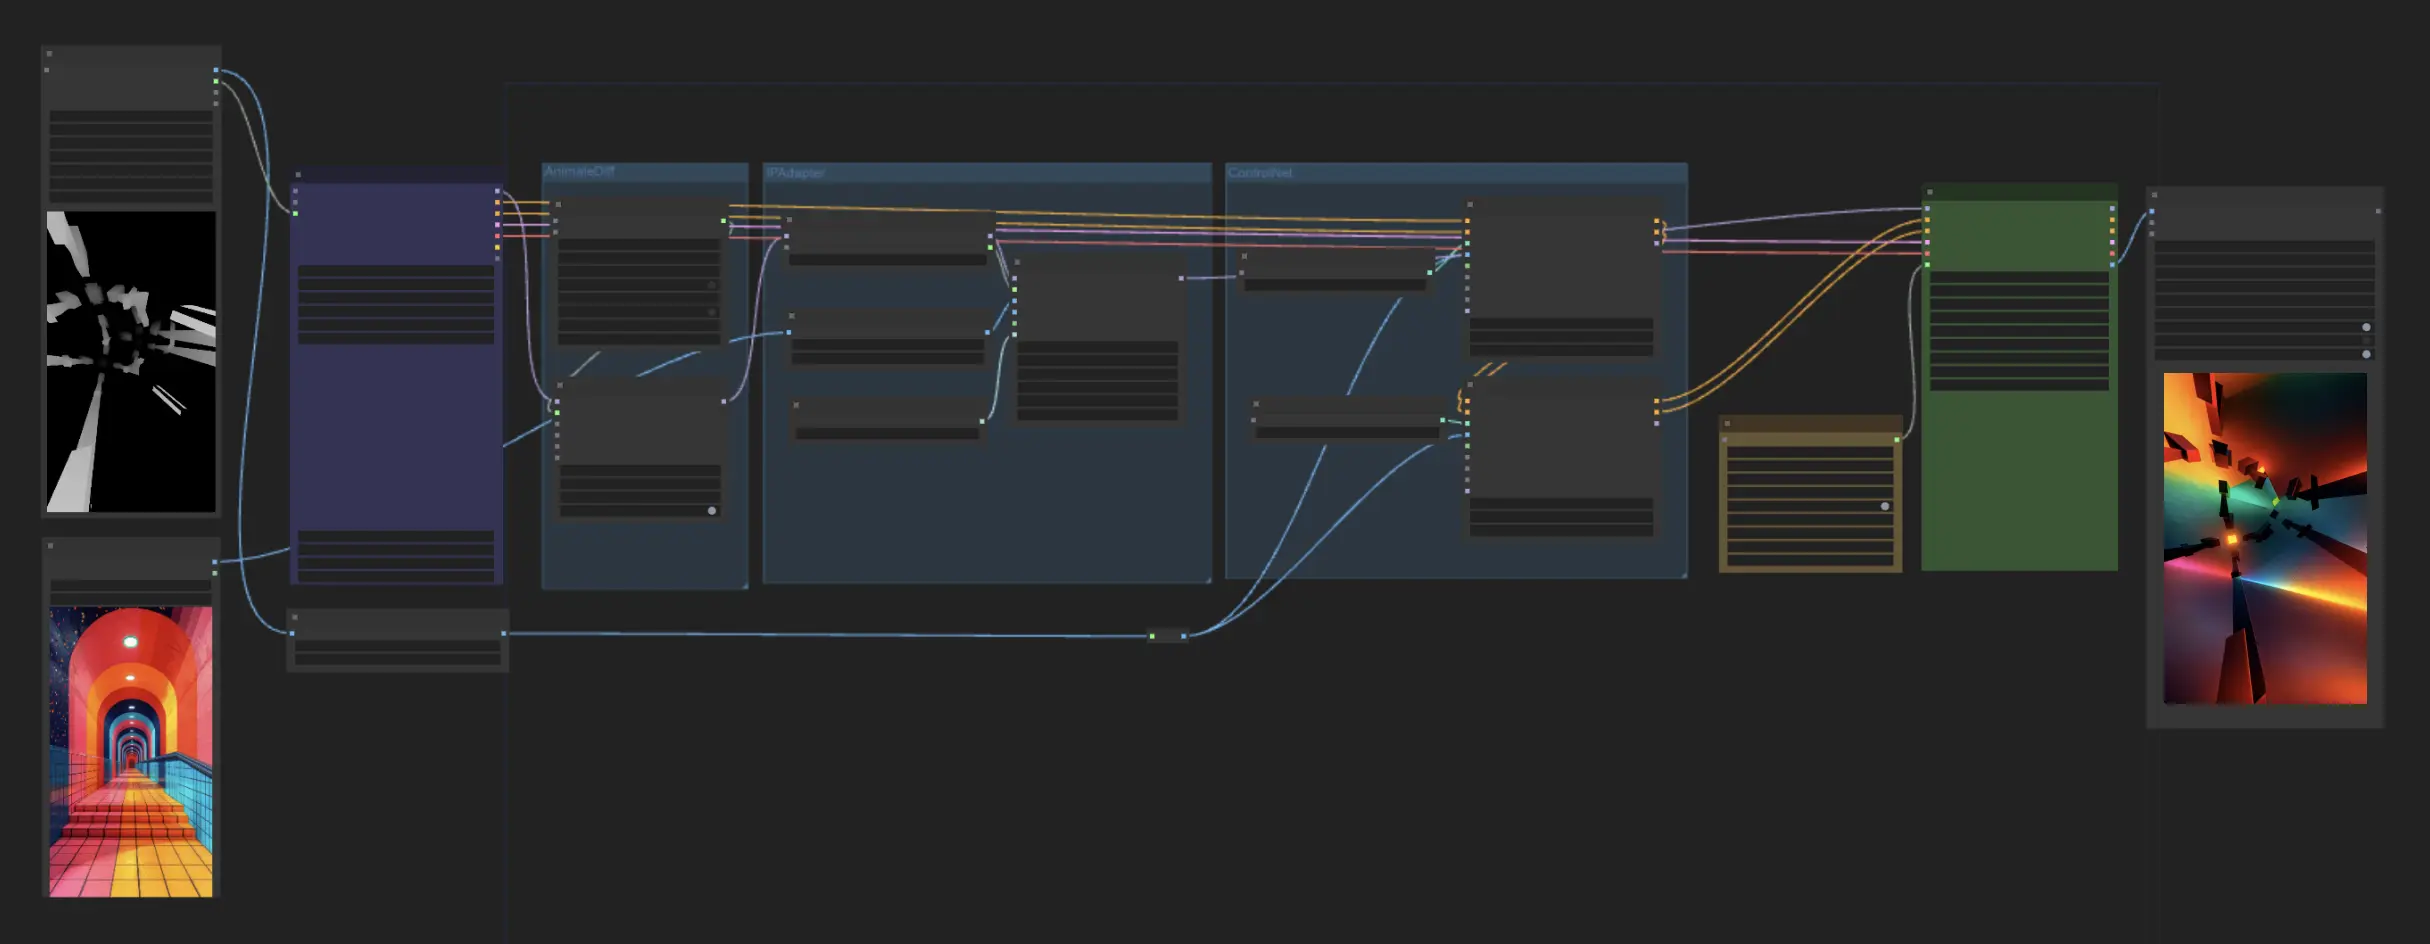
Using ComfyUI for rendering opens up a world of creative possibilities. Start by selecting your initial inputs: a simple black and white video and a reference image that captures the style you aim to achieve. This setup allows you to explore various artistic directions—experimenting with different videos and reference images can lead to exciting discoveries.
In this workflow, we leverage several powerful components:
- AnimateDiff is used for video generation, creating intricate effects based on the differences between video frames.
- AnimateLCM accelerates the rendering process, ensuring efficient production times without sacrificing quality.
- IPAdapter Plus analyzes the style of your input image and adapts the video to match this aesthetic, infusing your final product with the desired artistic flair.
- ControlNet manages the animation flow, providing control over how the animation progresses and interacts with audio inputs.
When selecting ControlNets, consider the specific needs of your video:
- If your video includes 3D effects, opt for a depth model from ControlNet to enhance the dimensional aspects.
- For styles that are more flat and graphic, Lineart or Canny models are excellent choices for achieving sharp, clean lines.
By experimenting with different combinations of these nodes, you can significantly boost the creativity and uniqueness of your rendered video.
3. Synchronizing Visuals with Audio Using TouchDesigner#
After your video is all generated in ComfyUI, it’s time to bring it into TouchDesigner. This is where you sync it up with your audio. TouchDesigner’s got these awesome operators that analyze the beats and vibes of your music. You can use audio signals, like beats, to adjust your video playback so it matches the sound perfectly. It’s like making your visuals dance to the music, creating a cool experience that feels as good as it looks.
This workflow is inspired by cerspense but has undergone some modifications.